How To Replace A Refrigerator Water Line (With Video!)
APP Expert / Friday February 18, 2022
Is your refrigerator transforming into a small waterfall, threatening to soak everything around it? A leaky water line is more than just a nuisance—it’s a gateway to costly damage. Fear not, though, since we have the perfect DIY solution for you! Dive into our step-by-step guide and accompanying how-to video just below, and learn how to replace your fridge’s water line with ease.
Need replacement for your fridge water line? Search below using your specific fridge model number to identify the exact part needed:

Signs Of A Broken Refrigerator Water Line
The most obvious sign that you’ve got a problem with your refrigerator’s water line is a leak at the back of the refrigerator. You may also notice leaking inside the refrigerator, at the water filter. If you’re getting leaks, check the length of the line for cracks, and replace it if you find any. Kinks in the line can also stop water from reaching the filter, leading to a weakened or stopped supply line of water from the dispenser or ice maker. Another thing to watch out for is mildew-tasting water. If you’ve recently replaced your fridge’s water filter and your water still tastes off, there may be mildew or mold growing in the water line. You can attempt to clean this with vinegar and hot water, but if the line is old, it may be easier to just purchase a new one and replace the part.
Finding The Right Replacement Part
To find a compatible water line, type your appliance’s model number into the search bar at AppliancePartsPros.com. We’ve got genuine OEM refrigerator replacement parts for every major brand, and they’ll be delivered to your door in just a few days.

Need help finding the model number? If you don’t have access to your manual, you can find the number on a label on the refrigerator. Check the following spots:
- On the exterior door or sides of the appliance
- Inside the door or on the door frame
- On the interior ceiling of the freezer or refrigerator compartment
- On the inside wall of either compartment
- On the fridge floor, beneath the crisper drawers
- Behind the kickplate at the bottom of the appliance
How To Replace A Refrigerator Water Line
In this tutorial, we replaced the water line on an LG/Kenmore-made French door refrigerator. Replacing a water line is roughly the same job regardless of your refrigerator’s brand, so you may be able to use this particular guide to help you with this job. However, you can also check out our YouTube channel for brand and model-specific videos for water line replacement, if you need a more detailed look at the process!
Tools for the job
- A compatible replacement water line
- Towels (at least one)
- Phillips screwdriver
- Wrenches, ½” and ⅜”
- Needle nose pliers
- Electrical tape
Before you begin…
Be sure to disconnect your refrigerator from its power source, either at the wall outlet or circuit breaker. Also turn off the water supply to the refrigerator, or you’ll wind up with quite a mess.
This is an easy job that shouldn’t take you long to complete, but you will need access to the rear of the fridge and the refrigerator will be disconnected from power for the duration of the repair. If you’re worried about any containers breaking or spilling when you move the fridge, or any medications or foods spoiling while the power is cut, move them to a cooler packed with ice until you’ve finished the job.
All set? Let’s begin!
Replacing a refrigerator water line
- Open the left refrigerator door and put a dish towel down beneath the refrigerator’s water filter. This will catch any water that may leak out during the next step.
- Remove the water filter and disconnect its housing.
- Turn the filter counter clockwise to release it and then pull it out of the housing.
- Once the filter is out, remove any screws holding the housing to the top of the refrigerator.
- With the screws out, pull the housing toward you to free it from a few locking tabs and lset it down. You don’t need to remove it completely.
- Around back, set a towel down beneath the water inlet valve to catch any water that may spill out while you change out the line.
- Use a ½” wrench to remove the water line from the water intake valve and set it out of the way. The water line is copper tubing running to the back of your refrigerator.
- Take the access cover off of the back of the refrigerator. It’s held in place by a number of Phillips head screws.
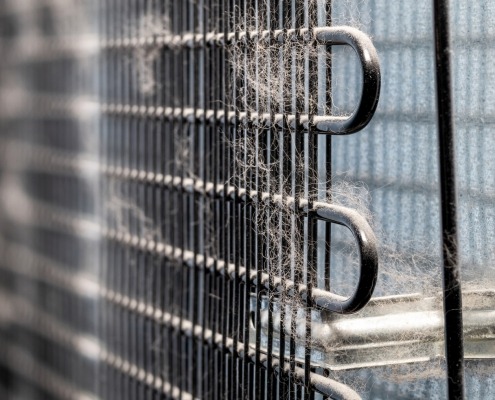
- Now may be a good time to carefully clean the condenser coils and area around the condenser. Your refrigerator will run much more efficiently (potentially lowering your power bill!) if you do. Just take care when cleaning around the various copper lines and wires. If any of these are damaged, they will need to be fixed by a professional repair technician.
- Take the water valve off the refrigerator frame. The valve’s bracket is likely held in place by a single Phillips head screw.
- Take the water line off of the water valve.
- It is held in place by a locking tab, which you can push out of place by hand or pull off with needle nose pliers.
- Once the locking tab is off, use your ⅜” wrench to press up on the locking collar – that’s the plastic disc around the water line – to release it and pull the water line free.
- With the water connection line out, you can set the valve down and move on to the next step.
- Loosen the screws holding the water line’s locking clamps in place. The water line is held in place by a number of locking clips or clamps that run up the back of your refrigerator. Loosen the screws on these just enough to move the clips out of place and free up the water line. You don’t need to remove the clamps completely.
- Disconnect the blue water line from its fitting. Up closer to the top of the refrigerator you’ll find a blue water line connected to a fitting. You can disconnect this from that L-shaped fitting the same way you did the other water line – use your ⅜” wrench to release the locking collar.
- Take the cover off the point where the two lines enter the refrigerator. You’ll need to remove one screw and slide it to the side to free up the tab that seats it before you can pull it away.
- Back at the front of the fridge, disconnect the water line from the filter head. Pull the water filter housing assembly to the front of the refrigerator so that you can more easily access it. Remove the locking tab holding the water line in place and release the locking collar to remove the old water line.
- Remove the water line from the refrigerator. It’ll be easier to do this from the back of the fridge.
- Prep the new water line. The new line doesn’t come with a spring, so you’ll need to remove the spring from the old line and install it on the new line. The spring should sit about an inch below the second black line. You can secure it in place with a new piece of electrical tape.
- Run the new water line through the back wall of the refrigerator. Make sure that you put it through the larger hole, which is probably on the left.
- Back around at the front, connect the new water line to the water filter assembly. Press it into place until you can’t press anymore to get a good seal, then install the locking tab.
- Reinstall the filter cover assembly. On this step, you’ll want to ensure that both water lines are properly fed out the opening in the back of the refrigerator and that the housing is seated properly and locked into place. Once it’s seated properly, you can reinstall the mounting screw.
- Put the water filter back in. Don’t forget to turn it to lock it in place. Also, is your filter more than six months old? Consider replacing it while you’re on the job.
- On the back of the fridge, reconnect the blue water line to the L-shaped valve. Push it in as far as it will go to ensure a secure lock.
- Reinstall the cover, hooking the top tabs in first, then the side tab before installing the mounting screw.
- Run the water line back through the upper two clamps and tighten them down. Skip the lower two clamps for now, though.
- Reconnect the water line to the water valve at the bottom of the refrigerator. Push it in until it bottoms out and then secure it with the locking clip.
- Reinstall the water valve. Push the water line beneath the water valve. The spring should ensure you don’t kink the line when you do this. Once everything is in place, you can secure the bracket to the frame of the fridge by reinstalling the mounting screw.
- Check the length of the water line and reseat the line beneath the bottom two clamps. You may have some excess line. If so, carefully loop or zig-zag the water line, then tighten down the clamps to keep everything secure.
- Reinstall the back access panel. It has a couple of locking tabs on the bottom, so make sure those are in place before reinstalling the screws.
- Reconnect the main water line. Use a wrench to tighten it down.
- Time for a test! Plug your refrigerator back in, turn the water back on. If your refrigerator is leak free, then your install job was a success!
- One last step: flush the line to get any dust or air bubbles out of the way. You can do this by holding a cup or bowl beneath your dispenser and letting it fill. A full flush can take upwards of 5 minutes of water dispensing.
Wrapping Up
Congratulations on another successful do-it-yourself repair! If you need a closer look at any of the steps we’ve laid out here, don’t forget to check out the how-to video or visit our YouTube channel for guides to replacing the water line in other brands and styles of refrigerator.
If you need any replacement parts for your appliances, you can enter your model number at AppliancePartsPros.com to locate and order them quickly. Most orders arrive in just two business days, and we have tons of great information in our repair help section and YouTube videos to help you troubleshoot.
Stay connected with the latest DIY tips, tutorial videos, and repair guides by following us on Facebook, Instagram, and Twitter. We love hearing about your repair stories and successes. If you need more help or want personalized guidance, feel free to contact or call us at 877-477-7278. We’re ready to help you take on your next project with confidence!
Since 1999, AppliancePartsPros.com has helped millions of people repair their broken appliances by providing high-quality original parts at well below retail prices, free support and troubleshooting, and award-winning customer service from an expert, friendly, US-based customer support team!
 https://www.appliancepartspros.com/b/wp-content/uploads/2021/03/shutterstock_1878792160.jpg
1017
1300
Steven E
https://www.appliancepartspros.com/b/wp-content/uploads/2020/11/app-logo-std.png
Steven E2021-03-17 10:27:362025-07-16 05:30:05How To Clean Refrigerator Coils In 5 Easy Steps & Why To Do It
https://www.appliancepartspros.com/b/wp-content/uploads/2021/03/shutterstock_1878792160.jpg
1017
1300
Steven E
https://www.appliancepartspros.com/b/wp-content/uploads/2020/11/app-logo-std.png
Steven E2021-03-17 10:27:362025-07-16 05:30:05How To Clean Refrigerator Coils In 5 Easy Steps & Why To Do ItHi! I’m Matt H., and I’m thrilled to be your guide through the world of appliance repair with over 25 years of invaluable experience in the industry.
From the early days of my career, I have been deeply passionate about appliances and their inner workings. Over the years, I’ve seen it all – from vintage models to the latest cutting-edge technology – and I’ve dedicated myself to mastering the art of repair. With a toolbox in one hand and a wealth of knowledge in the other, I’ve tackled every challenge that has come my way, learning and growing with each repair.
Join me as we dive into the intricacies of appliance repair. From step-by-step repair guides to explanations of common problems and their solutions, I’ll be here to simplify the repair process and empower you with the knowledge you need to keep your appliances running smoothly.
Feel free to explore our blog, ask questions, and leave comments – this platform is a space for learning, sharing, and growing together. Let’s work together to ensure that your appliances continue to serve you for years to come.
Thank you for joining me on this journey, and I look forward to being your go-to resource for all things related to appliance repair!