How To Replace A Washer Timer
APP Expert / Tuesday January 3, 2023
Is your washing machine misbehaving, abruptly stopping mid-cycle and leaving you with a load of soggy clothes? Don’t rush to replace it just yet—the culprit could be a faulty timer, and the fix is simpler than you think! Dive into our step-by-step guide, complete with an easy-to-follow how-to video just below, and get your laundry routine back on track in no time!
Is your washer throwing a temper tantrum? Skipping cycles or stopping halfway through, leaving you with a drum full of dirty laundry soup? It may be an issue with the timer – the device in the washer’s control console that manages all of the appliance’s functions. The problems caused by a faulty timer can seem pretty big, but they don’t mean it’s time for a whole new appliance! Replacing a washer timer is easy – you can manage it with a couple of screwdrivers and thirty minutes, and AppliancePartsPros.com is here to show you how!
Keep reading for our detailed guide to replacing a washing machine timer.
Signs of a broken or failing washing machine timer
The washing machine timer is a switch that constantly advances while the washer is running, directing the machine to transition cycles. Most often, if a timer fails, it’s because one or more of the contacts inside are sticking or because the timer motor is not advancing. When this happens, your only recourse is to replace the part.
Here are some signs you may be dealing with a broken or failing washer timer:
- The washer skips cycles, failing to spin out or drain. This problem could be inconsistent, so if it’s not happening every time you run your washer, the timer may still be failing.
- The washer’s cycles aren’t lasting as long as they should.
- The washer gets stuck in a cycle – for example, it never advances past the agitate stage, or it gets stuck in the spin cycle.
- The washer stops mid-cycle, leaving you with a drum full of water, or draining before spinning out.
- The timer knob spins freely.
Finding the right replacement part
To ensure compatibility, you’ll want to opt for a genuine OEM replacement part, but how do you go about finding the right one? Well, you start with your model number. You can find a partial number in your appliance’s manual if you have it, but you’re better off checking the machine for the sticker that has the appliance’s complete model number.
The sticker is usually in one of the following places:
- On the sides, near the top of the appliance.
- On the back of the appliance – check the entire back; if it’s on the control panel, it may be stuck on upside down.
- Under the lid or behind the door on front-loading models.
Once you have that full model number in hand, finding your part is simple! Head over to AppliancePartsPros.com and type the full model number into our search bar. You’ll be presented with a list of compatible components that you can refine down into the part you need with our easy-to-use search filters. Order from us and you’ll have your part in hand in as little as two days.
How to replace a washing machine timer
In our video guide, we replaced the timer on a Whirlpool top-loading washing machine. For most top-loading washing machine models, the steps for replacing the timer are roughly the same, so this walkthrough should help you out regardless of your washer’s make and model.
If you have a front loading washer or if you’ve found that the steps laid out here do not match your washer, check out our YouTube channel for additional washer repair guides. We have maintenance tutorials for a wide variety of washer makes and styles.
Tools for the job
Gather these items up before you begin so your repair job goes off without a hitch:
- A compatible replacement timer (part no. 3955651 for our washer, but yours may vary)
- A Phillips screwdriver
- A small flathead screwdriver
- Needle-nose pliers
- Putty knife
- Work gloves
Before you begin…
Replacing your washer’s timer is a quick job that shouldn’t take more than half an hour if you have everything you need on hand. Here’s what you’ll want to do to prep your space before you start:
- Disconnect the washer from power, either by unplugging it or flipping the circuit breaker. Never perform maintenance or repairs on an appliance that is still receiving power.
- Shut off the hot and cold water supply at the valves, which should be mounted to a wall somewhere nearby. While this job doesn’t require extensive disassembly, you’re better safe than sorry when dealing with water!
- Pull the washing machine away from the wall. You’ll need access to the back of the appliance. Give yourself at least enough room to fit a screwdriver back there.
Replacing a Whirlpool washer timer
Set aside about thirty minutes to replace your washer’s timer, but if all goes well, we’ll have your laundry day back on track in half the time!
Step One: Open up the control panel
Depending on your washing machine model, there are a few different ways to disassemble the control panel:
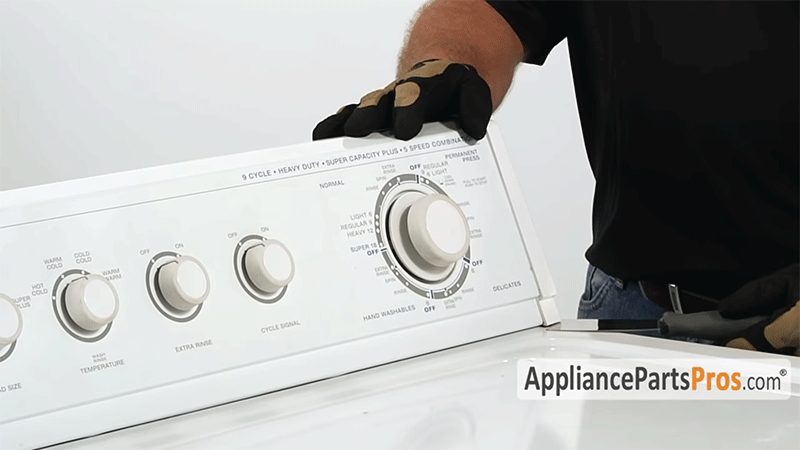
- Is there plastic trim on either side of your washer’s control panel? You probably need to remove these covers to reach the mounting hardware holding the control panel in place. You can use a small flathead screwdriver or putty knife to pry these off.
- Most models have a pair of mounting screws on either side holding the control panel in place. These can be found either on the front or the back.
- Some models are held in place by two spring clips on either side of the control panel at the front. Slide a putty knife into the seam between the body of the washer and the control panel to dislodge the clips.
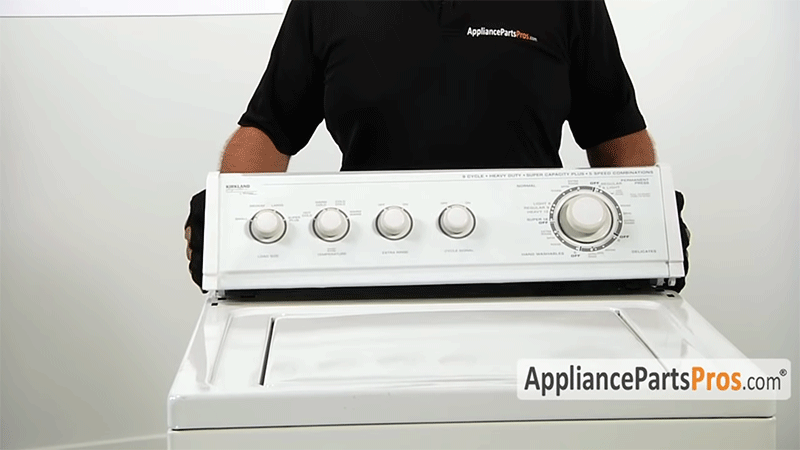
Once you’ve freed up the control panel, either by removing screws or releasing clips, grip it from the back and slide it forward. It can then be flipped over the back of the washer.
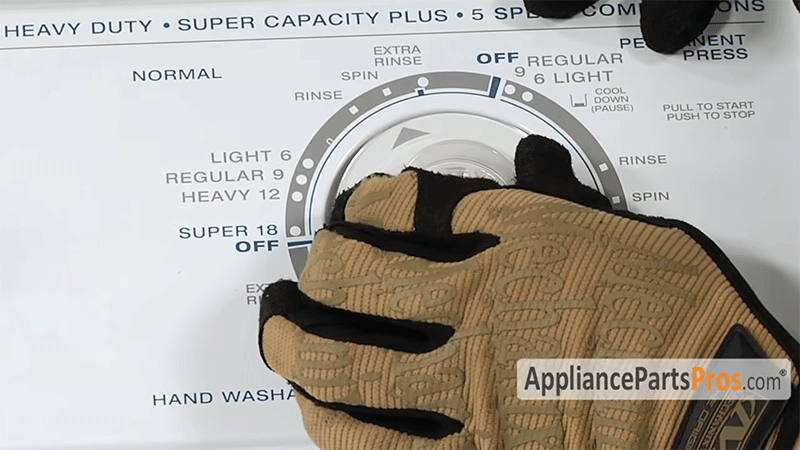
Step Two: Remove the timer knob
There’s a chance that your washer’s timer knob will come away by hand, but don’t force it! It may be locked in place.
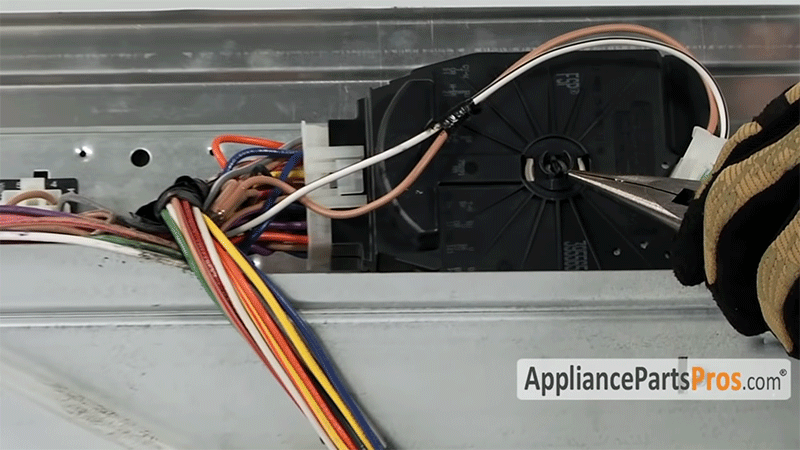
To get the timer knob off in this instance, check the back of the timer itself. There should be a shaft that turns as you turn the knob from the other side. Use your needle-nose pliers to hold this shaft in place, then tilt the control panel up and pull the timer off.
Step Three: Remove the timer dial
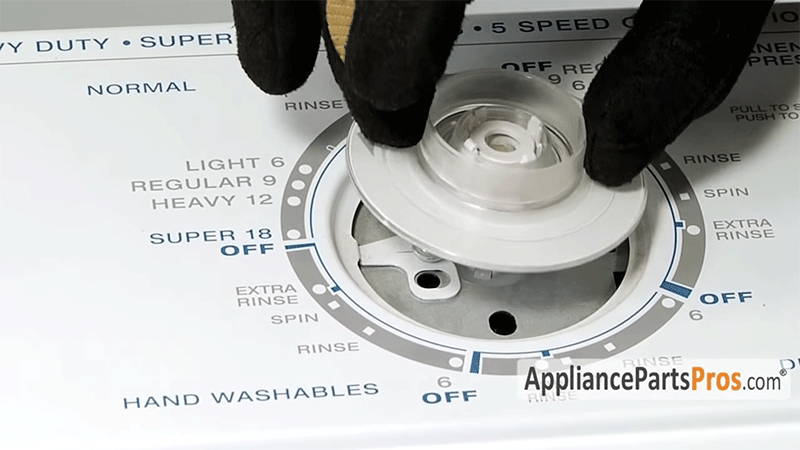
The dial is the flat plate behind the knob. With the knob off, you should be able to remove the dial by hand by lifting it off.
Take care when handling the knob and dial, and make sure they aren’t damaged while you work, since you’ll be reinstalling them later. If one does break, though, don’t fret! You can pick up a replacement at AppliancePartsPros.com.
Step Four: Disconnect and remove the timer
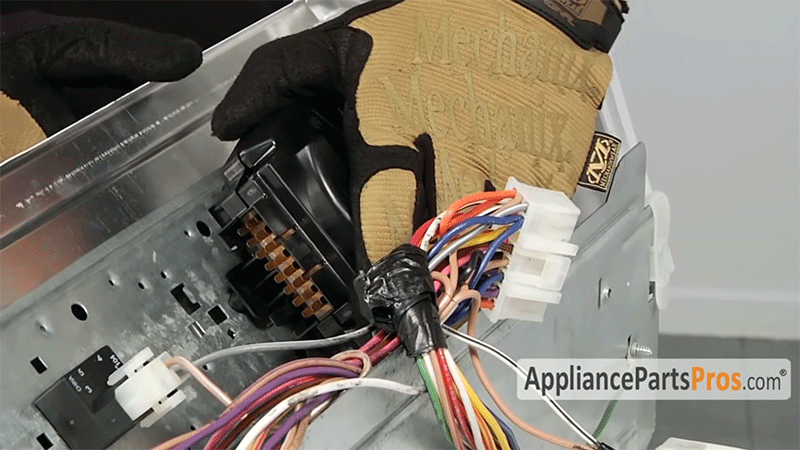
It’s time to remove the old timer! Before you can take it out, you’ll need to disconnect the wire harnesses. There are two.
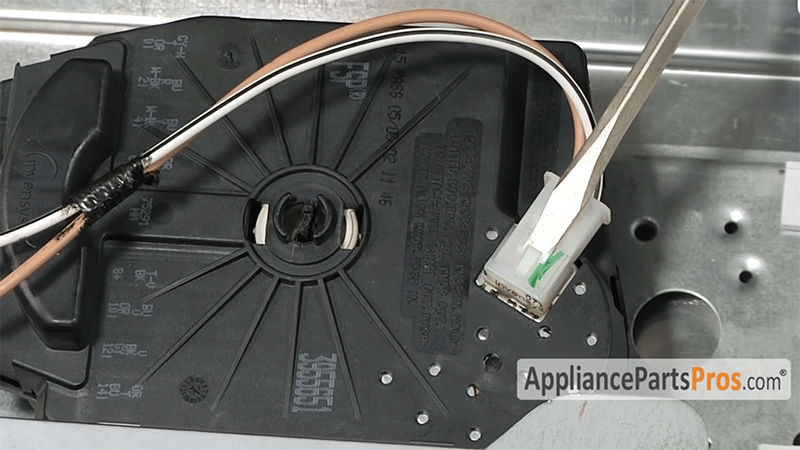
The smaller harness on the back of the timer connects it to the drive motor. To remove this, use a small flathead screwdriver to release the locking tab that holds the harness in place. Once the locking tab is released, you can remove the harness by hand.
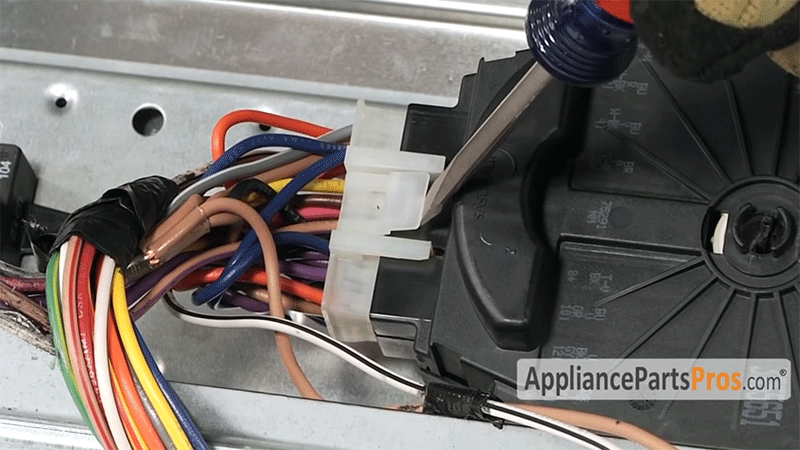
The larger harness on the side can also be removed with the help of a flathead screwdriver. Stick the screwdriver under the tab and lift it up to release it, then unplug the harness.
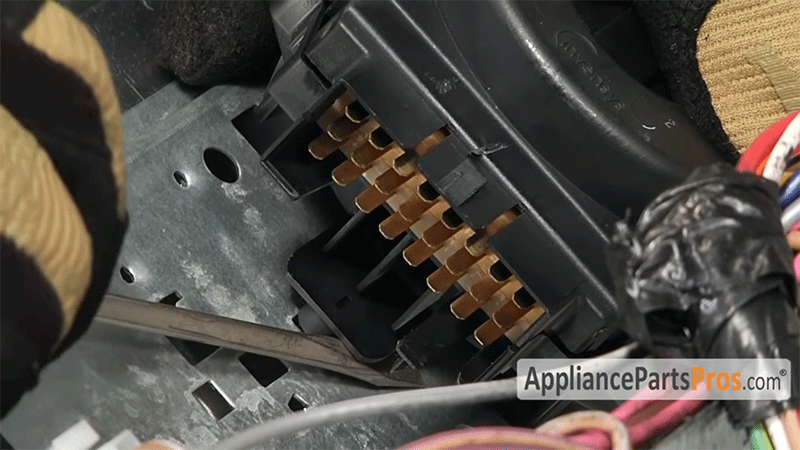
The timer is still held in place by one more locking tab, which you’ll find once the larger of the wire harnesses is removed. Use your flathead screwdriver to lift the tab, then slide the timer toward the center of the machine to dislodge it.
Step Five: Install the new timer
To properly seat the timer, the four mounting tabs will need to be aligned with the holes on the control console. Once the four tabs are in place, slide the timer toward the outside of the machine so that it locks into place.
Once properly seated, reinstall the two wire harnesses. Press each one on until it locks into place.
Step Six: Reinstall the timer dial
Flip the control panel back around to reinstall the timer dial. The dial has three locking tabs that must be properly aligned so that the dial will lock into place. Once lined up, you can push the dial into place.
Step Seven: Reinstall the knob
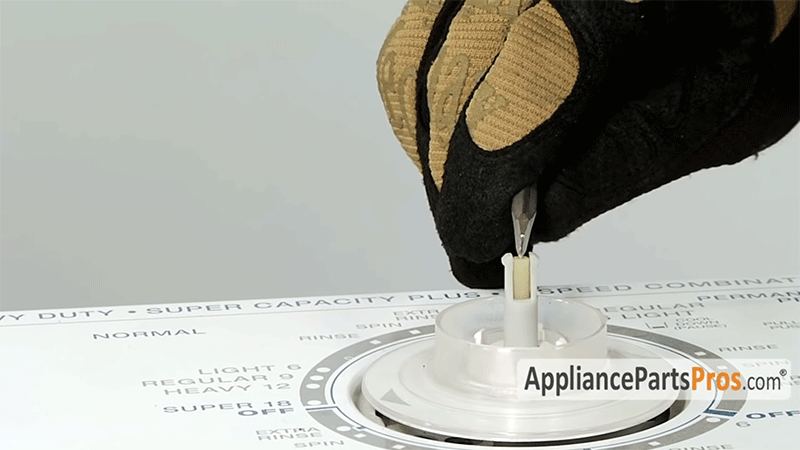
You may need to adjust the timer shaft to install the knob. On our washer, the shaft needed to be pulled up, and then the inner portion pressed down with a flathead screwdriver. Check out our video for a detailed look at how this is done.
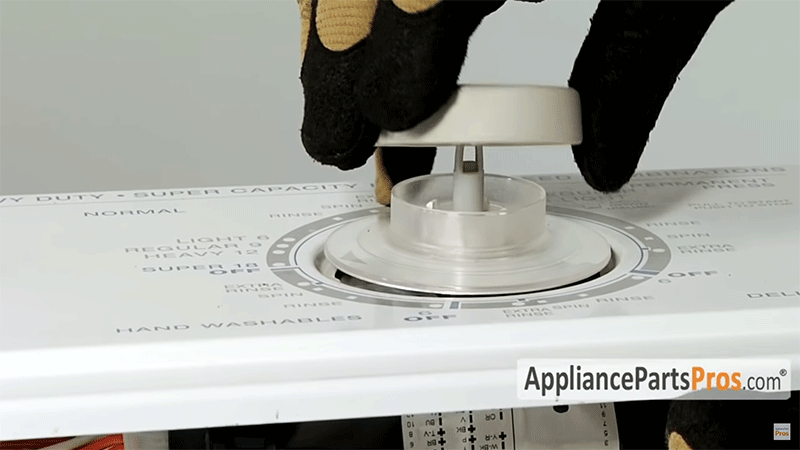
Once the shaft is properly positioned, you can reinstall the knob by pushing it into place. Check on the bottom of the knob before doing this. Two sides of the inner shaft on the knob should be flat. These need to be aligned with the tabs on the shaft to properly secure the knob.
Be sure to give the knob a turn to make sure it works properly before moving on to the next step!
Step Eight: Reassemble the control panel
Close up the console by flipping it forward. Press down and pull back on the control panel to ensure that the locking tabs are secure. You can then reinstall any screws or trim needed to secure the console.
Step Nine: Time for a test run!
You’ve finished replacing your timer. The only thing left to do is take that washer for a spin. Restore power to your appliance and turn the hot and cold water supplies back on, then run the washer on a short, cold water cycle empty with no detergent. Make sure it progresses through each step of the cycle and that it drains properly before you start your next load of laundry.
Wrapping Up
After following this tutorial, you should have a good idea of how to replace the timer in your top-loading washing machine. Be sure to check out the companion video for an in-depth look at each step outlined above, and if you have any questions not covered here, pay a visit to our main site. There, you’ll find tips and advice from experts and other DIYers just like you.
If you need any replacement parts for your appliances, you can enter your model number at AppliancePartsPros.com to locate and order them quickly. Most orders arrive in just two business days, and we have tons of great information in our repair help section and YouTube videos to help you troubleshoot.
Stay connected with the latest DIY tips, tutorial videos, and repair guides by following us on Facebook, Instagram, and Twitter. We love hearing about your repair stories and successes. If you need more help or want personalized guidance, feel free to contact or call us at 877-477-7278. We’re ready to help you take on your next project with confidence!
Since 1999, AppliancePartsPros.com has helped millions of people repair their broken appliances by providing high-quality original parts at well below retail prices, free support and troubleshooting, and award-winning customer service from an expert, friendly, US-based customer support team!
Hi! I’m Matt H., and I’m thrilled to be your guide through the world of appliance repair with over 25 years of invaluable experience in the industry.
From the early days of my career, I have been deeply passionate about appliances and their inner workings. Over the years, I’ve seen it all – from vintage models to the latest cutting-edge technology – and I’ve dedicated myself to mastering the art of repair. With a toolbox in one hand and a wealth of knowledge in the other, I’ve tackled every challenge that has come my way, learning and growing with each repair.
Join me as we dive into the intricacies of appliance repair. From step-by-step repair guides to explanations of common problems and their solutions, I’ll be here to simplify the repair process and empower you with the knowledge you need to keep your appliances running smoothly.
Feel free to explore our blog, ask questions, and leave comments – this platform is a space for learning, sharing, and growing together. Let’s work together to ensure that your appliances continue to serve you for years to come.
Thank you for joining me on this journey, and I look forward to being your go-to resource for all things related to appliance repair!


