How To Replace Oven Door Inner Glass
APP Expert / Monday November 14, 2022
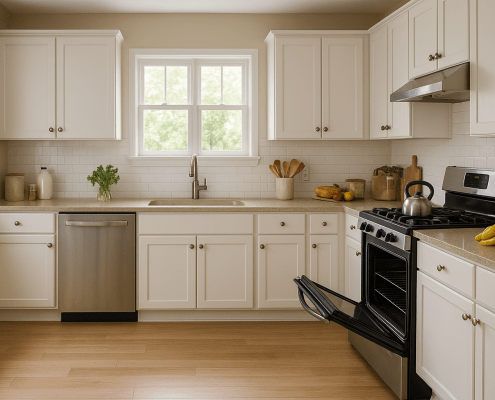
Is your oven door glass cracked or clouded with grime? Don’t let a small mishap lead you to expensive replacements when you can fix it yourself in just 20 minutes. Follow along with our step-by-step guide and how-to video below to learn how to replace or clean your oven door’s inner glass panels, keeping your kitchen running smoothly and safely.
Like any pane of glass, the panels in your oven door are fragile components. They can crack and break from impact or exposure to sudden, extreme temperature changes. Luckily, if that happens, it doesn’t mean you need an entirely new oven, and with the right replacement parts, fixing a damaged door glass can take as little as twenty minutes.
Whether you’ve got a crack in your oven door window or it’s just too filthy to effectively clean, we’ve got you covered. In this guide, we’re walking you through how to disassemble your oven door to replace or clean the inner glass panels.


Finding the right replacement part
Fit and quality of construction are incredibly important when it comes to oven components. That’s why, when you’re replacing your oven’s glass window, you should opt for a genuine OEM replacement part – and AppliancePartsPros.com can help!
To get the right replacement oven door glass, you’ll need your oven’s model number. It’ll be on a sticker somewhere on the body of the appliance. Check the following places:
- On the oven interior, around the frame
- Along the sides or inside of the bottom drawer
- Beneath the cooktop – you’ll need to lift it up
- On the sides or back of the oven
Once you’ve got that model number in hand, type it into the search bar on our website. You’ll get a list of parts that are compatible with your oven, so you can shop easy knowing you only need to buy once. Want to narrow it down a little? Check out our full listing of oven door glass.
How To Replace An Oven Door Inner Glass Panel
This guide will walk you through the steps to replace the inner door glass in a Whirlpool oven. The process is generally the same regardless of appliance brand, so you will likely find our tutorial useful even if your range isn’t in the Whirlpool family of brands.
Tools for the job
- A compatible replacement door glass (part no. WP8053948 for our range)
- Phillips & flathead screwdrivers
- Work gloves
- A towel you don’t mind potentially getting dirty with kitchen grease
Before you begin…
Whenever you’re performing maintenance on an appliance, be sure to disconnect the appliance from power and fuel entirely. This guide is written for electric ranges, so this means unplugging the range from the wall or flipping the circuit breaker. For a gas-powered range, the gas supply would need to be shut off, as well.
Aside from basic electrical safety, you’ll also want to prep a workspace. This job is easiest if the door (which you’ll be removing from the oven) is placed on a flat, stable workspace. Pick a table large enough to accommodate the door, and lay a towel down on it to protect both the surface of the table and your oven door.
Replacing An Oven Inner Door Glass
This is a fairly quick job, but not one you want to rush – don’t wind up with two broken oven door panes! Set aside at least 20 minutes to complete this job.
Step One: Remove the oven door completely
It’s not as hard as it might sound! To get the door off the oven, start by opening the oven door and locking the hinges. On our Whirlpool oven, that meant flipping the latches on each bracket up.
")
With the oven door open at a 45° angle, grip both sides firmly and lift the oven door up and off the body. Set your door exterior-side down on a stable, flat surface.
")
Step Two: Remove all the screws holding the door together
Time to take the door assembly apart. Along the bottom of the door, you’ll find nine screws – four holding each hinge in place, and one in the center. Remove these first. Then, remove the three screws on either side of the door’s inner panel. Leave the two screws at the top for last, and take care when removing them. They hold the trim and door handle in place, and these parts will likely fall once these last two screws are out.
Carefully remove the handle and trim assembly and set it aside. Next, you’ll need to remove the side trim pieces. A small flathead screwdriver can help to pop these off if they don’t easily come away by hand.
")
Step Three: Remove the inner panel
To get the inner panel off of the door assembly, you’ll first need to push both hinges up toward the top of the door. With that done, you should be able to carefully rotate the inner panel up from the bottom. There are a couple of tabs holding it in place at the top, so you’ll need to push forward slightly to dislodge it.
")
Step Four: Access the inner glass for replacement
At this point, you can easily remove the first of the two inner door glass panels by simply lifting it out.
The second panel can then be reached by removing the metal spacer that was beneath the first glass panel and then lifting out the second inner door glass. You don’t need to remove this middle glass panel or the spacer bracket if you aren’t replacing the middle panel.
If one of the glass panels was cracked or completely broken, take care when completing this step. Make sure you clean up any glass shards that may have fallen into the door assembly before moving on.
Quick Tip: Now you can clean between your oven’s glass panels!
We get a lot of questions about the best ways to clean the panels in your oven door. By following the steps we’ve laid out so far, you’re already to the point where you can start cleaning each panel. Now, how to actually get the panels clean:
- Make a paste with baking soda and water. Use about ½ cup of baking soda, and slowly add water, mixing until you get a thick paste from it.
- Apply the paste to the side of the glass that you want to clean and let it sit for around 20 minutes.
- After 20 minutes, wipe the paste off with a clean, damp (not wet!) microfiber cloth. Make sure you remove all the baking soda paste.
- A razor blade can help you remove any gunk or chunks of food left on the glass.
- You can repeat this process for the other side of the glass.
- Let the glass panel dry completely before reassembling the oven door.
Step Five: Install the new glass panel
This is as simple as setting the glass panel in place. If you’re replacing the middle panel, be sure to reseat the spacer bracket, as well, after setting the middle panel in place. Make sure that the glass pack is free of debris before putting the panels back in place.
")
Step Six: Reinstall the inner door panel
Start by seating the inner oven door panel at the top, where it hooks onto a couple of tabs. Then, push the inner tray holding the glass packs and insulation up toward the top slightly and rotate the inner panel down into place. Make sure the door’s insulation is tucked in while doing this.
Pull the hinges back down toward the base of the door frame as you lower the inner panel into place. With the hinges and inner door panel in place, reinstall the screws along the bottom of the door that hold these items in place, starting with the lower screws for each hinge, then the upper screws that secure the inner panel to the hinges, and finally that center screw.
")
Step Seven: Reinstall the side trim pieces
To start, you’ll need to slide the glass panel away from the side you’re working on – so if you’re installing the left-side trim, slide the glass to the right. Once the trim is in place, you can slide the glass in the other direction to do the opposite side.
The bottom of each trim piece is secured by a tab. You’ll need to rotate the trim pieces a bit to get their tabs properly seated. Check out our tutorial video for a quick look at exactly how that’s done!
When both trim pieces are in place, don’t forget to recenter the glass panel.
")
Step Eight: Reinstall the rest of the screws
To align the screw holes properly, you may need to push the inner panel up or use a small screwdriver to force the screw holes to align. You may also need to press up on that inner tray from the top of the door to ensure that the screws can reach properly. Once it’s all lined up, it’s just a matter of reinstalling all the screws.
Start with the three screws installed on either side of the inner panel. Then, press the upper trim and handle in place. The side trim pieces should be under the upper trim, which will also need to be properly seated against the glass. With the upper trim and handle in place, the final two screws along the top of the door can be reinstalled.
")
Step Nine: Put the door back on the oven
Carefully set the door in place, making sure that each hinge is properly hooked onto the brackets on the oven frame. Once the door is back on, open it up all the way and unlock the hinges by pushing the latches all the way back down.
Finally, close the oven door and make sure there are no unexpected gaps. If all looks good, you can plug your oven back in.
")
Wrapping Up
That’s it! Another successful DIY appliance repair. It’s a little tough to test this one out once it’s installed, but do pay attention the next time you turn your oven on. If it seems like your oven is taking a long time to heat up, or if it feels like a lot of heat is escaping, there may be an issue with how the door was reassembled. Otherwise, you’re good to go!
If you need any replacement parts for your appliances, you can enter your model number at AppliancePartsPros.com to locate and order them quickly. Most orders arrive in just two business days, and we have tons of great information in our repair help section and YouTube videos to help you troubleshoot.
Stay connected with the latest DIY tips, tutorial videos, and repair guides by following us on Facebook, Instagram, and Twitter. We love hearing about your repair stories and successes. If you need more help or want personalized guidance, feel free to contact or call us at 877-477-7278. We’re ready to help you take on your next project with confidence!
Since 1999, AppliancePartsPros.com has helped millions of people repair their broken appliances by providing high-quality original parts at well below retail prices, free support and troubleshooting, and award-winning customer service from an expert, friendly, US-based customer support team!
 https://www.appliancepartspros.com/b/wp-content/uploads/2025/09/20250715_0841_Bright-Spacious-Kitchen_simple_compose_01k071jcrwehnsmry5gd66h6f3.png
1024
1536
Steven E
https://www.appliancepartspros.com/b/wp-content/uploads/2020/11/app-logo-std.png
Steven E2025-09-05 09:46:082025-09-05 09:46:16How to Clean Your Oven After a Spill, Naturally and Easily
https://www.appliancepartspros.com/b/wp-content/uploads/2025/09/20250715_0841_Bright-Spacious-Kitchen_simple_compose_01k071jcrwehnsmry5gd66h6f3.png
1024
1536
Steven E
https://www.appliancepartspros.com/b/wp-content/uploads/2020/11/app-logo-std.png
Steven E2025-09-05 09:46:082025-09-05 09:46:16How to Clean Your Oven After a Spill, Naturally and Easily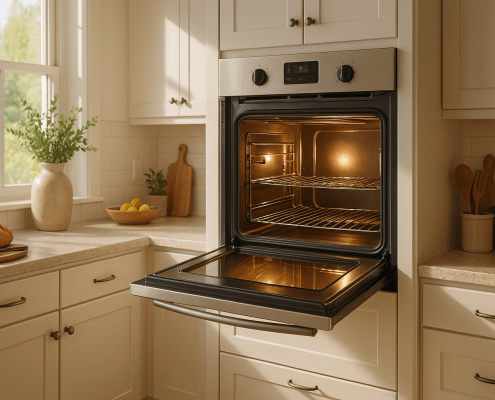 https://www.appliancepartspros.com/b/wp-content/uploads/2025/05/20250519_1022_Sunlit-Kitchen-Oven_simple_compose_01jvmeq4s4ekqbgm8w5zpk3br3.png
1024
1536
Steven E
https://www.appliancepartspros.com/b/wp-content/uploads/2020/11/app-logo-std.png
Steven E2025-05-19 07:25:132025-08-14 09:39:41Whirlpool oven light assembly WP74011278 replacement guide
https://www.appliancepartspros.com/b/wp-content/uploads/2025/05/20250519_1022_Sunlit-Kitchen-Oven_simple_compose_01jvmeq4s4ekqbgm8w5zpk3br3.png
1024
1536
Steven E
https://www.appliancepartspros.com/b/wp-content/uploads/2020/11/app-logo-std.png
Steven E2025-05-19 07:25:132025-08-14 09:39:41Whirlpool oven light assembly WP74011278 replacement guide https://www.appliancepartspros.com/b/wp-content/uploads/2025/05/20250509_1251_Oven-Display-Error_simple_compose_01jttz893ze0brtea6zebdkk8h.png
1024
1536
Steven E
https://www.appliancepartspros.com/b/wp-content/uploads/2020/11/app-logo-std.png
Steven E2025-05-13 06:22:432025-05-13 06:22:52How to Troubleshoot Error Code F121 on a Bosch Oven
https://www.appliancepartspros.com/b/wp-content/uploads/2025/05/20250509_1251_Oven-Display-Error_simple_compose_01jttz893ze0brtea6zebdkk8h.png
1024
1536
Steven E
https://www.appliancepartspros.com/b/wp-content/uploads/2020/11/app-logo-std.png
Steven E2025-05-13 06:22:432025-05-13 06:22:52How to Troubleshoot Error Code F121 on a Bosch OvenHi! I’m Matt H., and I’m thrilled to be your guide through the world of appliance repair with over 25 years of invaluable experience in the industry.
From the early days of my career, I have been deeply passionate about appliances and their inner workings. Over the years, I’ve seen it all – from vintage models to the latest cutting-edge technology – and I’ve dedicated myself to mastering the art of repair. With a toolbox in one hand and a wealth of knowledge in the other, I’ve tackled every challenge that has come my way, learning and growing with each repair.
Join me as we dive into the intricacies of appliance repair. From step-by-step repair guides to explanations of common problems and their solutions, I’ll be here to simplify the repair process and empower you with the knowledge you need to keep your appliances running smoothly.
Feel free to explore our blog, ask questions, and leave comments – this platform is a space for learning, sharing, and growing together. Let’s work together to ensure that your appliances continue to serve you for years to come.
Thank you for joining me on this journey, and I look forward to being your go-to resource for all things related to appliance repair!