What Causes Bathroom Exhaust Fan Leaks and How to Stop Them
Steven E / Monday June 30, 2025
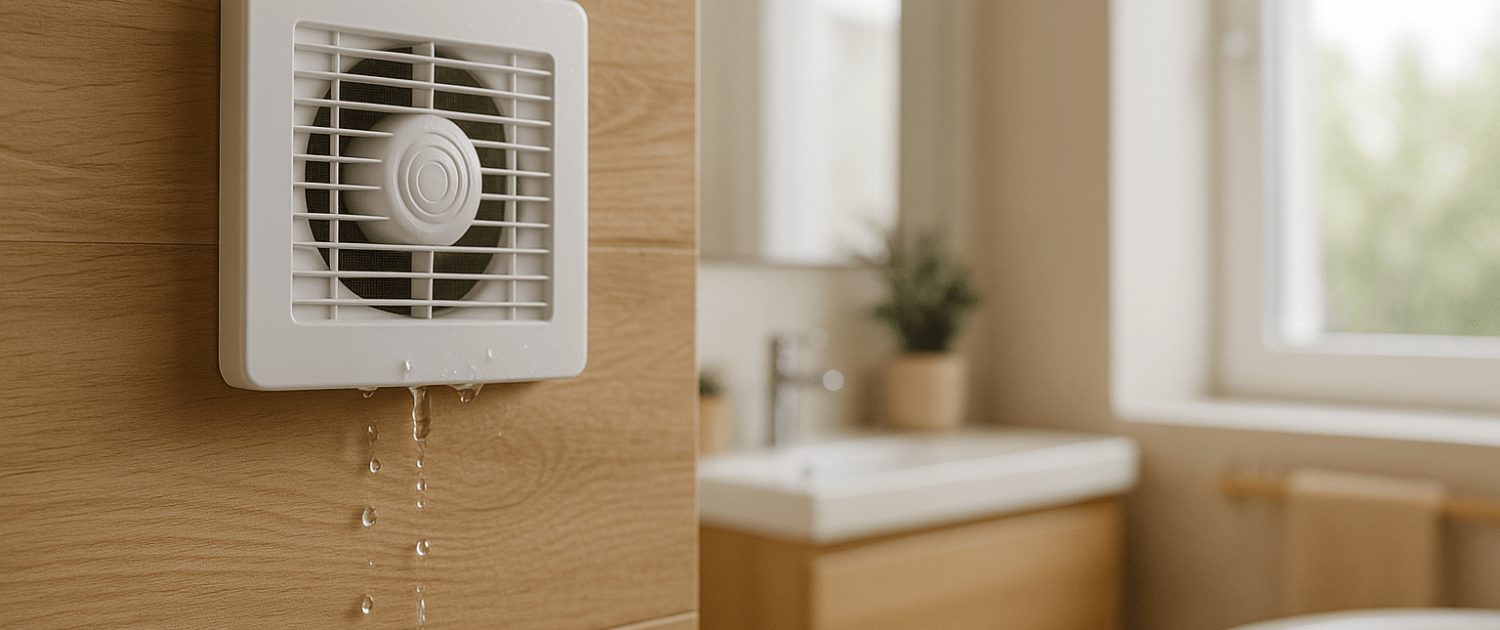
Finding water dripping from your bathroom fan is both surprising and frustrating. Not only does it seem counterintuitive, after all, it’s a ventilation device, but it can also lead to stained ceilings, warped drywall, or even mold if left unchecked.
The good news is that this is a common issue with understandable causes and, in most cases, a DIY-friendly fix. In this guide, we’ll explore why bathroom fans leak water, what problems may be contributing, and how to stop the problem before it causes permanent damage.
The information in this article may not apply to your specific appliance model. We recommend consulting your manufacturer’s documentation or contact us with any questions.
Common Causes of a Leaking Bathroom Fan
Bathroom fans are designed to remove humid air, not trap moisture. When water starts appearing around the fan housing, dripping from the grille, or forming stains on the ceiling nearby, something’s gone wrong in the system’s airflow, insulation, or duct design.

Here are the most likely culprits:
1. Condensation in the Ductwork
The most common reason a bathroom fan leaks water is condensation. As warm, moist air from the bathroom moves through the fan and into the cold ductwork, especially in attics during winter, it cools down. Moisture condenses on the inside walls of the duct and drips back toward the fan.
What it looks like:
- Water drips from the fan grille, especially after showers
- A damp ceiling around the fan
- Drips increase during cold weather
Why it happens:
- Poor duct insulation in cold attic spaces
- Long duct runs that don’t slope properly
- Warm air pooling in the duct after the fan shuts off
2. Improper Duct Slope
Your ductwork should be sloped slightly away from the fan housing, ideally toward the exterior vent. When the duct is flat or slopes backward toward the fan, condensate builds up and runs down into the fan box.
What it looks like:
- Intermittent leaks from the fan
- Water pooling in the duct
- Moisture stains around the fan housing
Why it happens:
- Incorrect installation angle
- Sagging flexible ducts in the attic
- Lack of proper support for the duct run
3. Exterior Vent Backdraft or Leaks
Rainwater or snowmelt can make its way into the duct system through the exterior vent, especially if the vent cover is damaged, missing, or improperly installed.
What it looks like:
- Leaks after heavy rain or snow
- Water appears regardless of whether the fan was used
- Drafts or cold air coming in from the vent
Why it happens:
- Missing or loose flapper/damper on the vent hood
- Poorly sealed or unprotected roof/wall vent
- Clogged screen or ice buildup allowing water to back up
4. Fan Housing Not Properly Sealed
If water collects around the fan housing itself due to poor insulation or duct issues, it can leak through gaps in the housing or ceiling cutout.
What it looks like:
- Leaks from the ceiling but not from the grille
- Water-stained drywall around the fan box
- Signs of corrosion or rust on the metal fan frame
Why it happens:
- Gaps around the housing where air and moisture escape
- Missing or ineffective ceiling vapor barrier
- Inadequate sealing or insulation around the fan
5. Ice Damming (in Cold Climates)
In freezing temperatures, condensation in the duct can freeze. When temperatures rise, that ice melts, and flows back down into the bathroom.
What it looks like:
- Leaks during temperature swings or sunny winter days
- Water dripping long after the fan has been used
- Ice visible in attic ductwork
Why it happens:
- Cold attic spaces with uninsulated or poorly insulated ducts
- Infrequent fan use allowing condensation to freeze
- Lack of attic ventilation
How to Fix a Leaking Bathroom Fan
Solving the issue depends on identifying the source. In most cases, the fix will involve improving duct design, insulation, or sealing, all of which are manageable with basic DIY skills.
Here’s how to tackle the most common fixes:
1. Add or Upgrade Duct Insulation
To prevent condensation in cold climates, ducts that run through unconditioned spaces (like attics) must be insulated.
- Use R-6 or higher-rated insulated ducting, or wrap existing ducts with pipe insulation or foil-faced batt insulation.
- Make sure insulation extends the full length of the duct, from fan to vent cap.
- Secure insulation with foil tape, not duct tape, to maintain an airtight seal.
2. Correct the Duct Slope
Make sure your ductwork slopes gently away from the fan toward the exterior vent. A slope of about 1/4 inch per foot is typically recommended.
- Use rigid metal ducting or secure flexible ducting to prevent sagging.
- Support long duct runs with straps or hangers to maintain proper slope.
- Avoid sharp bends or dips where water could collect.
3. Check and Seal the Exterior Vent
Inspect the outdoor vent hood or cap for damage, missing parts, or poor sealing.
- Ensure the backdraft damper (flapper) moves freely and closes tightly.
- Check that the vent cover is caulked and weather-sealed to prevent leaks.
- Clear away any debris, leaves, or ice that may block proper venting.
If necessary, replace the vent cover with a weather-resistant, hooded model that includes a damper and screen.
4. Seal the Fan Housing and Ceiling Gap
Use caulk or spray foam insulation to seal around the fan housing where it meets the ceiling drywall. This helps stop warm, moist air from leaking into the attic and condensing.
- Make sure any ceiling cutouts are tightly sealed.
- If your fan is installed below attic insulation, consider placing an insulated cover box (fan tent) over the fan unit in the attic.
- Don’t block ventilation or access to the fan motor when sealing.
5. Use a Timer or Humidity Sensor
One cause of condensation buildup is shutting the fan off too soon after a shower. Warm, moist air lingers in the ducts and begins to condense.
- Install a countdown timer switch that keeps the fan running 15–30 minutes after showering.
- Upgrade to a humidity-sensing fan that automatically runs until moisture levels return to normal.
- Leave the bathroom door open after using the fan to allow full air exchange.
Where To Find Us
If you need any replacement parts for your appliances, you can enter your model number at AppliancePartsPros.com to locate and order them quickly. Most orders arrive in just two business days, and we have tons of great information in our repair help section and YouTube videos to help you troubleshoot.
Stay connected with the latest DIY tips, tutorial videos, and repair guides by following us on Facebook, Instagram, and Twitter. We love hearing about your repair stories and successes. If you need more help or want personalized guidance, feel free to reach out. We’re ready to help you take on your next project with confidence!
 https://www.appliancepartspros.com/b/wp-content/uploads/2025/07/20250703_1412_Smart-Bathroom-Fan_simple_compose_01jz8qt9bcekbsfqqe9ftaxmxx.png
1024
1536
Steven E
https://www.appliancepartspros.com/b/wp-content/uploads/2020/11/app-logo-std.png
Steven E2025-07-03 12:11:292025-07-03 12:11:38How to Choose the Right Bathroom Fan Sones Rating for Comfort
https://www.appliancepartspros.com/b/wp-content/uploads/2025/07/20250703_1412_Smart-Bathroom-Fan_simple_compose_01jz8qt9bcekbsfqqe9ftaxmxx.png
1024
1536
Steven E
https://www.appliancepartspros.com/b/wp-content/uploads/2020/11/app-logo-std.png
Steven E2025-07-03 12:11:292025-07-03 12:11:38How to Choose the Right Bathroom Fan Sones Rating for Comfort https://www.appliancepartspros.com/b/wp-content/uploads/2025/07/20250703_1430_Bathroom-Ceiling-Fan_simple_compose_01jz8rtekzf5y8cq53y70h2a5n.png
1024
1536
Steven E
https://www.appliancepartspros.com/b/wp-content/uploads/2020/11/app-logo-std.png
Steven E2025-07-03 11:58:432025-07-03 11:58:52How to Replace a Cracked or Yellowed Bathroom Fan Lens
https://www.appliancepartspros.com/b/wp-content/uploads/2025/07/20250703_1430_Bathroom-Ceiling-Fan_simple_compose_01jz8rtekzf5y8cq53y70h2a5n.png
1024
1536
Steven E
https://www.appliancepartspros.com/b/wp-content/uploads/2020/11/app-logo-std.png
Steven E2025-07-03 11:58:432025-07-03 11:58:52How to Replace a Cracked or Yellowed Bathroom Fan Lens https://www.appliancepartspros.com/b/wp-content/uploads/2025/07/20250703_1409_Broken-Bathroom-Fan_simple_compose_01jz8qm7gcesnry71hn9twtyy7.png
1024
1536
Steven E
https://www.appliancepartspros.com/b/wp-content/uploads/2020/11/app-logo-std.png
Steven E2025-07-03 11:18:512025-07-03 11:18:59Fixing a Bathroom Fan That Has a Broken Spring Clip or Hanger
https://www.appliancepartspros.com/b/wp-content/uploads/2025/07/20250703_1409_Broken-Bathroom-Fan_simple_compose_01jz8qm7gcesnry71hn9twtyy7.png
1024
1536
Steven E
https://www.appliancepartspros.com/b/wp-content/uploads/2020/11/app-logo-std.png
Steven E2025-07-03 11:18:512025-07-03 11:18:59Fixing a Bathroom Fan That Has a Broken Spring Clip or HangerWith nearly a decade of experience in providing top-notch customer service regarding appliance parts and repair, Steven enjoys sharing practical advice, troubleshooting tips, and interesting information to help readers stay informed.