How to Check and Fix Uneven Airflow from Central AC Vents
Steven E / Tuesday June 24, 2025
If you’ve ever walked from one room in your house to another and noticed a big difference in temperature or airflow, you’re not alone. Uneven airflow is a common issue with central air conditioning systems. It leads to hot and cold spots, discomfort, and even wasted energy. The good news? Most causes of uneven airflow can be addressed with a bit of DIY troubleshooting and some basic tools.
In this guide, we’ll break down what causes uneven airflow, how to diagnose the problem, and walk you through several steps to restore balanced airflow throughout your home.
Why Uneven Airflow Happens
Central AC systems rely on a network of ducts, fans, motors, and vents to deliver cooled air evenly. When any part of that system is blocked, imbalanced, or malfunctioning, airflow can drop off in specific areas.
Here are the most common culprits:

- Dirty or clogged air filters
- Closed or obstructed vents
- Leaky or poorly insulated ducts
- Misadjusted or broken dampers
- Weak blower motor
- Incorrectly sized HVAC system
- Thermostat placement or zoning issues
Let’s walk through the steps you can take to fix the issue.
Step 1: Check and Replace Your Air Filter
The air filter is one of the simplest components in your HVAC system, yet it’s also one of the most critical. A dirty filter reduces the amount of air that can flow through the system, which often leads to uneven airflow and reduced cooling performance.
How to Check:
- Turn off the HVAC system.
- Locate the air filter (it’s usually in the return air vent or inside the furnace/air handler).
- Slide it out and hold it up to the light.
If you can’t see much light through it, it’s too dirty and needs replacing.
What to Do:
- Replace the filter with one of the same size and rating.
- For most homes, a MERV 8–11 filter offers a good balance of filtration and airflow.
- Mark your calendar to check or replace it every 1–3 months.
Tip: During heavy-use seasons (summer and winter), filters clog up more quickly. Frequent replacement is key to consistent airflow.
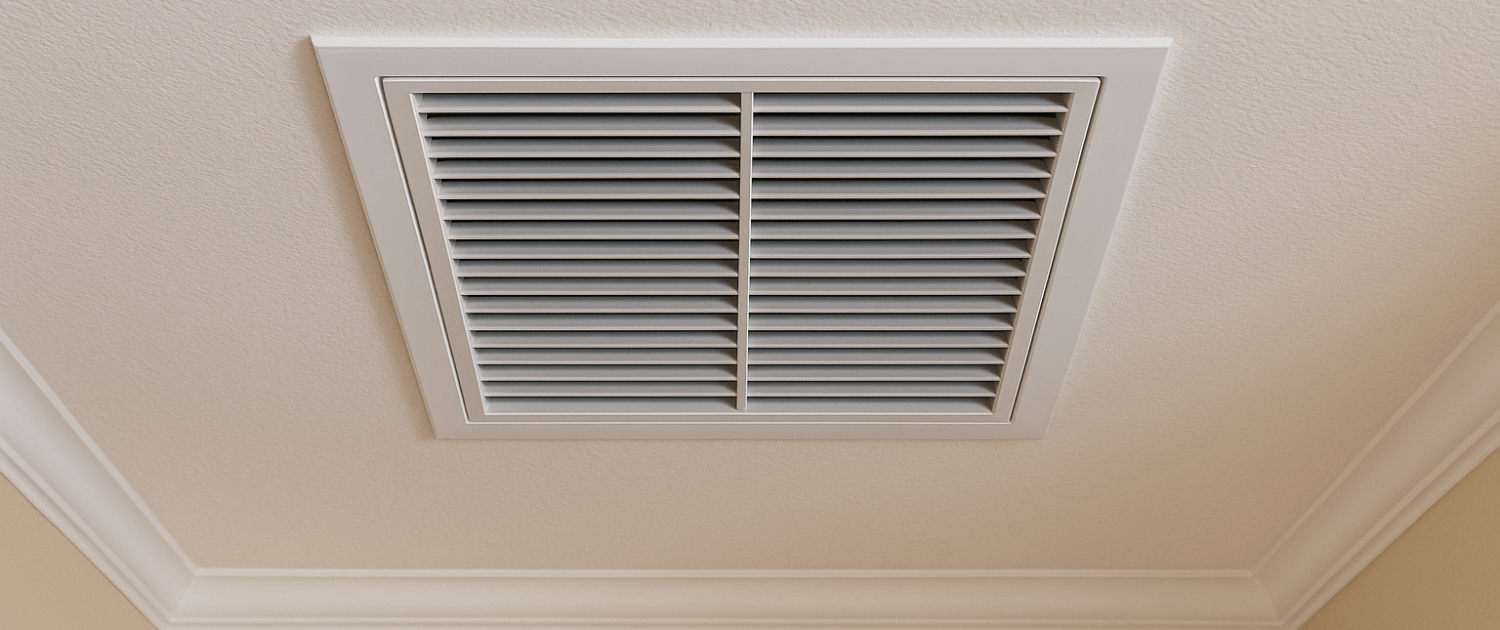
Step 2: Make Sure All Vents Are Open and Clear
Sometimes the solution is surprisingly simple: check your vents. If a supply vent is closed or blocked, the air won’t reach that room.
How to Check:
- Go room by room and inspect all supply and return vents.
- Make sure every vent is open.
- Remove furniture, rugs, or drapes that may be covering vents.
- Use a vacuum with a brush attachment to clean any dust or debris on the vent covers.
Bonus Tip: Floor vents are especially prone to being blocked by furniture or pets lying on them.
Step 3: Inspect Your Ductwork for Leaks or Disconnections
Leaky ducts can cause significant air loss, especially in long runs to far-away rooms. If you have rooms that are always too warm or too cold, a disconnected or damaged duct could be to blame.
What to Do:
- Turn off your system.
- Access your ductwork, typically in the attic, basement, or crawl space.
- Look for gaps between duct sections, tears or holes in flexible ducts and ducts that have pulled loose from their connections.
- Use UL-listed foil HVAC tape or mastic sealant to patch small leaks.
Important: Avoid using standard duct tape. It deteriorates over time and is not rated for HVAC use.
Step 4: Adjust Manual Dampers in the Ductwork
Some systems have manual dampers, metal levers attached to the ductwork that control how much air flows into each zone. If one is set incorrectly, it may restrict airflow to parts of the house.
How to Adjust:
- Find the dampers in your duct branches (they’re usually located near the main trunk line).
- The handle position shows whether it’s open or closed. Parallel to the duct = open. Perpendicular = closed.
- Try partially closing the dampers to rooms that get too much air.
- Leave dampers fully open to rooms with weak airflow.
Test and Adjust:
- Let the system run for 30–60 minutes after each adjustment.
- Fine-tune as needed to balance comfort throughout the home.
Step 5: Check the Blower Motor and Fan
The blower motor pushes air through your duct system. If it’s dirty, failing, or not running at full speed, it may struggle to maintain consistent airflow.
How to Inspect:
- Turn off power to your HVAC system at the breaker.
- Remove the panel on the furnace or air handler to access the blower.
- Look for signs of dust buildup or damaged fan blades.
- Gently clean the blower wheel with a vacuum and brush.
If the motor is making unusual noises, overheating, or spinning slowly, it may need to be lubricated or replaced.
Step 6: Use Airflow Booster Solutions
If certain rooms are always hot or cold despite your best efforts, airflow boosters can help.
Options Include:
- Register booster fans: These sit directly in a vent and help pull more air into a room. Some models activate automatically when airflow is detected.
- In-line duct booster fans: These are installed inside the duct to push more air toward a specific room.
- Portable fans: In a pinch, they can help circulate air better throughout your home.
Step 7: Evaluate Your System Size and Layout
If your HVAC system is too large or too small for your home, you’ll always have trouble balancing airflow. Oversized systems cool quickly but don’t run long enough to distribute air evenly. Undersized systems struggle to cool the entire space, leaving distant rooms underserved.
What to Look For:
- Rooms at the far end of the duct network that always feel different in temperature.
- Short cycling (the system turns on and off frequently).
- Rising energy bills with poor comfort.
Step 8: Consider Adding a Zoning System
For multi-level homes or homes with vastly different sun exposures, zoning is a long-term solution.
What Zoning Includes:
- Multiple thermostats
- Motorized dampers in the ductwork
- A controller that regulates airflow to each zone independently
More Help
If you need extra support, visit us at AppliancePartsPros.com, where you’ll find detailed repair instructions, tons of replacement parts, and advice on repair help for many appliance brands and models.
We’re here to help you tackle uneven airflow and all other appliance hiccups with confidence.
Don’t forget to subscribe to us on YouTube and follow us on Facebook, Twitter and Instagram!
The information in this article may not apply to your specific appliance model. We recommend consulting your manufacturer’s documentation or contact us with any questions.
 https://www.appliancepartspros.com/b/wp-content/uploads/2025/07/20250702_1619_Snow-Covered-AC-Unit_simple_compose_01jz6cp8qae85tntktgnjk373z.png
1024
1536
Steven E
https://www.appliancepartspros.com/b/wp-content/uploads/2020/11/app-logo-std.png
Steven E2025-07-02 13:21:122025-07-02 13:21:22Preparing Your Central AC for Winter: A Comprehensive Checklist
https://www.appliancepartspros.com/b/wp-content/uploads/2025/07/20250702_1619_Snow-Covered-AC-Unit_simple_compose_01jz6cp8qae85tntktgnjk373z.png
1024
1536
Steven E
https://www.appliancepartspros.com/b/wp-content/uploads/2020/11/app-logo-std.png
Steven E2025-07-02 13:21:122025-07-02 13:21:22Preparing Your Central AC for Winter: A Comprehensive Checklist https://www.appliancepartspros.com/b/wp-content/uploads/2025/07/20250701_1101_Cozy-Utility-Closet_simple_compose_01jz380t8ef6taqrge05hhegv1.png
1024
1536
Steven E
https://www.appliancepartspros.com/b/wp-content/uploads/2020/11/app-logo-std.png
Steven E2025-07-02 13:15:202025-07-02 13:15:30How to Test and Replace a Central AC Capacitor
https://www.appliancepartspros.com/b/wp-content/uploads/2025/07/20250701_1101_Cozy-Utility-Closet_simple_compose_01jz380t8ef6taqrge05hhegv1.png
1024
1536
Steven E
https://www.appliancepartspros.com/b/wp-content/uploads/2020/11/app-logo-std.png
Steven E2025-07-02 13:15:202025-07-02 13:15:30How to Test and Replace a Central AC Capacitor https://www.appliancepartspros.com/b/wp-content/uploads/2025/07/20250702_1609_Modern-Home-Thermostat_simple_compose_01jz6c2cj6edkr4a4tgnsbppdy.png
1024
1536
Steven E
https://www.appliancepartspros.com/b/wp-content/uploads/2020/11/app-logo-std.png
Steven E2025-07-02 13:11:002025-07-02 13:11:10How to Test and Replace a Faulty Central AC Thermostat
https://www.appliancepartspros.com/b/wp-content/uploads/2025/07/20250702_1609_Modern-Home-Thermostat_simple_compose_01jz6c2cj6edkr4a4tgnsbppdy.png
1024
1536
Steven E
https://www.appliancepartspros.com/b/wp-content/uploads/2020/11/app-logo-std.png
Steven E2025-07-02 13:11:002025-07-02 13:11:10How to Test and Replace a Faulty Central AC ThermostatWith nearly a decade of experience in providing top-notch customer service regarding appliance parts and repair, Steven enjoys sharing practical advice, troubleshooting tips, and interesting information to help readers stay informed.