Bathroom Fan Duct Cleaning Tips That Prevent Moisture Damage
Steven E / Tuesday July 1, 2025
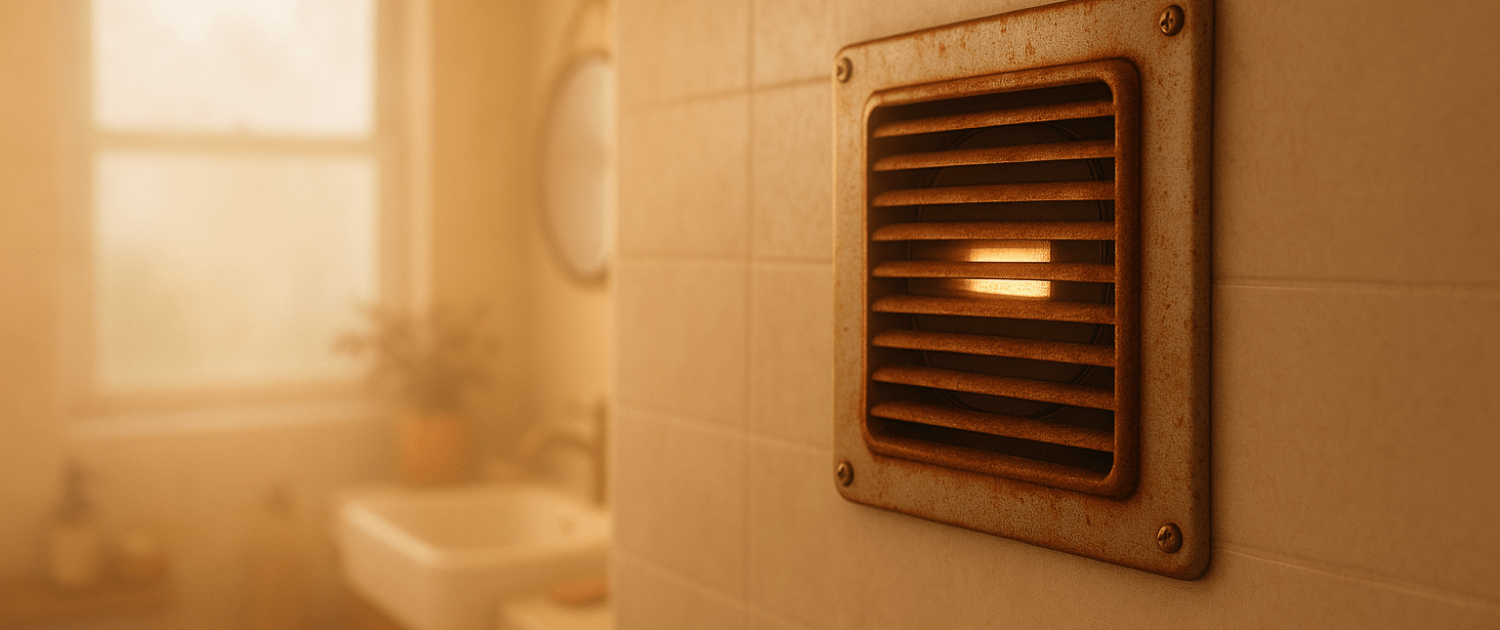
A bathroom exhaust fan helps eliminate excess moisture, remove odors, and prevent mold and mildew buildup. Keeping your bathroom fan ductwork clean is essential for maintaining efficient airflow and reducing potential fire hazards caused by dust buildup. We’ll walk you through why bathroom duct maintenance matters, how to inspect and clean your ducts, and what tools and techniques can make the job easier and more effective.
The information in this article may not apply to your specific appliance model. We recommend consulting your manufacturer’s documentation or contact us with any questions.
Why Cleaning Bathroom Fan Ductwork Matters
The duct connected to your bathroom exhaust fan carries moist air from your bathroom to the outside of your home. Over time, dust, lint, and other debris collect inside the ductwork. In damp conditions, this buildup can:
- Restrict airflow and reduce ventilation efficiency
- Cause condensation inside the duct, leading to water damage or mold
- Increase energy use as the fan works harder
- Pose a fire hazard if debris contacts a faulty fan motor
- Lead to unpleasant odors if moisture and debris collect
A quick inspection and cleaning routine can extend the life of your fan and improve indoor air quality.

How Often Should You Clean Bathroom Fan Ducts?
In general, bathroom exhaust fan ductwork should be inspected and cleaned at least once a year. However, if your fan runs frequently, like in a family home with multiple daily showers, you may want to check it every 6 months.
You should also inspect the duct if you notice:
- A musty smell is coming from the fan
- Moisture lingering on mirrors or walls longer than usual
- Dust is blowing from the vent
- A fan that runs loudly or struggles to clear steam
Even if your fan seems to be running fine, regular maintenance ensures it’s doing its job as efficiently as possible.
Tools and Supplies You’ll Need
Before getting started, gather the following:
- Screwdriver (typically Phillips)
- Flashlight or headlamp
- Shop vacuum or household vacuum with hose attachment
- Flexible dryer vent cleaning brush or long bottle brush
- Microfiber cloths or rags
- Mild detergent or all-purpose cleaner
- Ladder or step stool
- Duct tape (optional for resealing)
- Drill with nut driver bit (if housing screws are tight)
Optional but helpful:
- A leaf blower or an air compressor for blasting out long duct runs
- An inspection camera or a phone camera with a flashlight for tight spots
Step 1: Turn Off the Power to the Fan
Before doing any work, turn off the bathroom fan at the wall switch. If you’re going to disassemble anything beyond the grille, it’s a good idea to cut power at the breaker box. Safety always comes first, especially when working around electrical fixtures.
Step 2: Remove and Clean the Fan Grille
- Use a ladder or a step stool to reach the fan.
- Gently pull down the grille; it usually snaps into place.
- Squeeze the mounting clips on each side to fully remove it.
- Wash the grille with warm, soapy water and let it dry completely.
- Wipe the surrounding ceiling area to remove dust and cobwebs.
Cleaning the grille improves airflow and gives you better access to the fan housing and duct inlet.
Step 3: Inspect the Fan and Duct Connection
- Use a flashlight to examine the inside of the fan housing.
- Look for dust buildup on the fan blades, housing walls, and duct connection.
- Identify where the duct attaches; this is usually a flexible or rigid metal pipe leading out through an attic, roof, or side wall.
Step 4: Vacuum Around the Fan Housing
Use a vacuum with a crevice or brush attachment to remove dust from:
- Fan blades and motor assembly
- Duct entry point
- Inner walls of the housing
Avoid damaging wires or dislodging any parts. If the fan blade is especially dirty, use a microfiber cloth dampened with cleaner to gently wipe it clean.
Step 5: Disconnect the Duct (If Accessible)
If you can access the fan’s duct connection (for example, in an attic), disconnect the duct from the fan outlet for a more thorough cleaning. Depending on how it’s secured, you may need to loosen a hose clamp or remove duct tape.
With the duct detached, you’ll be able to:
- Inspect the inside of the duct with a flashlight or camera
- Remove heavy clogs or built-up lint with a brush or vacuum
- Clean the duct run from both ends (fan side and exterior vent)
If you don’t have access to the attic, you can still clean from inside the bathroom, but you’ll be limited to the length your tools can reach.
Step 6: Clean the Ductwork
There are a few ways to clean your bathroom ductwork:
Option 1: Vacuum Method
- Insert the hose of a shop vac or household vacuum as far into the duct as possible.
- Slowly move the hose in and out while rotating it to dislodge debris.
- Use an extension wand or flexible hose if needed.
Option 2: Brush Method
- Use a flexible dryer vent brush to scrub the inside of the duct.
- Insert it gently and rotate while feeding it through.
- Pull it back slowly, removing debris each time.
Option 3: Air Blast Method
- Use a leaf blower or air compressor to blow out the duct from the bathroom side.
- Stand outside at the vent exit to ensure debris clears the system.
Pro Tip: Always make sure the vent flap or louver on the exterior of your home is clean and opens easily. Debris buildup here can choke airflow even if the duct itself is clean.
Step 7: Reconnect the Duct and Reassemble
- Once the duct is clean, reconnect it to the fan housing.
- Secure it with duct tape or a hose clamp, ensuring a snug fit.
- Reinstall the fan grille and press it into place.
- Restore power to the fan and turn it on to test airthe flow.
You should notice a smoother, quieter operation and stronger suction once the duct is free of debris.
Step 8: Wipe Down Exterior Vent
Don’t forget about the vent where the duct terminates. This may be on the side of your house, on the roof, or in the soffit.
- Use a brush or cloth to remove any dirt, cobwebs, or insect nests.
- Make sure the vent flap isn’t stuck closed.
- Clean behind the louver if possible; dust and lint can collect here, especially if the duct isn’t well-sealed.
Proper vent function is critical to ensure air leaves your home without resistance.
Tips for Keeping Ductwork Clean Longer
You don’t need to deep-clean your ducts every month, but a few simple habits can extend the time between cleanings and keep your fan operating efficiently:
- Run the fan for 15–20 minutes after each shower to fully remove moisture.
- Keep the fan cover clean by wiping it monthly.
- Use a vacuum or brush to remove dust from around the fan inlet.
- Upgrade to a more powerful fan if your current model struggles to keep up with humidity.
- Install a fan timer so the unit runs long enough to clear moisture without staying on all day.
These steps help reduce moisture buildup, improve airflow, and prevent dust from settling inside the duct.
Where To Find Us
If you need any replacement parts for your appliances, you can enter your model number at AppliancePartsPros.com to locate and order them quickly. Most orders arrive in just two business days, and we have tons of great information in our repair help section and YouTube videos to help you troubleshoot.
Stay connected with the latest DIY tips, tutorial videos, and repair guides by following us on Facebook, Instagram, and Twitter. We love hearing about your repair stories and successes. If you need more help or want personalized guidance, feel free to reach out. We’re ready to help you take on your next project with confidence!
 https://www.appliancepartspros.com/b/wp-content/uploads/2025/07/20250703_1412_Smart-Bathroom-Fan_simple_compose_01jz8qt9bcekbsfqqe9ftaxmxx.png
1024
1536
Steven E
https://www.appliancepartspros.com/b/wp-content/uploads/2020/11/app-logo-std.png
Steven E2025-07-03 12:11:292025-07-03 12:11:38How to Choose the Right Bathroom Fan Sones Rating for Comfort
https://www.appliancepartspros.com/b/wp-content/uploads/2025/07/20250703_1412_Smart-Bathroom-Fan_simple_compose_01jz8qt9bcekbsfqqe9ftaxmxx.png
1024
1536
Steven E
https://www.appliancepartspros.com/b/wp-content/uploads/2020/11/app-logo-std.png
Steven E2025-07-03 12:11:292025-07-03 12:11:38How to Choose the Right Bathroom Fan Sones Rating for Comfort https://www.appliancepartspros.com/b/wp-content/uploads/2025/07/20250703_1430_Bathroom-Ceiling-Fan_simple_compose_01jz8rtekzf5y8cq53y70h2a5n.png
1024
1536
Steven E
https://www.appliancepartspros.com/b/wp-content/uploads/2020/11/app-logo-std.png
Steven E2025-07-03 11:58:432025-07-03 11:58:52How to Replace a Cracked or Yellowed Bathroom Fan Lens
https://www.appliancepartspros.com/b/wp-content/uploads/2025/07/20250703_1430_Bathroom-Ceiling-Fan_simple_compose_01jz8rtekzf5y8cq53y70h2a5n.png
1024
1536
Steven E
https://www.appliancepartspros.com/b/wp-content/uploads/2020/11/app-logo-std.png
Steven E2025-07-03 11:58:432025-07-03 11:58:52How to Replace a Cracked or Yellowed Bathroom Fan Lens https://www.appliancepartspros.com/b/wp-content/uploads/2025/07/20250703_1409_Broken-Bathroom-Fan_simple_compose_01jz8qm7gcesnry71hn9twtyy7.png
1024
1536
Steven E
https://www.appliancepartspros.com/b/wp-content/uploads/2020/11/app-logo-std.png
Steven E2025-07-03 11:18:512025-07-03 11:18:59Fixing a Bathroom Fan That Has a Broken Spring Clip or Hanger
https://www.appliancepartspros.com/b/wp-content/uploads/2025/07/20250703_1409_Broken-Bathroom-Fan_simple_compose_01jz8qm7gcesnry71hn9twtyy7.png
1024
1536
Steven E
https://www.appliancepartspros.com/b/wp-content/uploads/2020/11/app-logo-std.png
Steven E2025-07-03 11:18:512025-07-03 11:18:59Fixing a Bathroom Fan That Has a Broken Spring Clip or HangerWith nearly a decade of experience in providing top-notch customer service regarding appliance parts and repair, Steven enjoys sharing practical advice, troubleshooting tips, and interesting information to help readers stay informed.