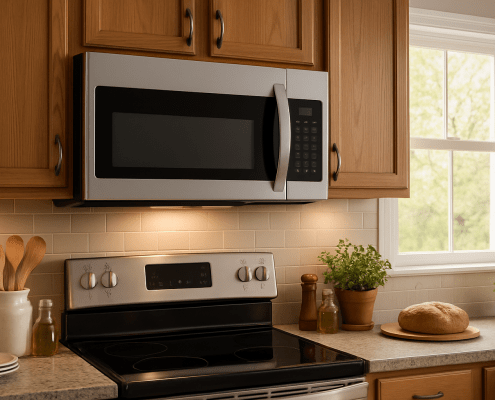
How to replace grease filter W10208631A on a Whirlpool, KitchenAid or Maytag built-in microwave
Steven E / Wednesday December 20, 2023
Is your over-the-range microwave struggling to clear smoke and odors? The culprit might be a clogged grease filter, and while regular cleaning can help, sometimes it needs a quick replacement. Don’t worry—our step-by-step guide and handy how-to video below will show you how to easily swap out your old filter in under 15 minutes, so you can get your microwave back to optimal performance in no time!
Over time, the grease filter in your over-the-range microwave can become clogged with oil and other residue, which can prevent the vent fan from clearing smoke, steam and odors from above your stove.
While you should clean the grease filter on a regular basis, you may need to replace it if it’s damaged or can’t be cleaned.

Thankfully, replacing the grease filter is an easy fix you can do yourself in less than 15 minutes.
Let’s walk through the steps to remove your existing filter and install a new one. With some simple tools and the right filter for your Whirlpool, KitchenAid or Maytag model, you can get your microwave working like new again.
If you need a replacement grease filter, you can order part W10208631A here. If you need a different filter or another part, enter your model number into the search bar at AppliancePartsPros.com to find what you need.
Watch: How To replace a Whirlpool/KitchenAid/Maytag Grease Filter W10208631A
NOTE: The information in this article only applies to over-the-stove or built-in microwave ovens. Countertop microwaves don’t have grease filters that can be cleaned.
Disclaimer: The part replacement information provided in this article is based on general service manuals and may not apply to your specific appliance model. While we strive to offer helpful advice for DIY appliance repairs, variations in models and configurations can lead to differences in troubleshooting steps, error codes and part replacements. For the most accurate guidance, we strongly recommend consulting the technical sheet for your specific appliance model.
What you need
- Cleaning cloth or sponge
- Mild dish soap or degreaser – for cleaning the microwave and/or filter area
- Replacement filter – check the compatibility with your specific Whirlpool microwave model
How To Find Your Appliance’s Model Number
Safety precautions
- Always power off and unplug your microwave before attempting any maintenance or replacement work so you can prevent the risk of electric shock.
- If the microwave has recently been used, give it plenty of time to cool down before attempting to replace the grease filter.
- Take your time and don’t rush while working to prevent accidents and personal injuries.
- Work in a well-lit area so you can clearly see and access the filter and other parts of the microwave.
- Check your Whirlpool/KitchenAid/Maytag microwave’s user manual to see if there are specific instructions related to replacing the grease filter. Different models may have slight variations in the replacement process.
- Be gentle when handling parts or removing components from the microwave. Excessive force might damage the appliance or cause injury.
- Keep children and pets away from the work area while working on the microwave.
Read more: How to Clean a Microwave

Replacement steps
- Turn off your microwave and disconnect it from the power source.
- Find the grease filter on the underside of your microwave.
- Slide the old filter 1 inch to the left. This will release the right side of the filter from its locked position.
- With the right side loose, pull the entire filter toward you to remove it from the microwave. Take note of how it was positioned.
- Inspect and compare the old filter to the new replacement filter. Check that the size, shape and mounting alignment look the same.
- Slide the new filter into the empty space, making sure it’s in the same orientation as the old one.
- Firmly push the new filter to the right until it clicks and locks into place. Tug it gently to make sure it’s secure.
- Reconnect the microwave to power and turn it back on. Test it by cooking on high for 1 minute to make sure it runs normally.
Read more: How to Change a Microwave Light Bulb
Additional information
Thanks for reading! We hope this guide helped you replace the grease filter on your microwave.
If you still need some replacement parts, grab your model number and head over to AppliancePartsPros.com. We offer over two million parts and most orders arrive in two business days. If you need some help with finding the right part or placing an order, you can contact our team at 1 (877) 477-7278.
While you’re waiting for your new part to arrive, you can explore our DIY blog and watch thousands of video tutorials on our YouTube channel.
Be sure to follow us on Facebook, Twitter and Instagram to see our latest repair guides!
 https://www.appliancepartspros.com/b/wp-content/uploads/2025/05/20250519_1030_Sunlit-Kitchen-Microwave_simple_compose_01jvmf79cteavbdhnmpdwt26c9.png
1024
1536
Steven E
https://www.appliancepartspros.com/b/wp-content/uploads/2020/11/app-logo-std.png
Steven E2025-05-19 07:32:242025-05-19 07:32:33Microwave Display Not Working? Here’s How to Repair It
https://www.appliancepartspros.com/b/wp-content/uploads/2025/05/20250519_1030_Sunlit-Kitchen-Microwave_simple_compose_01jvmf79cteavbdhnmpdwt26c9.png
1024
1536
Steven E
https://www.appliancepartspros.com/b/wp-content/uploads/2020/11/app-logo-std.png
Steven E2025-05-19 07:32:242025-05-19 07:32:33Microwave Display Not Working? Here’s How to Repair It https://www.appliancepartspros.com/b/wp-content/uploads/2025/05/20250515_0904_Morning-Kitchen-Glow_simple_compose_01jva0mafdfgyrnmh1c7rqaz6w.png
1024
1536
Steven E
https://www.appliancepartspros.com/b/wp-content/uploads/2020/11/app-logo-std.png
Steven E2025-05-16 05:43:522025-08-14 07:31:31GE Microwave Light Lens WB36X10071 Replacement
https://www.appliancepartspros.com/b/wp-content/uploads/2025/05/20250515_0904_Morning-Kitchen-Glow_simple_compose_01jva0mafdfgyrnmh1c7rqaz6w.png
1024
1536
Steven E
https://www.appliancepartspros.com/b/wp-content/uploads/2020/11/app-logo-std.png
Steven E2025-05-16 05:43:522025-08-14 07:31:31GE Microwave Light Lens WB36X10071 Replacement https://www.appliancepartspros.com/b/wp-content/uploads/2025/05/20250515_0845_Cottage-Kitchen-Microwave_simple_compose_01jv9zkjvnekzrxxn0d1fm6ngt.png
1024
1536
Steven E
https://www.appliancepartspros.com/b/wp-content/uploads/2020/11/app-logo-std.png
Steven E2025-05-16 05:40:552025-08-14 07:25:04How to Replace LG Microwave Choke Cover 3552W1A032J
https://www.appliancepartspros.com/b/wp-content/uploads/2025/05/20250515_0845_Cottage-Kitchen-Microwave_simple_compose_01jv9zkjvnekzrxxn0d1fm6ngt.png
1024
1536
Steven E
https://www.appliancepartspros.com/b/wp-content/uploads/2020/11/app-logo-std.png
Steven E2025-05-16 05:40:552025-08-14 07:25:04How to Replace LG Microwave Choke Cover 3552W1A032JWith nearly a decade of experience in providing top-notch customer service regarding appliance parts and repair, Steven enjoys sharing practical advice, troubleshooting tips, and interesting information to help readers stay informed.