Fix Your KitchenAid Ice Machine with These Simple Water Valve Tests
Steven E / Thursday November 13, 2025
Looking for the right part? Enter your appliance model number below to find the exact match and get your appliance running like new again!
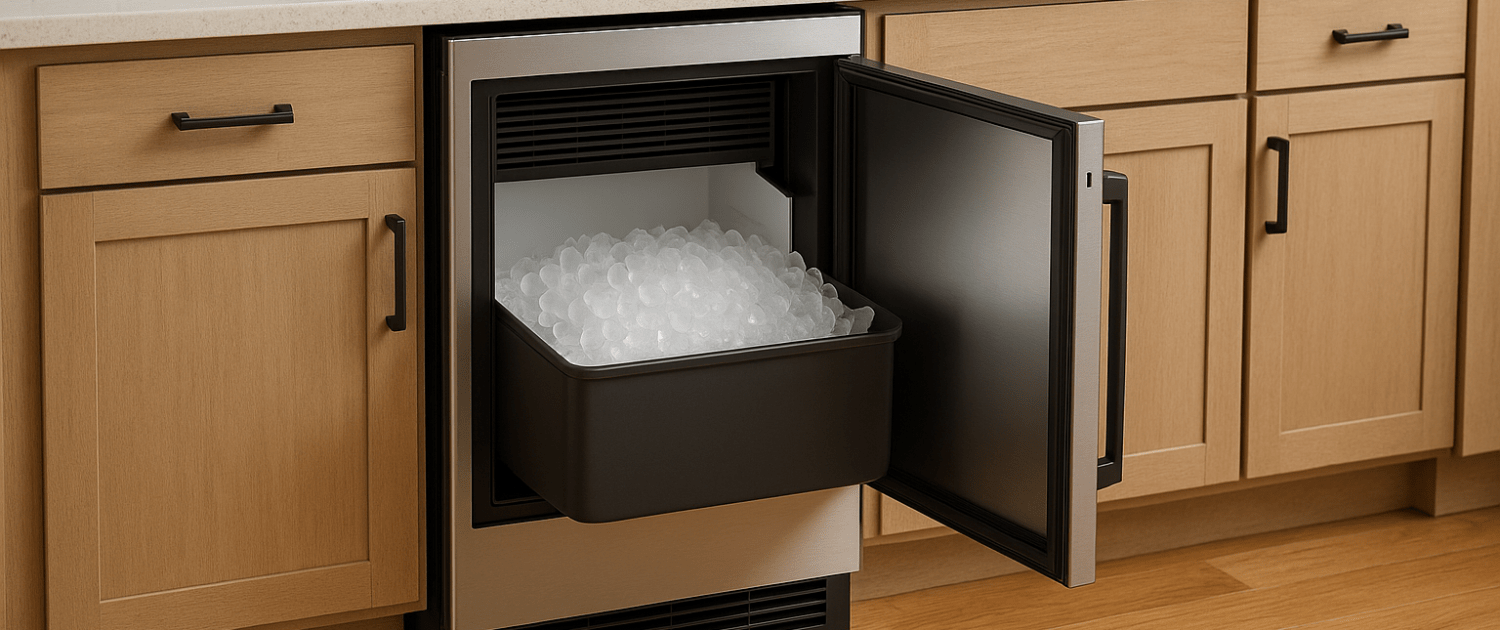
When a KitchenAid freestanding ice machine stops producing ice, drips water, or refuses to fill the reservoir, the water inlet valve is a top suspect. The good news is that this is a fix many homeowners can handle with a little patience, a multimeter, and a clear plan.
Quick Symptoms Checklist
If one or more of these sounds familiar, the water inlet valve, often called a smart valve on these machines, is a strong candidate.

- No ice production at all, even after several hours of operation
- Water reservoir stays empty during a cycle
- Slow ice production with noticeable gaps between fills
- Puddles under the front or a light drip from the cabinet
- A humming sound from the machine during fill, yet no water movement
- Fresh filter installed and water supply is on, but nothing changes
What the Water Inlet Valve Does
The water inlet valve is an electrically controlled gate that opens and closes to let water into the ice machine at the right moments. The control board tells the valve when to energize. Once energized, internal seals lift and allow pressurized water from your household line to flow through tubing into the reservoir. When power is removed, the valve closes and water stops.
A failing valve can stick closed, stick open, or partially open. Any of these conditions can cause no fill, overfill, leaks, or erratic ice production. Because this valve sits at the start of the water path, getting it right protects downstream parts such as the reservoir, pump, and evaporator grid.
Find the Valve on a KitchenAid Freestanding Unit
On many KitchenAid freestanding ice machines the valve sits near the condenser area, commonly toward the left side when facing the front. Some models place it behind the front panel, others place it near the back. If your unit has a smart valve, it will look like a compact plastic body with two push-fit water connections and a small electrical connector or two. Once the front panel is removed you will typically see it within reach on the left side of the lower compartment.
Tools and Supplies You Will Use
Keep the setup simple. For most tests and a clean swap you only need:
- Multimeter that can read AC voltage and continuity or resistance
- Quarter inch nut driver
- Phillips screwdriver
- Small flashlight or headlamp
- Towel for stray drips
- A couple of labeling tags if you like to mark tubing
Always have the model number handy. It makes finding the correct replacement part at AppliancePartsPros.com fast and accurate.
Safety Notes
Working around live voltage and pressurized water requires care.
- Do not touch bare terminals or wiring while the machine is energized.
- If you are not comfortable measuring live voltage, skip the live test and focus on resistance measurements with power disconnected, or ask a friend with multimeter experience to help read the display while you observe from a safe distance.
- Turn off the household water supply to the machine before disconnecting tubing.
- Keep the unit level while panels are off so internal pans and drains stay aligned.
Smart Diagnostics: Confirm Water Supply First
Before focusing on the valve, make sure the water supply feeding the machine is good.
- The saddle valve or shutoff should be fully open.
- The line should not be kinked behind the cabinet.
- If your setup includes an inline filter or a refrigerator style filter head, confirm it is not clogged or missing.
- A quick flow test at the service line helps. Disconnect the line from the machine end, hold it over a bucket, and briefly crack the shutoff to confirm solid flow. Turn the supply off again before reconnecting.
If supply is strong and the machine still does not fill, the valve and its control signal deserve testing.
Electrical Test: Is the Valve Getting Power
KitchenAid freestanding ice machines cycle the valve during fill. When the control calls for water the valve should receive approximately 120 volts AC. Testing for the presence of this voltage separates a bad valve from a control or wiring issue.
What to check
- With panels open and the valve in view, locate the power leads to the valve. Many models use a black and a white wire.
- The machine must be in a fill portion of the cycle to energize the valve. If you recently powered it, wait for the moment it usually fills, or use the machine controls to start a cycle that includes filling.
The reading you want
- Around 120 volts AC at the valve connector when the machine is in a fill cycle.
How to interpret the result
- Voltage present but no water flows
The valve solenoid is being told to open, yet it does not pass water. The valve has failed and should be replaced. - No voltage present when the machine should be filling
The control board is not sending power, or there is a break in the wiring harness. Inspect connectors and harness routing. If the harness is intact, the control board may be the issue.
If live voltage testing is not your preference, you can unplug the unit and use your meter in ohms or continuity mode to evaluate the valve coil. Many smart valves are sealed assemblies, but a coil that reads open indicates internal failure. If the coil reads within a normal range, a mechanical failure inside the valve may still be present, which also calls for a replacement.
Water-Side Checks That Mimic Valve Failure
A valve can seem bad when the real problem is elsewhere in the water path. Rule out these simple items while you are set up.
- Push-fit tubing not fully seated
If tubing is not pushed past the internal O-ring, the connection can leak or admit air. Air pockets reduce fill flow. - Mineral buildup in the valve inlet screen
Some valves include a fine screen right at the inlet. If your household water is hard, this screen can collect sand or scale. If the screen is removable, clean it gently with a soft brush and water. If it is non-removable or damaged, replace the valve. - Clog in the reservoir feed line
Algae or scale can narrow soft tubing. Pinch the tube in a few spots to feel for stiffness or blockage.
Confirming these small items can save you from replacing a good part and will keep a brand new valve performing like it should.
How to Replace the Water Inlet Valve
Once you have confirmed the valve is the issue, the swap itself is very manageable. Take your time and keep parts organized.
Preparation
- Power off the machine at the plug or breaker.
- Turn the household water supply to the machine fully off.
- Place a towel under the valve area to catch a few drops.
Remove the old valve
- Disconnect the electrical connectors. A gentle wiggle on the housing, not the wires, helps avoid damage.
- Most KitchenAid smart valves use push-to-connect, also called John Guest, fittings on the water lines. To release, push the tubing inward toward the valve, press the round collar toward the valve body, then pull the tubing outward. The push in, press collar, pull out motion is the trick. Do not cut the tubing unless it is damaged.
- Remove the mounting screws that hold the valve to the side wall or bracket and lift the valve free.
Install the new valve
- Set the new valve in the same orientation as the original.
- Reattach the mounting screws so the valve sits firmly and the fittings face the correct direction.
- Insert each tube into its matching port. Push until you feel the tube bottom out, then give a gentle tug to confirm a secure seat.
- Reconnect the electrical plug or plugs.
Leak check before closing up
- With the cover still off and a towel in place, turn the household water back on and watch the connections for a full minute.
- If a drip appears, push the tube in further, or remove and reinsert to ensure a clean seat.
- When dry and secure, restore power to the machine and let it attempt a fill.
- Listen for the valve click and watch for water moving into the reservoir.
Push-Fit Connections
Push-fit connections save time, but they must be seated correctly. Keep these small habits in mind.
- Cut ends should be square and free of scratches. If a tube end is crushed or oval, trim a small slice so the sealing surface is smooth.
- Push firmly until the tube bottoms out. There is usually a slight line on the tube that shows the original depth. Aim to match it.
- After inserting, tug lightly to confirm the internal teeth have gripped.
- If you ever need to remove a tube, press the collar fully as you pull the tube out. Do not pry with tools.
These tips prevent slow weeps that can go unnoticed in a closed cabinet.
Final Checks After the Repair
Take a few minutes to verify a smooth result.
- Look and listen during the first fill. You should hear the click of the valve followed by a steady flow into the reservoir.
- Watch the push-fit connections closely for any hint of moisture.
- Confirm the reservoir level reaches its normal height and the next cycle proceeds without errors.
- Reinstall the front cover once you are satisfied everything is dry and stable.
Give the machine time to run several cycles. Consistent fills and steady ice production confirm the repair is complete.
Where To Find Us
If you need any replacement parts for your appliances, you can enter your model number at AppliancePartsPros.com to locate and order them quickly. Most orders arrive in just two business days, and we have tons of great information in our repair help section and YouTube videos to help you troubleshoot.
Stay connected with the latest DIY tips, tutorial videos, and repair guides by following us on Facebook, Instagram, and Twitter. We love hearing about your repair stories and successes. If you need more help or want personalized guidance, feel free to contact or call us at 877-477-7278. We’re ready to help you take on your next project with confidence!
Since 1999, AppliancePartsPros.com has helped millions of people repair their broken appliances by providing high-quality original parts at well below retail prices, free support and troubleshooting, and award-winning customer service from an expert, friendly, US-based customer support team!
 https://www.appliancepartspros.com/b/wp-content/uploads/2024/04/Copy-of-Copy-of-Copy-of-Copy-of-Copy-of-Copy-of-Copy-of-Copy-of-Copy-of-Copy-of-Copy-of-Copy-of-Copy-of-Copy-of-IMAGE-TEMPLATE-FOR-BLOG-8.jpg
1080
1920
Steven E
https://www.appliancepartspros.com/b/wp-content/uploads/2020/11/app-logo-std.png
Steven E2024-04-24 05:22:482024-05-07 06:12:27How to replace Whirlpool ice machine cutter grid W10919199
https://www.appliancepartspros.com/b/wp-content/uploads/2024/04/Copy-of-Copy-of-Copy-of-Copy-of-Copy-of-Copy-of-Copy-of-Copy-of-Copy-of-Copy-of-Copy-of-Copy-of-Copy-of-Copy-of-IMAGE-TEMPLATE-FOR-BLOG-8.jpg
1080
1920
Steven E
https://www.appliancepartspros.com/b/wp-content/uploads/2020/11/app-logo-std.png
Steven E2024-04-24 05:22:482024-05-07 06:12:27How to replace Whirlpool ice machine cutter grid W10919199 https://www.appliancepartspros.com/b/wp-content/uploads/2024/04/Copy-of-Copy-of-Copy-of-Copy-of-Copy-of-Copy-of-Copy-of-Copy-of-Copy-of-Copy-of-Copy-of-Copy-of-IMAGE-TEMPLATE-FOR-BLOG-11.jpg
1080
1920
Samantha Bullington
https://www.appliancepartspros.com/b/wp-content/uploads/2020/11/app-logo-std.png
Samantha Bullington2024-04-09 07:44:202024-04-09 09:45:33Cleaning & maintenance tips for under-the-counter ice machines
https://www.appliancepartspros.com/b/wp-content/uploads/2024/04/Copy-of-Copy-of-Copy-of-Copy-of-Copy-of-Copy-of-Copy-of-Copy-of-Copy-of-Copy-of-Copy-of-Copy-of-IMAGE-TEMPLATE-FOR-BLOG-11.jpg
1080
1920
Samantha Bullington
https://www.appliancepartspros.com/b/wp-content/uploads/2020/11/app-logo-std.png
Samantha Bullington2024-04-09 07:44:202024-04-09 09:45:33Cleaning & maintenance tips for under-the-counter ice machines https://www.appliancepartspros.com/b/wp-content/uploads/2024/03/Copy-of-Copy-of-Copy-of-Copy-of-Copy-of-Copy-of-Copy-of-Copy-of-Copy-of-IMAGE-TEMPLATE-FOR-BLOG-8.jpg
1080
1920
Steven E
https://www.appliancepartspros.com/b/wp-content/uploads/2020/11/app-logo-std.png
Steven E2024-03-20 11:44:282024-03-20 11:44:36How to replace Whirlpool ice machine drain pump W11542868
https://www.appliancepartspros.com/b/wp-content/uploads/2024/03/Copy-of-Copy-of-Copy-of-Copy-of-Copy-of-Copy-of-Copy-of-Copy-of-Copy-of-IMAGE-TEMPLATE-FOR-BLOG-8.jpg
1080
1920
Steven E
https://www.appliancepartspros.com/b/wp-content/uploads/2020/11/app-logo-std.png
Steven E2024-03-20 11:44:282024-03-20 11:44:36How to replace Whirlpool ice machine drain pump W11542868With nearly a decade of experience in providing top-notch customer service regarding appliance parts and repair, Steven enjoys sharing practical advice, troubleshooting tips, and interesting information to help readers stay informed.
Leave a Reply
Want to join the discussion?Feel free to contribute!