Simple Tips for Maintaining Your Weed Eater
Steven E / Friday May 19, 2023
Achieving a pristine, lush lawn involves more than just mowing. To ensure a healthy, well-manicured yard, proper maintenance of your trusty weed eater is essential. Regular upkeep keeps your machine running efficiently. In this article, we’ll guide you through the essential steps of maintaining your weed eater effectively. Additionally, we’ll share valuable troubleshooting tips to address any issues that may arise. Get ready to elevate your lawn care game with expert advice on weed eater maintenance and troubleshooting.
Pre-Season Maintenance Checks
The warm weather is here and it’s time to start your lawn care! However, before using a weed eater, one must perform several maintenance checks to ensure proper functioning and safety:
- Inspect the filter cover for any cracks or damage.
- If you discover damage, replace the filter cover immediately.
- Check the oil level window for the correct oil level before using it.
- If necessary add oil through the oil fill hole located on top of the engine.
Safety Precautions
Before diving into maintenance tasks, prioritizing safety is paramount. Begin by disconnecting the spark plug wire from the spark plug itself. This simple step prevents any accidents while working on the machine. Equally important is familiarizing yourself with the owner’s manual for your specific weed eater model. Understanding its specifications ensures you won’t inadvertently cause engine damage or compromise the safety of your weed eater.
Moreover, safeguard yourself by wearing appropriate protective clothing and eyewear when handling maintenance tasks. This ensures you’re shielded from debris that may be propelled when the machine is in operation. By taking these precautionary measures prior to performing any maintenance, you can enjoy a secure and worry-free experience with your weed eater.

How To Prepare For Maintenance
Maintaining a weed eater is essential to ensuring a reliable performance over time. Preparation is the key to success when it comes to maintenance tasks. Here are a few steps to follow before beginning maintenance on your weed eater:
- Check the spark plug: A faulty spark plug can prevent your weed eater from starting or cause sputtering while in use. Replace the spark plug if necessary.
- Empty the fuel tank: If there is any fuel left in the tank, make sure you empty it completely before beginning maintenance. This will help avoid any dangerous fuel spills during the process.
- Clean off dirt and debris: Use a stiff brush to clean off any dirt and debris from the exterior of your weed eater. Make sure you get into all hard-to-reach areas as well.
- Inspect for loose parts: Inspect your weed eater for any loose parts. They may need tightening or replacing before continuing with maintenance tasks.
These steps are important for ensuring that your weed eater is working before beginning maintenance work. It also helps keep it running for years to come.
Cleaning The Machine
Now that preparation for maintenance is complete, the next step is to clean the weed eater. This should include wiping down external surfaces and removing any debris caught in the machine.
When cleaning, it is important to use an appropriate cleaning agent depending on the material of the weed eater. Different agents are safe to use on plastic, metal, motorized parts, and other components. Make sure not to damage any seals, rubber gaskets, or wiring when cleaning them with a damp cloth.
Cleaning also helps prevent build-up from materials such as oil and dirt. Dirt build-up can seem harmless, but it can prevent proper operation and cause damage over time if left untreated. It is important to clean outdoor power equipment regularly to maintain functionality.
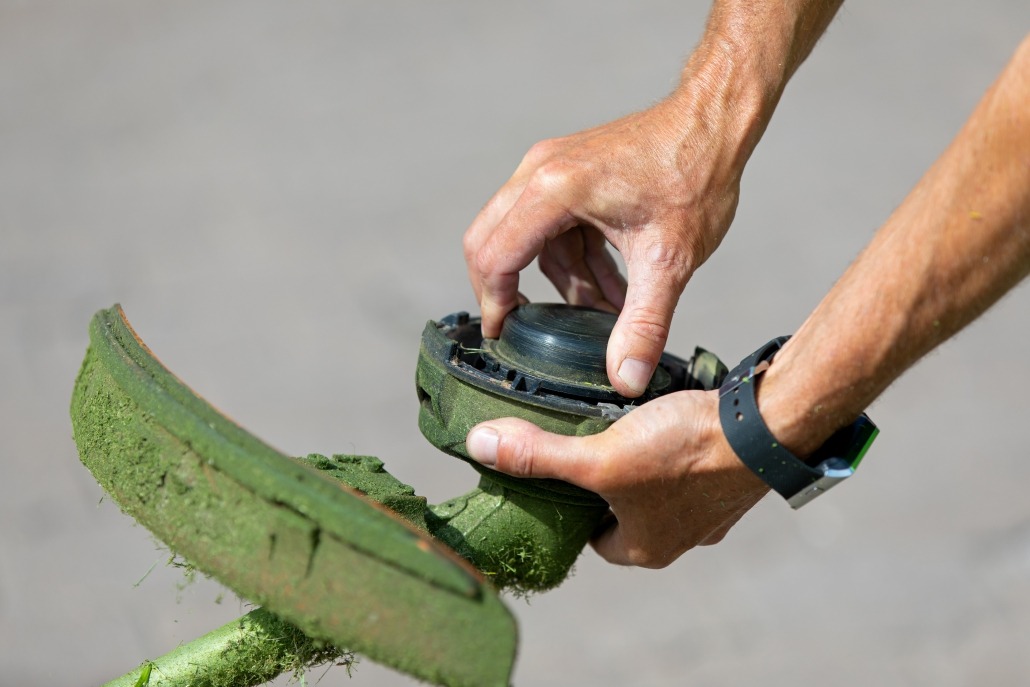
Replacing Trimmer Lines
To keep your weed eater running smoothly, replacing the string trimmer line is a crucial maintenance task. Let’s walk through the process step by step, ensuring you’re well-equipped to handle this task effortlessly:
- Turn off the trimmer and disconnect it from any power source to prioritize safety.
- Clear any debris from the cutting head using a brush or tool, ensuring a clean work area.
- Using a screwdriver, unscrew and remove the cutting head to access the spool inside.
- Remove the old spool and replace it with a new one that comes pre-loaded with a suitable replacement string (consult the manual to determine the specific type required for your trimmer model).
- Carefully wind the replacement string onto the spool, ensuring it moves smoothly within the housing when the trimmer is spinning at full speed.
- Securely screw the cutting head cover back on, ensuring it is properly attached.
- Test the trimmer by running it without any load to ensure everything is functioning correctly.
- Once the test is successful, you can continue using the weed eater for your lawn care needs.
By following these simple and numbered steps, you’ll have a freshly equipped weed eater, ready to tackle your lawn maintenance tasks effortlessly. Regular string replacement guarantees optimal performance and keeps your trimmer in top-notch condition.
Checking And Replacing Parts
Maintaining a weed wacker involves regular checks and replacements of various parts to keep it performing at its best. Here are some key components to inspect and replace when necessary:
- Cutting Head: Check the cutting head for wear and damage. If it’s too worn or damaged to cut effectively, it’s time for a replacement.
- Oil Level: Regularly check the oil level and ensure it’s at the recommended level. If the oil is old or dirty, replace it with fresh oil to keep the engine running smoothly.
- Spark Plug: Inspect the spark plug for carbon build-up. If there’s excessive build-up or the spark plug is faulty, replace it for optimal ignition and engine performance.
- Air Filter and Fuel Filter: Keep an eye on the air filter and fuel filter for signs of clogging. If they’re clogged, replace them with clean filters to ensure proper airflow and fuel flow, respectively, for optimal engine performance.
- Belts and Cables: Check for any frayed or worn belts and cables. If you notice damage, replace them promptly to avoid potential malfunctions and ensure smooth operation.
Regularly inspecting and maintaining these parts will help keep your weed wacker operating at its peak performance. By promptly replacing worn or damaged components, you can ensure that each part is functioning properly, contributing to the overall efficiency and longevity of your weed wacker.
Inspecting Fuel System Components
Inspecting the fuel system components is a crucial part of maintaining your trimmer’s performance. Let’s explore these components and how to ensure they’re in top shape:
- Carburetor, Fuel Lines, and Fuel Filter: Consult the instruction manual for your trimmer model to inspect these parts for damage, wear, and air leaks. Keep the fuel filter clean to prevent clogs and reduce engine strain.
- Spark Plug: Check the spark plug for dirt or wear. Replace it if needed to avoid misfires and poor performance. Follow safety guidelines during replacement.
- Adjustment: Make necessary adjustments to ensure optimal performance of the fuel system components.
By performing these maintenance tasks, you’ll keep your trimmer running smoothly and efficiently. Don’t overlook the importance of fuel system maintenance for long-lasting trimmer performance.
Sharpening Blades
Maintaining sharp blades is essential for the safe and efficient operation of your weed eater. Here’s how you can sharpen the blades effectively:
- Check Blade Type: Determine if your weed eater has blades that require sharpening. Trimmers with blades need frequent sharpening as dull blades can tear at the grass instead of cutting it.
- Choose the Right Tool: Use a specialized file or stone designed for sharpening blades. The correct tools ensure proper sharpening without damaging the blade.
- Sharpening Technique: File the blade in one direction, following the existing edges. Avoid aggressive filing to prevent damage and ensure an even cutting edge.
- Test the Blade: After sharpening, test the blade to ensure proper reshaping and cutting performance.
Maintaining sharp blades on your weed eater is vital for both safety and performance. Here’s why:
- Enhanced Safety: Sharp blades reduce the risk of damage to foliage and potential kickback forces that can harm the user.
- Minimized Foliage Damage: With sharp blades, you’ll achieve precise cuts, minimizing damage to your lawn’s foliage.
- Reduced Strain on the Motor: Sharpened blades alleviate strain on the motor, extending its lifespan and reducing the need for frequent maintenance tasks like spark plug or air filter replacements.
By prioritizing blade sharpening in your regular maintenance routine, you’ll enjoy a well-maintained weed eater that delivers precise and clean cuts. It’s the key to a beautifully manicured lawn and a trimmer that lasts.
Lubricating Parts
Lubricating the parts of a weed wacker is crucial for optimal performance and longevity. Follow these steps to ensure proper lubrication:
- Apply Lubricant: Regularly oil or grease moving parts like bearings for smooth operation and reduced wear.
- Check Screw Tightness: Inspect and tighten loose screws to maintain component stability.
- Prevent Rust: Clean blades with a wire brush and coat them with oil or grease to prevent rust.
- Avoid Over-Lubrication: Use the right amount of lubricant to prevent clogs and residue buildup.
Proper lubrication ensures the smooth functioning of your weed eater while minimizing potential issues. With regular maintenance and the right amount of lubrication, your weed eater will perform reliably and enjoy a longer lifespan.
Troubleshooting Common Problems
Troubleshooting common string trimmer problems is key to maintaining efficient operation. Follow these steps:
- Inspect Oil Level: Check the oil level at least once per season. Top it off or add a small amount of oil as needed to ensure proper lubrication and prevent damage.
- Gas/Oil Mixture: Regularly check the gas/oil mixture. Excessive oil can lead to carburetor or exhaust system clogs. Refer to the manufacturer’s guidelines for the correct ratio, typically not exceeding 40:1 for two-stroke engines.
- Fuel Level and Air Filter: Ensure an adequate fuel level in the tank and a clean air filter. Measure fuel by weight instead of volume, considering different fuel densities.
- Spark Plug Inspection: Regularly inspect and clean or replace the spark plug. It’s a vital part of the ignition system, requiring maintenance every season or every 100 hours of operation for effective grass-cutting.
By troubleshooting these areas, you’ll maintain a well-functioning string trimmer and prevent potential issues.
Conclusion
Give your weed eater the care it deserves for peak performance! Proper maintenance is essential for a machine that delivers without the need for frequent repairs. With regular attention, you’ll enjoy superior performance while saving time and money. Regularly cleaning the machine, replacing trimmer lines, and sharpening blades are all integral parts of keeping the device in top condition. Now that you know how to do that, your trusty tool will tackle tough tasks year after year.
Ultimately, taking good care of a weed eater is an investment in its longevity. A maintained machine will not only deliver superior performance but also save time and money in the long run. With a few simple steps each year, users can rest assured that their trusty tool will do its job for years to come. So, give it some TLC and make lawn trimming a breeze. Visit AppliancePartsPros.com for all your maintenance needs. Happy trimming!
With nearly a decade of experience in providing top-notch customer service regarding appliance parts and repair, Steven enjoys sharing practical advice, troubleshooting tips, and interesting information to help readers stay informed.
Leave a Reply
Want to join the discussion?Feel free to contribute!