How to Check and Replace a Central AC Condenser Fan Blade
Steven E / Tuesday June 24, 2025
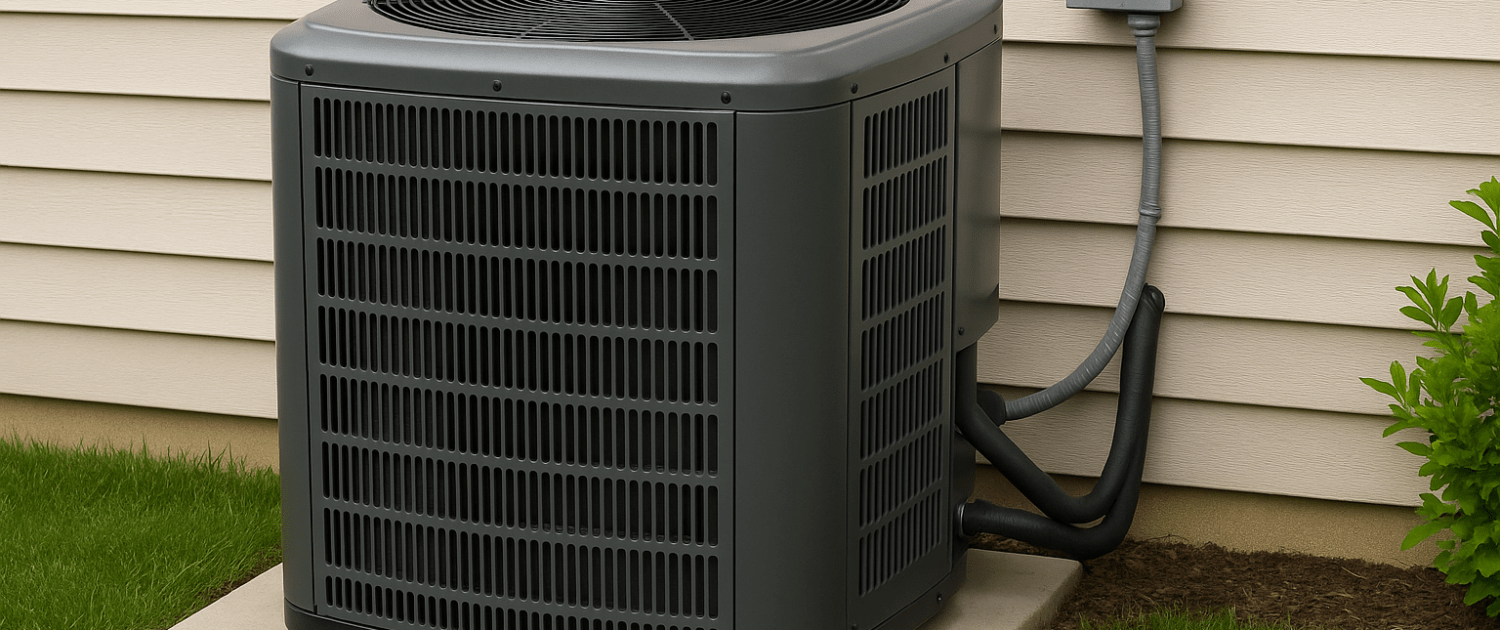
When your central air conditioning stops keeping things cool, the usual suspects come to mind, low refrigerant, dirty coils, or a bad capacitor. But one often-overlooked culprit? A damaged or worn-out condenser fan blade.
This simple component plays a big role in how efficiently your system cools your home. It pulls air across the outdoor coil, releasing heat absorbed inside. If that fan isn’t spinning correctly, or worse, not spinning at all, you could end up with poor cooling, high energy bills, and even a burnt-out compressor.
The good news? Replacing or repairing a condenser fan blade is totally doable with some basic tools and a little know-how. So, grab your toolbox and let’s get your AC back in action.
Why the Condenser Fan Blade Matters
The condenser fan blade is located in the outdoor unit (aka the condenser). Its job is to expel the heat absorbed from inside your house by blowing outside air over the condenser coil. If the fan is bent, cracked, loose, or unbalanced, the whole system suffers.

Common issues with fan blades include:
- Cracks or chips in the blade
- Bent or warped blades
- Loose mounting on the motor shaft
- Fan not spinning (often due to motor or capacitor issues, but sometimes the blade itself is seized)
Ignoring a faulty fan blade can lead to:
- Poor system efficiency
- Overheating of the compressor
- Louder operation or strange noises
- Premature wear on the motor
Signs you might have a bad condenser fan blade:
- Whirring, clicking, or banging sounds from the outdoor unit
- Warm air from vents even though the system is running
- Fan not spinning even though the compressor is running
- Uneven or wobbling rotation
- High electric bills despite normal usage
If you’re seeing these signs, it’s time for an inspection, and possibly a replacement.
What You’ll Need
- Screwdriver or nut driver (usually 1/4″ or 5/16″)
- Wrench or socket set
- Allen wrench (if your fan blade uses set screws)
- Rubber mallet (optional for stubborn blades)
- Safety gloves and goggles
- Multimeter (to test power or capacitor if needed)
- Replacement fan blade (match size, number of blades, and rotation direction)
- Penetrating oil (like WD-40)
- Anti-seize lubricant (optional)
Steps to Replace or Repair a Condenser Fan Blade
1. Turn Off Power
AC units run on 220–240 volts, and that’s nothing to mess with. Shut off power at the breaker box, and double-check by trying to start the system from the thermostat.
For extra safety, pull the disconnect switch outside near the condenser unit.
2. Remove the Top Grille or Fan Assembly
The condenser fan is usually mounted to the underside of the top grille or cover of your outdoor unit.
- Use a screwdriver or nut driver to remove the screws or bolts holding the grille in place.
- Carefully lift the top off, the fan motor will still be attached, so don’t yank it or let it dangle by the wires.
- Flip the grille over and rest it gently on the side of the unit (or prop it up if the wires are short).
3. Inspect the Fan Blade
Now that you can see the fan, inspect it closely for damage. If the blade is bent slightly, you may be able to gently straighten it. But most of the time, it’s best to replace a damaged blade entirely to avoid vibration and future motor damage.
4. Remove the Old Fan Blade
Removing the fan blade can be the most stubborn part of the job, especially if it’s rusted onto the motor shaft.
- Find the set screw (or screws) on the hub of the blade and loosen them with an Allen wrench.
- Apply penetrating oil to the shaft if the blade is stuck.
- Hold the motor securely and wiggle or twist the blade off the shaft.
- In tough cases, tap lightly with a rubber mallet to break the grip, just don’t hit the blade itself, or you risk bending it more.
Note: Pay attention to the orientation and pitch of the old fan blade. The replacement must match in both diameter and rotation direction (CW or CCW facing the motor).
5. Install the New Fan Blade
Before sliding on the new blade, clean the motor shaft with a rag and apply a bit of anti-seize lubricant if you have it.
- Slide the new blade onto the shaft in the same position as the old one (distance from motor body matters, refer to specs or take a photo of the old setup before removing).
- Tighten the set screws securely. You don’t want the blade flying off at 1,000 RPM.
Double-check that the blade spins freely and doesn’t rub against the shroud or wiring.
6. Reassemble the Unit
- Carefully place the fan/grille assembly back on the unit.
- Align the screw holes and fasten it down securely.
- Make sure no wires are pinched or exposed.
7. Restore Power and Test the System
With everything buttoned up, go inside and turn the thermostat to COOL, then lower the temperature so the system kicks on.
Go outside and watch the fan:
- Is it spinning smoothly?
- Is the airflow direction correct (should be blowing upward)?
- Is it quiet and steady?
If it checks all the boxes, congratulations, you just repaired or replaced your condenser fan blade like a pro.
Tips for a Smoother Job
- Take pictures before you remove anything. It’s the best way to remember placement.
- Label your wires if you need to disconnect any, especially if replacing the fan motor as well.
- If your capacitor is bad (fan hums but won’t spin), replace it at the same time. They’re inexpensive and easy to swap.
- If the fan runs backward, you’ve likely installed the wrong blade or mounted it in reverse.
Final Thoughts
The condenser fan blade might seem like a small piece of the puzzle, but it’s critical to your central AC’s performance. Whether it’s cracked, off-balance, or just worn out, replacing it is a straightforward DIY job that can save you time, money, and frustration during those hot summer months.
With a few tools and about an hour of your time, you can get your outdoor unit running like new, and keep your home cool and comfortable without waiting for a service call.
Where To Find Us
If you need any replacement parts for your appliances, you can enter your model number at AppliancePartsPros.com to locate and order them quickly. Most orders arrive in just two business days, and we have tons of great information in our repair help section and YouTube videos to help you troubleshoot.
Stay connected with the latest DIY tips, tutorial videos, and repair guides by following us on Facebook, Instagram, and Twitter. We love hearing about your repair stories and successes. If you need more help or want personalized guidance, feel free to reach out. We’re ready to help you take on your next project with confidence!
The information in this article may not apply to your specific appliance model. We recommend consulting your manufacturer’s documentation or contact us with any questions.
 https://www.appliancepartspros.com/b/wp-content/uploads/2025/07/20250702_1619_Snow-Covered-AC-Unit_simple_compose_01jz6cp8qae85tntktgnjk373z.png
1024
1536
Steven E
https://www.appliancepartspros.com/b/wp-content/uploads/2020/11/app-logo-std.png
Steven E2025-07-02 13:21:122025-07-02 13:21:22Preparing Your Central AC for Winter: A Comprehensive Checklist
https://www.appliancepartspros.com/b/wp-content/uploads/2025/07/20250702_1619_Snow-Covered-AC-Unit_simple_compose_01jz6cp8qae85tntktgnjk373z.png
1024
1536
Steven E
https://www.appliancepartspros.com/b/wp-content/uploads/2020/11/app-logo-std.png
Steven E2025-07-02 13:21:122025-07-02 13:21:22Preparing Your Central AC for Winter: A Comprehensive Checklist https://www.appliancepartspros.com/b/wp-content/uploads/2025/07/20250701_1101_Cozy-Utility-Closet_simple_compose_01jz380t8ef6taqrge05hhegv1.png
1024
1536
Steven E
https://www.appliancepartspros.com/b/wp-content/uploads/2020/11/app-logo-std.png
Steven E2025-07-02 13:15:202025-07-02 13:15:30How to Test and Replace a Central AC Capacitor
https://www.appliancepartspros.com/b/wp-content/uploads/2025/07/20250701_1101_Cozy-Utility-Closet_simple_compose_01jz380t8ef6taqrge05hhegv1.png
1024
1536
Steven E
https://www.appliancepartspros.com/b/wp-content/uploads/2020/11/app-logo-std.png
Steven E2025-07-02 13:15:202025-07-02 13:15:30How to Test and Replace a Central AC Capacitor https://www.appliancepartspros.com/b/wp-content/uploads/2025/07/20250702_1609_Modern-Home-Thermostat_simple_compose_01jz6c2cj6edkr4a4tgnsbppdy.png
1024
1536
Steven E
https://www.appliancepartspros.com/b/wp-content/uploads/2020/11/app-logo-std.png
Steven E2025-07-02 13:11:002025-07-02 13:11:10How to Test and Replace a Faulty Central AC Thermostat
https://www.appliancepartspros.com/b/wp-content/uploads/2025/07/20250702_1609_Modern-Home-Thermostat_simple_compose_01jz6c2cj6edkr4a4tgnsbppdy.png
1024
1536
Steven E
https://www.appliancepartspros.com/b/wp-content/uploads/2020/11/app-logo-std.png
Steven E2025-07-02 13:11:002025-07-02 13:11:10How to Test and Replace a Faulty Central AC ThermostatWith nearly a decade of experience in providing top-notch customer service regarding appliance parts and repair, Steven enjoys sharing practical advice, troubleshooting tips, and interesting information to help readers stay informed.