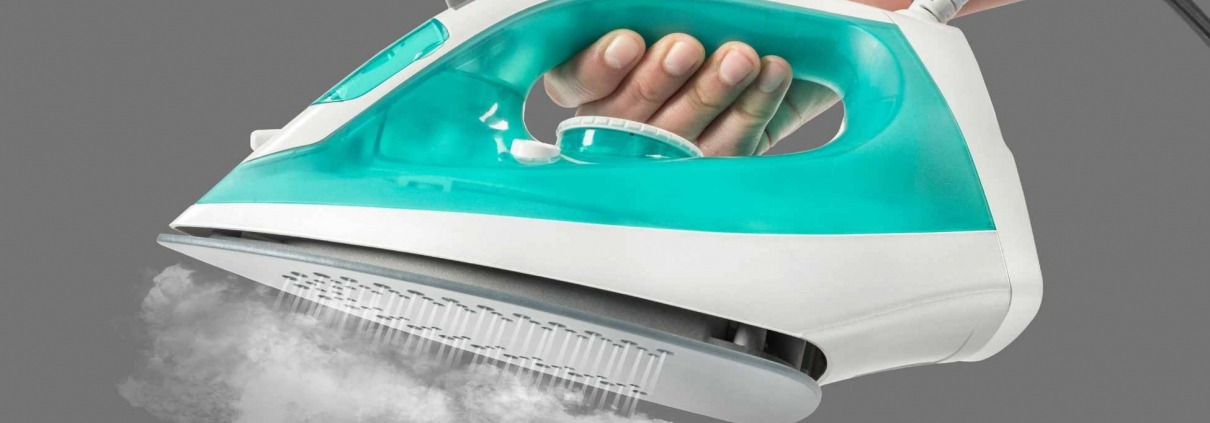
How to Clean an Iron and Beat Build-Up
APP Expert / Wednesday June 28, 2023
Is your iron giving you trouble, or do you just not like the look of that white build-up on the soleplate? Either way, we’ve got you covered! Today, AppliancePartsPros.com is walking you through a thorough cleaning of this handy helper. Keep reading to learn how best to clean your clothing iron.
When should I clean my iron?
It’s a good idea to check your iron’s soleplate before each use and wipe it off with a clean cloth if you notice anything there. Past that, it depends on how often you’re breaking out the iron to press or steam your clothes.
Here are a few telltale signs it’s time to clean your iron:
- There is a film on the iron’s soleplate. If regular build-up is a problem and it seems to be a detergent or fabric softener, consider using a little less when you wash your clothes; it may not be getting rinsed out properly.
- There is visible mineral buildup on the soleplate or the spray openings.
- Plastic, wax, or some other substance has melted onto the soleplate.
- Your iron is leaving marks on clothes – typically either brown, red, or black. These are generally left by mineral deposits, like rust, in the water you put in your iron.
- The water coming out of your iron when you’re using the spray or steam function is brown or otherwise discolored.
- Your iron seems to be sticking to the fabric when you use it.
- It takes an unusually long time to heat up, never quite reaches an adequate temperature, or seems to run unusually hot.
- The steam or spray features are sputtering or otherwise working incorrectly.
- If your iron smells mildewy or musty.
What to do before you begin
It probably goes without saying, but you should make sure that your iron is off, unplugged, and completely cool before you start any cleaning. You may need to turn the iron on and heat it up for some cleaning methods, but always start with it off – especially if you’re cleaning the soleplate.
Before you even get the cleaning products you want to use together, though, you should check your iron’s manual and see if it has any instructions or guidelines for cleaning. Some irons have a non-stick coating on the sole, and that coating may not be able to stand up to abrasive cleaners or cleaning tools.
What you’ll need to clean your iron
Again, be sure to check your iron’s manual for any special instructions before you decide what cleaner to use. You should be able to find a PDF copy online by searching the model number on the manufacturer’s website if you don’t have a physical copy of the document.
Now, what you need will depend on the sort of cleaning you’re doing:
- For a basic, thorough cleaning, you’ll want a toothbrush, soft sponge or cloth, cotton swabs, dish soap, distilled white vinegar, and distilled water – avoid tap water if at all possible, as it will contain the mineral deposits that wind up clogging your iron or leaving stains on your clothes. Make sure you also have a stable work surface to do your cleaning on. These items will cover a basic cleaning for almost any iron.
- If your iron does not have a non-stick coating, you should be okay to use more abrasive cleaning methods (but be sure to check your manual first, still). If you’ve got a lot of build-up to deal with, you can add baking soda – which you’ll be making into a paste with water – and a more abrasive cleaning tool, like a melamine sponge (also known as a magic eraser).
- If it does have a non-stick coating, make sure you avoid abrasive sponges or cleaners. Stick with dish soap and a cloth, soft sponge, or toothbrush.
- If you’re dealing with something melted onto the iron’s soleplate, like plastic, you may need to purchase a commercial iron cleaning product.
Before buying commercial iron cleaning chemicals, like steam iron buildup dissolvers, research the product and check your iron’s manual. Using some of these cleaning products may void warranties. The same goes for harsh household cleaners like bleach. Avoid harsh cleaning chemicals in general if at all possible, as they can deteriorate the plastic and metal in and on your iron.
How to clean the inside of a steam iron
The steam feature on irons is a great way to release wrinkles and relax fabrics, but it also needs to be maintained to avoid clogs, unwanted odors, and staining on the clothes you iron. Thankfully, cleaning out the interior is fairly easy, and assuming there aren’t any other issues, should only take you 15 to 20 minutes to complete.
- Start with a 1:3 mixture of vinegar and water – so, ¼ cup vinegar and ¾ cup water, for instance. You’ll also want some cotton swabs and a toothbrush.
- Before you plug anything in, inspect the soleplate. If you see any mineral deposits or other buildup around the holes (it’ll typically be white or rust-colored) or the sprayer, scrub at them with a cotton swab or toothbrush to loosen that up. You can also use a toothpick, here. Just avoid using metal brushes or scouring pads if possible.
- Add your vinegar and water mixture to the iron, then turn the iron on and, if necessary, set it to steam.
- Allow your iron to heat up – around five minutes, typically.
- Press and hold the steam button until it produces steam. Let steam flow for around 20 seconds, then release the button.
- Repeat this step five or six times.
- Unplug the iron and allow it to cool.
- Check the soleplate again and wipe away any remaining build up with a cloth or cotton swab – the steam should have loosened anything that was stuck on.
- Empty the iron’s reservoir. If you have concerns about things smelling like vinegar, you can repeat the steaming part of this process with just distilled water.
How to clean an iron soleplate
Cleaning the soleplate is a similarly simple process. Avoid using harsh chemicals or stiff cleaning tools where possible. Things like scouring pads can scratch the soleplate, greatly increasing the chances that your iron will rust.
Remember to check your manual for cleaning tips for your specific model of iron before you clean the soleplate!
- As always, start with your iron unplugged, off, and completely cool.
- Dish soap, distilled water, and a clean cloth or soft sponge should be enough to get you started. If your iron can stand up to more abrasive cleaning tools, you can mix a paste. The paste should consist of equal parts baking soda and distilled water. This is particularly useful if you’re contending with gunky build-up on your iron.
- Do not submerge your iron in water. Start by dampening a clean cloth or sponge with soapy water and wipe the soleplate down.
- Whenever you’ve got some stuck-on grime, bust out the toothbrush to do a bit of scrubbing. If nooks and crannies are giving you problems, cotton swabs, and toothpicks can get at those hard-to-reach places.
- If dish soap isn’t cutting it, it’s time to use your baking soda paste. Apply it with a clean cloth, gently scrubbing in a circular motion to break up gunk.
- You can additionally apply the baking soda paste directly to any build-up and allow it to sit for 10 to 15 minutes. Once it’s dried, wipe it up with a damp, clean cloth, making sure to get rid of any residue.
- You may also find success with a melamine sponge, but exercise caution if your iron has a non-stick coating. Melamine sponges can potentially scratch and damage non-stick coatings.
- Before you finish up, make sure to wipe the soleplate down with a clean, damp cloth or sponge. Don’t leave any soapy or baking soda residue behind!
Cleaning melted plastic off of an iron
Here are some quick tips for getting melted plastic or wax off of your iron:
- Fill a baking dish or plastic container large enough to hold your iron with a single layer of ice cubes.
- Set your iron soleplate down on top of the ice. Allow this to sit for around 10 to 15 minutes.
- Using a credit card or plastic knife, scrape the cold plastic off of your iron. Do not use a metal tool to do this, as it can scratch the soleplate, causing bigger issues.
- Finally, be sure to clean the soleplate as described in the steps above.
A few final tips for keeping your iron in good condition
Before we wrap up, here are a few tips for keeping your iron in top shape:
- When filling your iron’s water reservoir, always use distilled water. If distilled water isn’t available, try to at least use filtered water.
- Empty the water reservoir when you’re done using your iron (wait until after it’s cooled, of course). Don’t let water sit in there for long periods.
- How often you need to clean your iron depends on how much you use it, but you should consider at least cleaning the water reservoir with a water/vinegar mixture annually (if you use your iron rarely), seasonally (if you use your iron somewhat frequently), or monthly (if you’re using it all the time).
- After every use, once the iron has cooled, be sure to wipe the soleplate off with a clean cloth, especially if there’s lingering moisture on its surface.
- Store your iron upright when it’s not in use. This will protect the soleplate and prevent water from leaking out of your iron.
Conclusion
A regular cleaning schedule for all your household tools and appliances isn’t just about staying tidy, it’ll keep your stuff in good working order! Keeping those tools clean can solve a number of problems commonly encountered with irons and other appliances. If you’re curious, we have a whole host of other cleaning tutorials over on our blog, and if you’re dealing with a damaged appliance in need of repair, we can help there, too! AppliancePartsPros.com is your source for genuine OEM appliance parts delivered fast to your door.
Hi! I’m Matt H., and I’m thrilled to be your guide through the world of appliance repair with over 25 years of invaluable experience in the industry.
From the early days of my career, I have been deeply passionate about appliances and their inner workings. Over the years, I’ve seen it all – from vintage models to the latest cutting-edge technology – and I’ve dedicated myself to mastering the art of repair. With a toolbox in one hand and a wealth of knowledge in the other, I’ve tackled every challenge that has come my way, learning and growing with each repair.
Join me as we dive into the intricacies of appliance repair. From step-by-step repair guides to explanations of common problems and their solutions, I’ll be here to simplify the repair process and empower you with the knowledge you need to keep your appliances running smoothly.
Feel free to explore our blog, ask questions, and leave comments – this platform is a space for learning, sharing, and growing together. Let’s work together to ensure that your appliances continue to serve you for years to come.
Thank you for joining me on this journey, and I look forward to being your go-to resource for all things related to appliance repair!


Leave a Reply
Want to join the discussion?Feel free to contribute!