How To Disassemble A Dryer (With Video!)
Samantha Bullington / Wednesday December 29, 2021
Feeling overwhelmed at the thought of taking apart your dryer for repairs? Don’t worry—getting to the root of the problem is simpler than it seems. Our step-by-step guide will show you exactly how to disassemble and reassemble your dryer, with an easy-to-follow video tutorial included below to help you tackle this DIY project with confidence.
Need a part to fix your dryer? Search below using your specific refrigerator model number to identify the exact part needed:

For a major appliance like a washer or dryer, the prospect of taking everything apart might seem a little intimidating, but don’t let the idea of a mess of screws and components stop you from fixing an issue with your appliance! Dryer disassembly in particular is actually pretty straightforward. There aren’t too many components to worry about, and it should only take you a few minutes to get everything taken apart.
If you’re still reluctant, don’t worry, we’ll walk you through it! In this how-to guide, we’ll review disassembling and reassembling the front and back of your dryer. Don’t forget to check out our video guide as well to get an up close look at how everything is done.

How To Disassemble A Dryer
For this guide and in the companion video, we disassembled a Whirlpool dryer. The disassembly process is pretty much the same regardless of the make and model of your appliance, so even if your dryer is a different brand or model from the one we’ve worked on, you should find that the steps still line up. If something isn’t lining up, you can refer to your dryer’s manual for more specific instructions.
Tools Need to Disassemble a Dryer
Disassembling and reassembling a dryer isn’t as big a job as it looks. We’ll have you fixing your appliance in no time at all. Start by gathering these common household tools:
- Phillips and flathead screwdrivers
- Nut driver
- Putty knife
- Work gloves
Before you begin any repairs, make sure to either unplug the dryer or flip its breaker off. Never work on an appliance that is still receiving power. Once that’s done, we can get to it!
Disassembling A Dryer
- To start, remove the mounting screws behind the lint screen. You can access them by either lifting the lint screen cover or pulling the lint screen out entirely. There should be two screws.
- Release the locking tabs on the dryer lid to free it up. About two inches in from each front corner, there is a locking tab that you will need to release before you can remove the lid. You can release these by sliding a putty knife between the lid and body of the dryer, but make sure to angle the putty knife up slightly when you do. You want to hit the release on the locking tab, not slide under it. If you’re having trouble getting the tabs to release, this could be why.
- Lift the dryer lid and carefully set it back out of the way.
- Disconnect the door switch. Toward the front of the dryer, you will find a bundle of wires connected by wire harness. These wires supply power to the appliance’s door switch. You can use a flat head screwdriver to release and separate the locking clip holding the wires together.
- Remove the screws holding the front panel on. You’ll probably need a socket or a nut driver to do this. On our dryer, they were 5/16 in hex head screws.
- Take the front panel off. The steps are a little different depending on what sort of dryer you have:If your dryer’s front panel is one solid piece, you’ve already completed the necessary steps to remove it. Carefully pull it forward and then lift it up to free it from the brackets at the base of the appliance.
If you have a dryer that has two front panels – a larger main panel and a smaller kick plate or access panel at the bottom – you will need to do the following to remove them:
- Wedge a flathead screwdriver or putty knife into the seam between the smaller access panel and the body of the washer and pop the access panel out of place.
- If there are door springs on each side of the access panel, take them off.
- Loosen the screws on the bottom of the larger panel. Don’t remove them completely, but do ensure they’re loose enough that you can take the panel off.
- Separate the idler pulley and the belt. The idler pulley is most likely at the bottom of the dryer’s body. To get the belt off of the pulley, press the pulley toward the outside of the dryer. This will slacken the belt so that you can take it off the pulley. If you aren’t replacing the belt, don’t remove it completely. You can use it to help with removing the dryer’s drum.
- Finally, use the belt to support the drum as you carefully lift the drum out of the dryer body.
With the front panel pulled off and the drum removed, you now have access to just about anything you might need to repair. You’re ready to take care of that fix!
Next, we’ll walk you through putting it all back together again. Most of these steps should be pretty familiar to you now.
Reassembling A Dryer
- Start by putting the drum back in. You can lift it up by the belt and guide it back into the body of the dryer. Set it down onto the roller wheels. Be mindful that you don’t pinch any of the felt on the drum.
- Give the dryer drum a turn, checking to make sure that the felt is laying flat. You can turn the drum by pulling on the belt, and if you find any points where the felt is folded, pinched, or pulled away, be sure to smooth it out. The felt acts as an insulator and seal. If there are gaps, hot air will escape while the dryer is in use, making the appliance run less efficiently.
- Reattach the belt to the idler pulley. Lift the pulley arm and push it toward the side of the machine. While you have it raised, loop a bit of the belt through the arm opening and then around the motor pulley.
- Put the front panel back on. Once again, the process will be a little different depending on the type of dryer you have.If you have a single front panel, align the panel with the brackets it was resting on before, and then push it down on them to make sure it is seated correctly.
If your dryer has a large main front panel and a smaller access panel, first put the main panel on and then tighten down the screws, starting with the two lower screws and then the two upper screws. Once the screws are in place, reconnect the springs on both sides of the access panel and slide the kick plate back onto the lower tabs. From there, you should be able to rotate it back and snap it into place.
Either way, you will need to lift the drum while you put the front panel back on to ensure the drum seal aligns with the front panel(s). If you’re having trouble getting the panel to shut all the way, or keeping the seal in place, try wiggling both the panel and the drum.
- Reinstall the 5/16 in hex head screws. These held the panel onto the body of the dryer.
- Reconnect the door switch wiring harness by simply plugging the two pieces back together.
- Put the dryer lid back into place. Be sure to press down on it so that it snaps onto the locking tabs.
- Don’t forget to reinstall those first two screws you removed from the lint trap.
By repeating the disassembly steps in reverse and being mindful of how everything sits, you should have successfully reassembled your dryer. Before we wrap up, we’ll cover disassembling and reassembling a dryer’s rear panel. Keep reading!
Removing & Reassembling A Dryer’s Rear Access Panel
- Pull your dryer away from the wall. You’ll need full access to the rear of the appliance.
- Remove all the screws that hold that back panel on with a ¼ inch nut driver.
- Once all the screws are removed, you can remove both the smaller access panel and the larger panel.
When you’ve completed your repair and you’re ready to reassemble the rear panel:
- Set the large panel back into place, making sure it’s lined up properly.
- Put the small access panel back into place, first inserting the tab, and then reinstalling the screw.
- The smaller access panel’s screw will hold both panels in place while you reinstall the rest of the screws.
Where To Find Us
If you need any replacement parts for your appliances, you can enter your model number at AppliancePartsPros.com to locate and order them quickly. Most orders arrive in just two business days, and we have tons of great information in our repair help section and YouTube videos to help you troubleshoot.
Stay connected with the latest DIY tips, tutorial videos, and repair guides by following us on Facebook, Instagram, and Twitter. We love hearing about your repair stories and successes. If you need more help or want personalized guidance, feel free to contact or call us at 877-477-7278. We’re ready to help you take on your next project with confidence!
Since 1999, AppliancePartsPros.com has helped millions of people repair their broken appliances by providing high-quality original parts at well below retail prices, free support and troubleshooting, and award-winning customer service from an expert, friendly, US-based customer support team!
 https://www.appliancepartspros.com/b/wp-content/uploads/2024/06/Copy-of-Copy-of-Copy-of-Copy-of-app-blog-square.jpg
1080
1080
Steven E
https://www.appliancepartspros.com/b/wp-content/uploads/2020/11/app-logo-std.png
Steven E2024-06-04 13:02:092025-07-31 10:59:33How to replace Frigidaire dryer control thermistor 134587700
https://www.appliancepartspros.com/b/wp-content/uploads/2024/06/Copy-of-Copy-of-Copy-of-Copy-of-app-blog-square.jpg
1080
1080
Steven E
https://www.appliancepartspros.com/b/wp-content/uploads/2020/11/app-logo-std.png
Steven E2024-06-04 13:02:092025-07-31 10:59:33How to replace Frigidaire dryer control thermistor 134587700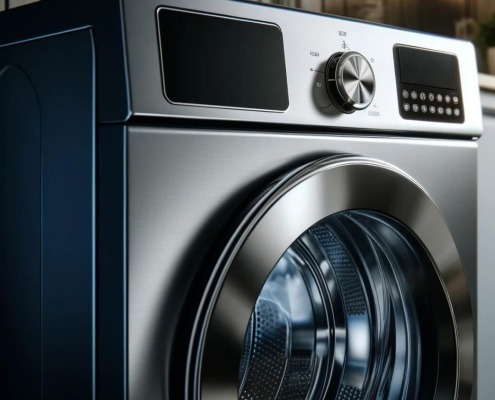 https://www.appliancepartspros.com/b/wp-content/uploads/2024/05/Copy-of-Copy-of-Copy-of-app-blog-square-1.jpg
1080
1080
Steven E
https://www.appliancepartspros.com/b/wp-content/uploads/2020/11/app-logo-std.png
Steven E2024-05-30 13:56:562025-07-31 08:42:13How to replace LG / Kenmore dryer light bulb 6913EL3001E
https://www.appliancepartspros.com/b/wp-content/uploads/2024/05/Copy-of-Copy-of-Copy-of-app-blog-square-1.jpg
1080
1080
Steven E
https://www.appliancepartspros.com/b/wp-content/uploads/2020/11/app-logo-std.png
Steven E2024-05-30 13:56:562025-07-31 08:42:13How to replace LG / Kenmore dryer light bulb 6913EL3001E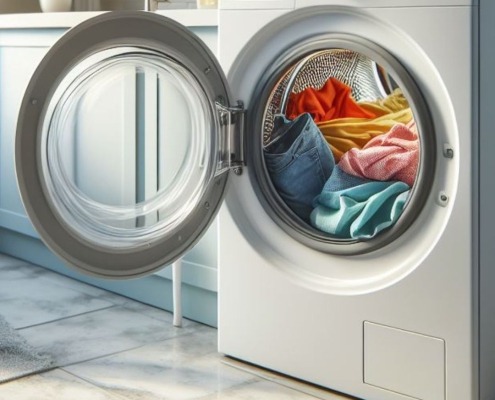 https://www.appliancepartspros.com/b/wp-content/uploads/2024/05/Copy-of-app-blog-square-16.jpg
1080
1080
Steven E
https://www.appliancepartspros.com/b/wp-content/uploads/2020/11/app-logo-std.png
Steven E2024-05-24 13:50:062024-05-24 13:50:13F3E2 error on a Maytag dryer: A troubleshooting guide
https://www.appliancepartspros.com/b/wp-content/uploads/2024/05/Copy-of-app-blog-square-16.jpg
1080
1080
Steven E
https://www.appliancepartspros.com/b/wp-content/uploads/2020/11/app-logo-std.png
Steven E2024-05-24 13:50:062024-05-24 13:50:13F3E2 error on a Maytag dryer: A troubleshooting guideHey there, I’m Samantha and I’m super excited to be a part of the Appliance Parts Pros team! With 9 years of experience, I’ve had the awesome opportunity to assist countless customers in troubleshooting their home appliances and finding DIY repair solutions.