How to Fix a JennAir Slide-In Electric Downdraft Range That Won’t Broil
Steven E / Tuesday December 16, 2025
Looking for the right part? Enter your appliance model number below to find the exact match and get your appliance running like new again!
Is your JennAir slide-in electric downdraft range not heating properly when you switch it to broil? You set the control, wait a few minutes… and nothing happens. No glow. No heat. No perfectly broiled dinner.
Today, we’re going to walk through one of the most common causes of this issue: a failed broil element.

The broil element sits at the very top of the oven cavity and is responsible for producing intense, direct heat. When it stops working, the broil function simply won’t do its job. The good news is that this is a repair many homeowners can handle themselves with basic tools and a little guidance. Let’s get started.
How the Broil Element Works
Before jumping into the repair, it helps to understand what the broil element does and why it matters.
The broil element:
- Is mounted at the top of the oven cavity
- Produces high, direct heat for broiling
- Heats quickly and reaches higher temperatures than the bake element
When you select the broil setting, the control board sends power directly to this element. If the element is burned out, cracked, or electrically open, the oven may still bake normally—but broil will fail completely.
Common Signs of a Bad Broil Element
A faulty broil element often gives clear warning signs. You may notice:
- The oven heats fine on bake, but not on broil
- Food never browns or crisps under broil
- The broil element does not glow red
- Visible damage like blistering, cracks, or burn marks
- A tripped breaker when broil is selected
If any of these sound familiar, it’s time to test the element.
Tools and Safety Precautions
Tools You’ll Need
Gather these tools before starting:
- Phillips-head screwdriver
- 1/4-inch nut driver
- Multimeter (for resistance and voltage testing)
Important Safety Notes
This repair involves electrical components and, in one test, live voltage.
Before starting:
- Unplug the range or turn off the breaker
- Confirm power is completely off
- Wear work gloves if available
- Never touch live wires unless you are experienced and confident
Accessing the Broil Element Terminals
On a JennAir slide-in electric downdraft range, the broil element terminals are accessed from the rear of the unit.
Step-by-Step Access
- Carefully slide the range away from the wall
- Remove the screws securing the rear access panel
- Set the panel aside
- Locate the broil element terminals near the top of the range
You’ll see two wires connected to the terminals of the broil element. These wires will be disconnected for testing.
Testing the Broil Element for Resistance
Testing resistance tells you whether the broil element is electrically intact.
How to Test Resistance
- Make sure the power is off
- Carefully disconnect both wires from the broil element terminals
- Set your multimeter to the resistance (ohms) setting
- Touch one probe to each terminal
Interpreting the Results
- 12–18 ohms: Element is likely good
- No reading or infinite resistance: Element is bad
- Very low or erratic reading: Element is failing
If the resistance reading is incorrect or nonexistent, the broil element needs to be replaced.
Testing for Live Voltage (Optional but Helpful)
If the resistance test passes, the next step is to confirm the oven is actually sending power to the broil element.
This test involves live voltage and should only be done if you’re comfortable using a multimeter on energized circuits.
Live Voltage Test Steps
- Reconnect the wires to the broil element
- Restore power to the range
- Set the oven to broil
- Set your multimeter to AC voltage
- Carefully place one probe on each terminal
You should see approximately 240 volts AC
What the Results Mean
- 240 volts present, no heat: Broil element is bad
- No voltage present: Likely a wiring issue or faulty control board
Once you get your reading:
- Turn the oven off
- Disconnect power again before continuing
Removing the Old Broil Element
If testing confirms the broil element has failed, replacement is straightforward.
Step-by-Step Removal
- Open the oven door
- Remove all oven racks
- Locate the broil element at the top of the oven cavity
- You’ll typically find two screws securing the element at the back wall and six screws holding two brackets across the top
- Remove all mounting screws
- Gently pull the element forward
- Disconnect the two wires
- Lift the element out of the oven cavity
Take note of how the wires are routed so you can reconnect them properly later.
Installing the New Broil Element
Installation is essentially the reverse of removal.
Step-by-Step Installation
- Slide the new broil element into position at the top of the oven
- Reconnect the wires to the terminals
- Carefully push the element back into place
- Secure it using the original mounting screws
- Reinstall the top brackets and screws
- Replace the oven racks
- Close the oven door
Next, head back behind the range.
Reassembling the Range
- Reinstall the rear access panel
- Secure it with the screws
- Slide the range back into position
Double-check that:
- No wires are pinched
- All screws are tight
- The range sits level
Final Broil Test
With everything reassembled, it’s time to confirm the repair.
Testing the New Broil Element
- Restore power to the range
- Set the oven to broil
- Wait one to two minutes
You should see:
- The broil element glowing red
- Heat building quickly at the top of the oven
This confirms the repair was successful.
What If the Broil Element Isn’t the Problem?
If your broil element tests good and there’s no voltage at the terminals, other components may be at fault, including:
- Control board
- Wiring harness
- Temperature sensor
- Selector switch
At that point, further testing is required to pinpoint the issue. Many of these parts can still be replaced DIY with the right diagnosis.
Where To Find Us
If you need any replacement parts for your appliances, you can enter your model number at AppliancePartsPros.com to locate and order them quickly. Most orders arrive in just two business days, and we have tons of great information in our repair help section and YouTube videos to help you troubleshoot.
Stay connected with the latest DIY tips, tutorial videos, and repair guides by following us on Facebook, Instagram, and Twitter. We love hearing about your repair stories and successes. If you need more help or want personalized guidance, feel free to contact or call us at 877-477-7278. We’re ready to help you take on your next project with confidence!
Since 1999, AppliancePartsPros.com has helped millions of people repair their broken appliances by providing high-quality original parts at well below retail prices, free support and troubleshooting, and award-winning customer service from an expert, friendly, US-based customer support team!
 https://www.appliancepartspros.com/b/wp-content/uploads/2025/12/20250429_1559_Early-Morning-Kitchen_simple_compose_01jt1j32s1fttttheyf8zzt359.png
1024
1536
Steven E
https://www.appliancepartspros.com/b/wp-content/uploads/2020/11/app-logo-std.png
Steven E2025-12-16 12:47:252025-12-16 12:47:32How to Fix a JennAir Slide-In Electric Downdraft Range That Won’t Broil
https://www.appliancepartspros.com/b/wp-content/uploads/2025/12/20250429_1559_Early-Morning-Kitchen_simple_compose_01jt1j32s1fttttheyf8zzt359.png
1024
1536
Steven E
https://www.appliancepartspros.com/b/wp-content/uploads/2020/11/app-logo-std.png
Steven E2025-12-16 12:47:252025-12-16 12:47:32How to Fix a JennAir Slide-In Electric Downdraft Range That Won’t Broil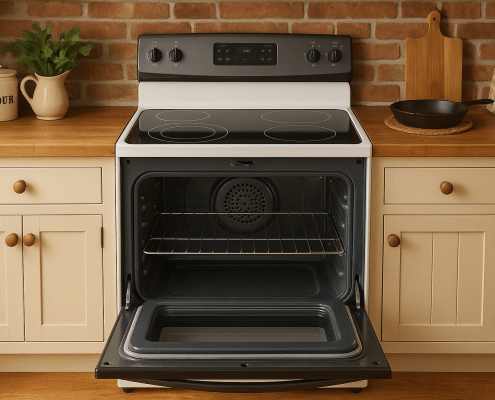 https://www.appliancepartspros.com/b/wp-content/uploads/2025/10/20250618_1508_Country-Kitchen-Oven_simple_compose_01jy26zs6rf9esjy9e3tgff7et.png
1024
1536
Steven E
https://www.appliancepartspros.com/b/wp-content/uploads/2020/11/app-logo-std.png
Steven E2025-10-31 07:42:172025-10-31 07:42:49Easy Way to Troubleshoot Whirlpool Oven Broil Element Issues
https://www.appliancepartspros.com/b/wp-content/uploads/2025/10/20250618_1508_Country-Kitchen-Oven_simple_compose_01jy26zs6rf9esjy9e3tgff7et.png
1024
1536
Steven E
https://www.appliancepartspros.com/b/wp-content/uploads/2020/11/app-logo-std.png
Steven E2025-10-31 07:42:172025-10-31 07:42:49Easy Way to Troubleshoot Whirlpool Oven Broil Element Issues https://www.appliancepartspros.com/b/wp-content/uploads/2025/09/20250618_1508_Country-Kitchen-Oven_simple_compose_01jy26zs6tfz49rvn6pf1w94ev.png
1024
1536
Steven E
https://www.appliancepartspros.com/b/wp-content/uploads/2020/11/app-logo-std.png
Steven E2025-09-26 12:20:062025-09-26 12:20:17Is Your Samsung Oven Baking Element Dead? Find Out Now!
https://www.appliancepartspros.com/b/wp-content/uploads/2025/09/20250618_1508_Country-Kitchen-Oven_simple_compose_01jy26zs6tfz49rvn6pf1w94ev.png
1024
1536
Steven E
https://www.appliancepartspros.com/b/wp-content/uploads/2020/11/app-logo-std.png
Steven E2025-09-26 12:20:062025-09-26 12:20:17Is Your Samsung Oven Baking Element Dead? Find Out Now!With nearly a decade of experience in providing top-notch customer service regarding appliance parts and repair, Steven enjoys sharing practical advice, troubleshooting tips, and interesting information to help readers stay informed.
Leave a Reply
Want to join the discussion?Feel free to contribute!