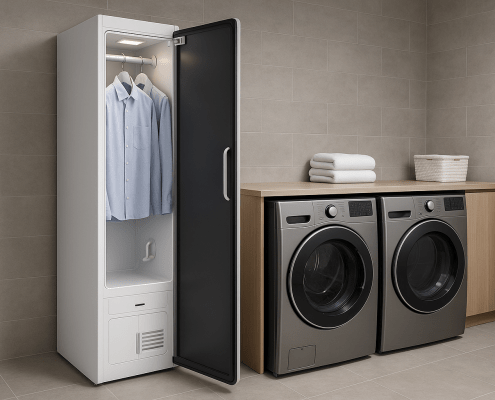
How to Fix a Laundry Steam Closet with Steam Leaking At the Door
Steven E / Tuesday July 8, 2025

Noticed steam escaping around the edges of your laundry steam closet door? Don’t worry, this is a common issue that can usually be fixed with a little DIY troubleshooting. Here’s how to figure out what’s going on and get your steam closet sealed up and working properly again.
The information in this article may not apply to your specific appliance model. We recommend consulting your manufacturer’s documentation or contact us with any questions.
Why Does Steam Leak Through the Door?
The door of your steam closet is designed to form an airtight seal when closed. This keeps steam inside where it belongs and ensures even treatment of your clothes. Most of the time, leaks happen because of one of these reasons:
- Worn, cracked, or dirty door gasket.
- Misaligned door or loose hinges.
- Debris or residue stis uck on the gasket or door frame.
- Improper loading is causing the door not to close fully.
- The appliance is not sitting level, which twists the door frame slightly.
All of these are simple to diagnose and fix yourself.

What You’ll Need
Before you start troubleshooting, gather a few basic supplies:
- Microfiber cloths
- Warm, soapy water
- White vinegar (for tough residue)
- Soft brush or old toothbrush
- Replacement gasket (if needed)
- Screwdrivers
- Flashlight
- Level
Step 1: Unplug and Inspect
Safety first: always unplug your steam closet before inspecting or working on it. Then take a close look at the area around the door while it’s closed. Use a flashlight if necessary to see where the steam seems to be escaping most noticeably.
Step 2: Check for Obstructions
One of the most common, and easiest to fix, causes of a leaky door is something as simple as debris or lint caught on the seal or frame.
- Open the door and carefully examine the rubber gasket all the way around.
- Look for lint, dirt, or bits of fabric stuck to the surface or jammed into the folds of the gasket.
- Check the metal door frame for any sticky spots, dried detergent, or grime.
Even a small amount of residue can prevent the gasket from making full contact and sealing.
Step 3: Clean the Gasket and Frame
If the gasket looks dirty but otherwise intact, a good cleaning may solve your problem.
- Mix warm water with a drop of mild dish soap.
- Dip a microfiber cloth in the solution and wipe the entire gasket, getting into the folds.
- Use a toothbrush to gently scrub away stubborn debris.
- Wipe the door frame clean as well.
- Dry thoroughly with a clean towel.
After cleaning, close the door and check the seal. Run a short cycle and see if the steam leak persists.
Step 4: Inspect the Gasket for Damage
If cleaning doesn’t fix the problem, take a closer look at the gasket itself. Over time, rubber gaskets can dry out, crack, flatten, or tear.
What to look for:
- Cracks or splits anywhere along the gasket.
- Hard, brittle spots that don’t compress properly.
- Flattened areas that don’t spring back.
- Sections are pulling away from the door frame.
If you see any of these, the gasket is likely no longer sealing properly and should be replaced.
Step 5: Replace the Gasket
If your gasket is worn or damaged, replacing it is straightforward and makes a huge difference.
- Order a replacement gasket that is compatible with your model.
- Peel the old gasket off the door frame.
- Clean the channel where the gasket sits with soapy water and dry thoroughly.
- Press the new gasket into place, working your way around the frame and making sure it sits evenly.
- Close the door and press around the edges to ensure the gasket compresses evenly.
After replacement, run a test cycle and check for leaks.
Step 6: Check Door Alignment
If the gasket is in good shape but the door seems to sit unevenly or feels loose when closed, it may not be aligned properly.
- Stand directly in front of the closet and look at the gap between the door and frame, it should be uniform all the way around.
- If the door seems higher on one side or doesn’t close flush, the hinges may need adjusting.
- Use a screwdriver to slightly tighten or loosen the hinge screws, adjusting the door until it sits squarely and closes snugly.
- Test by closing the door and seeing if the seal feels tight all the way around.
Step 7: Level the Steam Closet
Sometimes the steam closet itself isn’t sitting level, which can twist the frame just enough to prevent the door from sealing properly.
- Place a level on top of the steam closet, checking side-to-side and front-to-back.
- Adjust the leveling feet at the bottom corners until the unit sits flat and stable.
- Close the door again and see if the seal improves.
Step 8: Don’t Overload the Closet
If you pack your steam closet full of clothing, the garments may be pressing against the door from the inside and preventing it from closing completely.
- Load clothes evenly and avoid letting them drape against the door.
- Keep heavier items centered and leave a small gap near the door edge.
Run a test cycle with a lighter load and see if the leak goes away.
Step 9: Run a Final Test
Once you’ve cleaned, adjusted, or replaced what’s necessary, plug your steam closet back in and run a full cycle. If everything looks good, you’ve successfully fixed the problem.
Tips to Keep Your Steam Closet Leak-Free
Now that your door is sealing properly again, keep it that way with a few simple maintenance habits:
- Wipe down the gasket and door frame after each use.
- Keep the gasket clean and flexible by conditioning it occasionally with a small amount of food-safe silicone lubricant.
- Avoid slamming the door shut, which can damage the seal.
- Check for lint or debris weekly and clean as needed.
- Inspect the gasket every few months for signs of wear and replace when needed.
Where To Find Us
If you need any replacement parts for your appliances, you can enter your model number at AppliancePartsPros.com to locate and order them quickly. Most orders arrive in just two business days, and we have tons of great information in our repair help section and YouTube videos to help you troubleshoot.
Stay connected with the latest DIY tips, tutorial videos, and repair guides by following us on Facebook, Instagram, and Twitter. We love hearing about your repair stories and successes. If you need more help or want personalized guidance, feel free to reach out. We’re ready to help you take on your next project with confidence!
 https://www.appliancepartspros.com/b/wp-content/uploads/2025/07/20250626_1511_Laundry-Steam-Closet_simple_compose_01jyptbe0tenasrfkphy3x07er.png
1024
1536
Steven E
https://www.appliancepartspros.com/b/wp-content/uploads/2020/11/app-logo-std.png
Steven E2025-07-03 12:59:132025-07-03 12:59:22How to Fix a Steam Closet That Leaves Clothes Unevenly Steamed
https://www.appliancepartspros.com/b/wp-content/uploads/2025/07/20250626_1511_Laundry-Steam-Closet_simple_compose_01jyptbe0tenasrfkphy3x07er.png
1024
1536
Steven E
https://www.appliancepartspros.com/b/wp-content/uploads/2020/11/app-logo-std.png
Steven E2025-07-03 12:59:132025-07-03 12:59:22How to Fix a Steam Closet That Leaves Clothes Unevenly Steamed https://www.appliancepartspros.com/b/wp-content/uploads/2025/07/20250626_1511_Laundry-Steam-Closet_simple_compose_01jyptbe0xfdevewrxrj7mgrv2.png
1024
1536
Steven E
https://www.appliancepartspros.com/b/wp-content/uploads/2020/11/app-logo-std.png
Steven E2025-07-03 12:47:172025-07-03 12:47:26Laundry Steam Closet Keeps Shutting Off Mid-Cycle? How To Fix It
https://www.appliancepartspros.com/b/wp-content/uploads/2025/07/20250626_1511_Laundry-Steam-Closet_simple_compose_01jyptbe0xfdevewrxrj7mgrv2.png
1024
1536
Steven E
https://www.appliancepartspros.com/b/wp-content/uploads/2020/11/app-logo-std.png
Steven E2025-07-03 12:47:172025-07-03 12:47:26Laundry Steam Closet Keeps Shutting Off Mid-Cycle? How To Fix It https://www.appliancepartspros.com/b/wp-content/uploads/2025/07/20250626_1517_Luxury-Steam-Closet_simple_compose_01jyptn89kee59pqmx7pdnhnec.png
1024
1536
Steven E
https://www.appliancepartspros.com/b/wp-content/uploads/2020/11/app-logo-std.png
Steven E2025-07-03 12:36:532025-07-03 12:37:03Repairing a Laundry Steam Closet That’s Not Recognizing Clothing
https://www.appliancepartspros.com/b/wp-content/uploads/2025/07/20250626_1517_Luxury-Steam-Closet_simple_compose_01jyptn89kee59pqmx7pdnhnec.png
1024
1536
Steven E
https://www.appliancepartspros.com/b/wp-content/uploads/2020/11/app-logo-std.png
Steven E2025-07-03 12:36:532025-07-03 12:37:03Repairing a Laundry Steam Closet That’s Not Recognizing ClothingWith nearly a decade of experience in providing top-notch customer service regarding appliance parts and repair, Steven enjoys sharing practical advice, troubleshooting tips, and interesting information to help readers stay informed.