How to Replace An Oven Door Light Switch
Samantha Bullington / Wednesday October 25, 2023
Is your oven light leaving you in the dark when you’re trying to check on your culinary creations? Don’t worry! We’ve got the solution to this common problem with a step-by-step guide to replace that faulty oven light switch yourself. Plus, check out the handy how-to video just below to illuminate your DIY journey.
Interior oven lights are super handy to have on while checking on your cooking dishes or cleaning your oven. But these lights are powered by simple switches, which can wear out over time.
If your oven light isn’t working anymore, the switch is likely faulty and needs to be replaced. Luckily, it’s a straightforward repair you can complete yourself.

If you haven’t ordered a replacement yet, you can enter your model number to find an oven light switch here. Most orders arrive in 2-3 business days.
You can also watch the full repair here.
About oven light switches
Before we dive into the repair, let’s review some key facts about oven light systems:
- Oven lights are usually controlled by a simple mechanical switch rather than an electronic control panel.
- The oven light switch uses an actuator rod and spring system to turn the light on when the oven door is opened. When the oven door closes, the rod gets pushed back into the off position, which turns the light off.
- Years of regular oven use can wear out the switch’s spring mechanism or electrical contacts.
Read More: Why It’s Best to Choose OEM Over Aftermarket Parts for Appliance Repairs

Safety tips
As with any electrical appliance repair, safety should be your top concern. Make sure to take these precautions before working on your oven’s light switch:
- Turn off the oven circuit breaker in your home’s main electrical panel. This cuts the power to avoid shocks, which can potentially cause serious injury.
- Unplug the oven as an extra precaution.
- Test the oven’s lights and controls to verify the power is off.
- Be very careful when working around the sharp metal edges inside the oven cavity.
- Wear gloves when handling hot oven components like bulbs and fixture housings.
- Keep a fire extinguisher nearby in case any electrical shorts happen.
- Never work with wet hands or on wet surfaces.
Read More: 8 DIY Safety Tips – Safety First with Appliance Parts Pros
What you need
Before taking apart your oven, gather these items to replace the light switch:
- New oven light switch – Use your model number to find the right part for your unit.
- Screwdrivers – Both flat-blade and Phillips screwdrivers will help you access internal oven components.
- Protective gloves – Heavy gloves help you avoid burns.
- Flashlight or headlamp – Good lighting is a must when working in an oven’s dark interior.
- Replacement oven light bulb – Replace the bulb when you replace the switch.
- Vacuum cleaner – For cleaning debris out of the oven before reassembling.
Read More: My part is no longer available! What do I do now?
Steps to Replace An Oven Light Switch
1. Remove the oven’s back panel
You’ll need to remove the oven’s rear panel to access the light switch wiring and mounting hardware.
To remove it:
- If your oven isn’t freestanding, pull it out from the wall or cabinetry so you can get behind it.
- Locate the screws securing the back panel, along the outer edges, and possibly along the top vent.
- Using your Phillips head screwdriver, remove all visible screws and set them aside in a safe place.
- Once all the screws are out, gently pull the back panel directly outward until it detaches.
- Carefully set the back panel aside to avoid bending or scratching it.
With the back open, we can now see and access the internal light switch wiring.
Read More: 5 Common Mistakes That Shorten The Lifespan Of Appliances
2. Disconnect the light switch wiring
Before fully removing the oven light switch, we need to disconnect the wiring from the power supply.
- Locate the oven light switch on the rear oven wall, close to the door hinge.
- Follow the switch wiring harness to the location where it connects to a wire terminal or outlet.
- Use a flat-blade screwdriver to detach the wiring connector or terminal screw.
- Once the wiring is free from the switch side, label or take photos of where the wires go so there’s no confusion when reconnecting later.
With the wiring disconnected, we can fully remove the oven light switch.
Read More: Cooking Efficiently in Your Oven
3. Remove the faulty oven light switch
- If your oven model has a wire bracket over the switch, remove that bracket first with pliers or a screwdriver.
- Look closely for any retaining clips or mounting screws holding the switch in place. Remove them as needed.
- Grasp the body of the light switch and pull it firmly away from the oven wall. If there’s resistance, check for any remaining clips or wiring obstruction before pulling farther.
- Once the old switch is freed, set it aside.
4. Install the replacement light switch
- 1. Compare terminals and connectors on new and old switches to determine compatibility.
- Insert the new light switch into the oven cavity opening. Make sure you align any screw holes or locking clips.
- Firmly press the new switch flush against the metal oven wall until it’s secured.
- Reattach any mounting screws or retaining brackets that were removed earlier.
- Restore the original wiring connections on the new switch’s terminals.
Read More: Oven Tips for Cooking a Holiday Turkey, Ham & More
5. Reinstall oven components and restore power
- Carefully bend the oven’s rear panel back into position and reinsert all mounting screws.
- If the oven was pulled out from a wall or cabinet, slide it fully back into position.
- Restore power at the circuit breaker and plug the oven back in if it’s disconnected.
- Reset the oven’s internal clock if needed.
With that, we’re done replacing the oven light switch! Let’s do a final test.
6. Test the newly repaired oven light
- 1. Open the oven door and make sure the interior oven light turns on.
- Check that the light turns back off when the door is closed.
- If the replaced light switch doesn’t automatically control the light, recheck the wiring connections.
- Test other electrical and heating components on the oven to see if they work correctly.
Read More: How to Clean an Oven
Common oven light switch problems
If you replace the oven light switch and it’s still not working right, here are some of the most common issues that you could troubleshoot:
- If the oven light stays on – This usually means the door actuator isn’t fully pressing the switch button like it’s supposed to. You’ll need to adjust the actuator rod angle or switch position.
- If the oven light stays off – If the light won’t turn on, you need to determine if wiring connections are secure on the new switch or check for faulty bulbs. Make sure you only test with known good bulbs.
- If the oven doesn’t heat – If replacing the light switch affects the oven heating function, recheck that all the wiring leads are correctly connected.
- If you hear a loud humming noise – Buzzing, humming, or popping sounds point to a wiring short circuit. Double-check the wire placement.
More information
Thanks for reading! We hope this information helped you get your oven light working again.
If you still need replacement parts for your oven or have any other appliance repair needs, grab your model number and head over to AppliancePartsPros.com, where you can check out our free video tutorials and troubleshooting guides.
Be sure to subscribe to us on YouTube and follow us on Facebook, Twitter, and Instagram!
 https://www.appliancepartspros.com/b/wp-content/uploads/2022/01/92_how-to-replace-an-oven-door-hinge-with-video_bottom.png
640
1536
APP Expert
https://www.appliancepartspros.com/b/wp-content/uploads/2020/11/app-logo-std.png
APP Expert2022-01-28 16:15:422026-01-22 09:53:36How To Replace An Oven Door Hinge (With Video!)
https://www.appliancepartspros.com/b/wp-content/uploads/2022/01/92_how-to-replace-an-oven-door-hinge-with-video_bottom.png
640
1536
APP Expert
https://www.appliancepartspros.com/b/wp-content/uploads/2020/11/app-logo-std.png
APP Expert2022-01-28 16:15:422026-01-22 09:53:36How To Replace An Oven Door Hinge (With Video!) https://www.appliancepartspros.com/b/wp-content/uploads/2022/01/shutterstock_676415506.jpg
1000
1500
APP Expert
https://www.appliancepartspros.com/b/wp-content/uploads/2020/11/app-logo-std.png
APP Expert2022-01-24 12:40:542025-07-17 13:14:28How To Replace An Oven Igniter (With Video!)
https://www.appliancepartspros.com/b/wp-content/uploads/2022/01/shutterstock_676415506.jpg
1000
1500
APP Expert
https://www.appliancepartspros.com/b/wp-content/uploads/2020/11/app-logo-std.png
APP Expert2022-01-24 12:40:542025-07-17 13:14:28How To Replace An Oven Igniter (With Video!)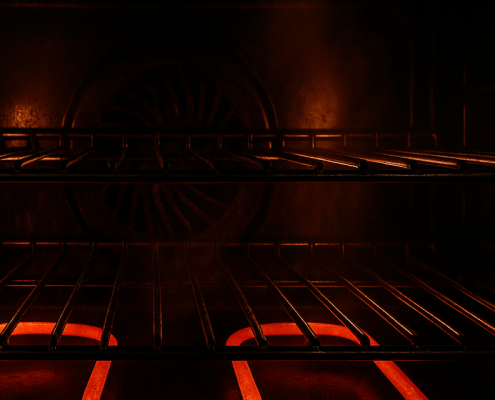 https://www.appliancepartspros.com/b/wp-content/uploads/2021/11/72_how-does-a-self-cleaning-oven-work_middle.png
640
1536
APP Expert
https://www.appliancepartspros.com/b/wp-content/uploads/2020/11/app-logo-std.png
APP Expert2021-11-19 14:52:342026-01-21 11:30:33How Does a Self-Cleaning Oven Work?
https://www.appliancepartspros.com/b/wp-content/uploads/2021/11/72_how-does-a-self-cleaning-oven-work_middle.png
640
1536
APP Expert
https://www.appliancepartspros.com/b/wp-content/uploads/2020/11/app-logo-std.png
APP Expert2021-11-19 14:52:342026-01-21 11:30:33How Does a Self-Cleaning Oven Work?Hey there, I’m Samantha and I’m super excited to be a part of the Appliance Parts Pros team! With 9 years of experience, I’ve had the awesome opportunity to assist countless customers in troubleshooting their home appliances and finding DIY repair solutions.