How to Replace Ice Chute Funnel WR17X12120 on a GE Fridge
Steven E / Friday June 6, 2025
Is your refrigerator’s ice chute funnel leaving you high and dry? A malfunctioning or clogged ice chute can disrupt your refreshing beverage routine, but don’t worry—relief is just one straightforward replacement away. Watch our how-to video below to guide you step by step through restoring perfect ice flow back to your fridge.
Looking for the right part? Enter your appliance model number below to find the exact match and get your appliance running like new again!
Having a refrigerator with a faulty or clogged ice chute funnel can be frustrating. This funnel is what guides the ice from the ice maker into your glass or container when you use the dispenser. So, if it gets damaged or gets clogged with ice buildup over time, you might notice the ice backing up in the chute or not being dispensed properly. But hey, don’t worry! By simply replacing this little plastic part, you can get your ice and water dispenser working like a charm again.

Watch the repair here: How to replace ice chute funnel
The information in this article may not apply to your specific appliance model. We recommend consulting your manufacturer’s documentation or contact us with any questions.
Safety First
Your safety should always be the top priority when performing any appliance repair:
- Always power off and unplug your appliance or switch off the circuit breaker before attempting any maintenance or replacement work. This keeps you safe by preventing any risk of electric shock.
- If the appliance has recently been used, give it plenty of time to cool down before working on it.
- Take your time and don’t rush while working to prevent accidents and personal injuries.
- Work in a well-lit area so you can clearly see and access appliance parts.
- Keep your workspace free of clutter and other obstacles. Keep children and pets away from the work area.
- Never work on internal parts with wet hands. Make sure the work area is completely dry.
- Check the user manual to see if there are specific installation or safety instructions related to your appliance or replacement part.
- Be gentle when handling or removing parts. Excessive force might damage the appliance or cause personal injury.
- Wear insulated work gloves to protect your hands from sharp metal parts and debris.
- When working with wires, avoid touching any exposed wires or terminals. If you need to touch a wire, use a non-conductive tool or wear insulating gloves to prevent electrical shock.
- Don’t test live voltage with a multimeter if you’re unfamiliar with how to prevent short-circuiting.
- Consider wearing safety glasses and/or a dust mask when working with chemicals, dust or a large amount of debris to prevent irritation or injury.
Tools and Materials
Before starting any appliance repair, it’s smart to have all the items you’ll need handy. For this GE refrigerator fix, you’ll want to get your hands on the following tools and parts:
- Ice chute funnel WR17X12120– Take your model number to AppliancePartsPros.com to locate the correct part for your unit.
- Small flathead screwdriver
- Phillips head screwdriver
- Work gloves (optional)
That covers everything you need to replace the busted or blocked GE ice funnel. Now let’s jump into taking apart the refrigerator door.
Removal and Disassembly Steps
- Locate the two small holes on either side of the control panel base.
- Take your flathead screwdriver and insert it into each hole, using it to press up and release the internal tabs holding the panel in place.
- Once released on both sides, slowly pull down on the bottom edge of the control panel. As you pull down, tilt it outward from the refrigerator door.
- You’ll find several wire harness connectors attached to the back. Carefully pry or twist these off using your screwdriver so they detach from the control board.
- With all connectors removed, you can fully remove the control panel and place it somewhere safe.
- Look inside the dispenser cavity and find the plastic wiring harness holder off to the side.
- Press down on the plastic locking tab and swing the wiring harness routing clip out of the way.
- Gather up the bundle of wires and use your hand to guide it safely towards the front. You want all wiring completely clear of the dispenser assembly to avoid damaging any connections.
- Locate the four total screws, two on each side around the edges of the dispenser housing.
- With your Phillips head screwdriver, begin carefully unscrewing each one. Make sure to have a firm grip on the dispenser assembly itself as you remove the final screw so it doesn’t fall forward when detached.
- Once all four mounting screws are out, slowly pull back the dispenser component, reaching your hand inside to guide out the bundle of wiring routed earlier.
- Fully remove the dispenser piece and set it face down on a flat, padded surface to avoid scratching the plastic housing.
- Locate the pivot points on either side of the dispensing arm’s housing. Insert a flathead screwdriver into the slight gap and gently pry upward to pop the clips free.
- Once detached, rotate the dispensing arm assembly upward and carefully slide out the hinge pin from the opposite side. Make sure not to lose this tiny but important pivot pin!
- Set the dispensing arm aside. You should now have an unobstructed view down into the ice chute.
- Look down into the ice chute and locate the semi-circular ice funnel fitted around the walls of the opening.
- Take note of the two small locking tabs positioned on either side of the funnel, protruding outward slightly.
- Wedge the flat end of your screwdriver between the chute wall and the locking tab. Apply gentle outward pressure with the screwdriver to release one locking tab.
- Repeat the same process on the opposite tab. With both tabs unlocked, the funnel can now slide freely out of position.
- Reach down into the ice chute, grasp the old funnel firmly, and carefully slide it upwards and out.
Installation and Reassembly Steps
- Locate and identify the proper orientation of the new funnel. One side will feature two small slots that align with the locking tabs.
- Hold the funnel at an angle and gently guide it down into the ice chute opening. Align those side slots with the locking tabs on the left and right interior walls.
- When aligned correctly, firmly press down and slide the funnel until it stops in place, with tabs securing it on both sides.
- Visually inspect to guarantee proper orientation and locking. Give the funnel a gentle downward tug to verify it’s held securely.
- Hold the dispensing arm assembly over the ice funnel and visually align the hinge point openings.
- Carefully insert the small metal pivot pin to reconnect the swinging arm. Make sure the pin is fully inserted and the arm rotates freely.
- Position wires safely out of the way and hold the dispenser component up to the opened door compartment.
- Slowly guide the wiring harness bundle through the dispenser opening as you rotate the dispenser back into place.
- Align screw holes on the corners of the dispenser housing with corresponding holes on the door liner.
- Insert and tighten down all four Phillips head screws securely.
- If needed, use your screwdriver to assist in carefully reattaching each wire harness connector in the proper order.
- When aligned correctly, firmly press and snap the control panel clips back into the door liner slots on both sides.
- Make sure the panel sits cleanly and flush without any bulges or gaps.
- Give the control buttons a test to guarantee proper responsiveness.
With that, you’ve successfully replaced that troublesome broken or stuck ice dispenser funnel!
Be sure to plug the refrigerator power cord back in and turn on the water supply lines you shut off earlier. Give the freshly replaced ice chute funnel a test run.
More Information
Thanks for reading! We hope this guide helped you replace the Ice chute funnel in your GE refrigerator.
If you still need some replacement parts, grab your model number and head over to AppliancePartsPros.com. We offer over two million parts and most orders arrive in two business days. If you need some help with finding the right part or placing an order, you can contact our team at 1 (877) 477-7278.
While you’re waiting for your new part to arrive, you can explore our DIY blog and watch thousands of video tutorials on our YouTube channel.
Be sure to follow us on Facebook, Twitter and Instagram to see our latest repair guides!
 https://www.appliancepartspros.com/b/wp-content/uploads/2025/06/20250618_1147_Refrigerator-Air-Ducts_simple_compose_01jy1vhs1ee0ss9k8d258eehzm.png
1024
1536
Steven E
https://www.appliancepartspros.com/b/wp-content/uploads/2020/11/app-logo-std.png
Steven E2025-06-19 06:20:382025-08-20 10:53:32Whirlpool Refrigerator Air Duct WP2316186 Replacement Guide
https://www.appliancepartspros.com/b/wp-content/uploads/2025/06/20250618_1147_Refrigerator-Air-Ducts_simple_compose_01jy1vhs1ee0ss9k8d258eehzm.png
1024
1536
Steven E
https://www.appliancepartspros.com/b/wp-content/uploads/2020/11/app-logo-std.png
Steven E2025-06-19 06:20:382025-08-20 10:53:32Whirlpool Refrigerator Air Duct WP2316186 Replacement Guide https://www.appliancepartspros.com/b/wp-content/uploads/2025/06/20250523_1507_Spacious-Kitchen-with-Refrigerator_simple_compose_01jvz8k873e1rbvmbfpse1e7dn.png
1024
1536
Steven E
https://www.appliancepartspros.com/b/wp-content/uploads/2020/11/app-logo-std.png
Steven E2025-06-19 06:11:212025-08-20 10:39:40Easily Replace Drawer Handle DA63-04275B on a Samsung Fridge
https://www.appliancepartspros.com/b/wp-content/uploads/2025/06/20250523_1507_Spacious-Kitchen-with-Refrigerator_simple_compose_01jvz8k873e1rbvmbfpse1e7dn.png
1024
1536
Steven E
https://www.appliancepartspros.com/b/wp-content/uploads/2020/11/app-logo-std.png
Steven E2025-06-19 06:11:212025-08-20 10:39:40Easily Replace Drawer Handle DA63-04275B on a Samsung Fridge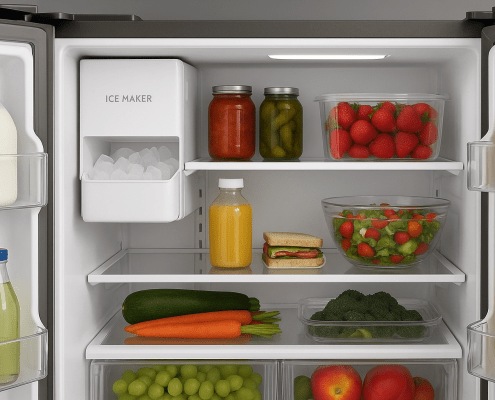 https://www.appliancepartspros.com/b/wp-content/uploads/2025/06/20250617_1527_Refrigerators-Ice-Maker_simple_compose_01jxznp0v7fvctbmy7qy4pvd68.png
1024
1536
Steven E
https://www.appliancepartspros.com/b/wp-content/uploads/2020/11/app-logo-std.png
Steven E2025-06-19 06:03:112025-08-20 10:15:33LG Fridge Icemaker Cooling Fan 5209JA1044A DIY Replacement
https://www.appliancepartspros.com/b/wp-content/uploads/2025/06/20250617_1527_Refrigerators-Ice-Maker_simple_compose_01jxznp0v7fvctbmy7qy4pvd68.png
1024
1536
Steven E
https://www.appliancepartspros.com/b/wp-content/uploads/2020/11/app-logo-std.png
Steven E2025-06-19 06:03:112025-08-20 10:15:33LG Fridge Icemaker Cooling Fan 5209JA1044A DIY ReplacementWith nearly a decade of experience in providing top-notch customer service regarding appliance parts and repair, Steven enjoys sharing practical advice, troubleshooting tips, and interesting information to help readers stay informed.