How to Replace LG Fridge Freezer Rail Guide AEC73337402
Steven E / Thursday June 19, 2025
Is your LG freezer drawer giving you a tug-of-war every time you try to reach for your favorite ice cream? If it’s sticking or tilting, the culprit could be a worn-out rail guide assembly. But fear not! We’ve got an easy step-by-step guide with a how-to video below to help you replace it and have your freezer drawer gliding like new in no time.
Looking for the right part? Enter your appliance model number below to find the exact match and get your appliance running like new again!
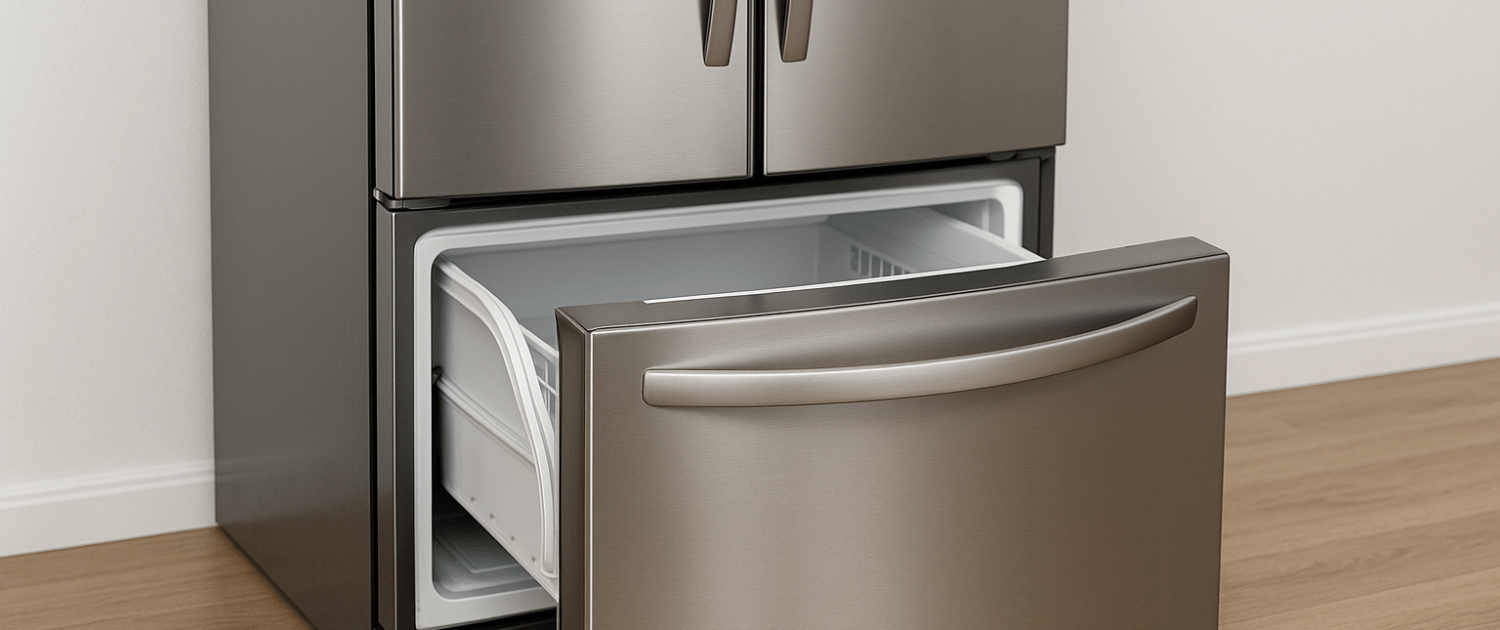
If your LG freezer drawer is sticking, tilting, or not sliding in and out smoothly, the rail guide assembly could be the problem. Part number AEC73337402 helps support and guide the drawer along its tracks. When it’s damaged or worn out, opening the freezer can become a frustrating workout. Luckily, replacing the rail guide assembly is a straightforward repair you can handle at home with just a few tools. In this guide, we’ll show you how to remove the old assembly and install a new one so your drawer glides like new. Let’s get started.

Watch here: How to replace freezer rail guide assembly on an LG refrigerator
The information in this article may not apply to your specific appliance model. We recommend consulting your manufacturer’s documentation or contact us with any questions.
Safety first
When working on any appliance, remember to keep safety first. Here are some tips to keep in mind:
- Unplug the refrigerator or flip the circuit breaker off.
- You’ll be working in the freezer compartment, so it’s a good idea to wear gloves and move quickly to prevent frost buildup.
- Take your time while working to prevent accidents and personal injuries. Rushing is the enemy of precision.
- Work in a well-lit area so you can clearly see and access appliance parts.
- Keep your workspace free of clutter and other obstacles. Keep children and pets away from the work area.
- Never work on internal parts with wet hands. Make sure the work area is completely dry.
- Be gentle when handling or removing parts. Excessive force might damage the appliance or cause personal injury.
- Wear insulated work gloves to protect your hands from sharp metal parts and debris.
- Turn off the water supply at the outlet before beginning repairs. Keep towels ready to catch any residual water in the system when removing parts.
Tools and materials needed
- New replacement freezer rail guide AEC73337402– Take your model number to AppliancePartsPros.com
- Phillips head screwdriver
- Flathead screwdriver
- Flashlight
- Protective gloves
Replacement Steps
Step 1: Remove the Freezer Drawers
- Open the freezer door completely.
- Start with the middle drawer.
- Lift up slightly and pull it straight out to remove it.
- Now for the upper drawer, find the locking tabs on each side near the rails.
- Reach behind the tabs and press them inward to release the locks.
- Once both tabs are released, lift up the drawer and pull it out.
Step 2: Remove the Old Freezer Rail Guide Assembly
- Locate the freezer rail guide assembly, usually mounted on the side rail, often on the right side.
- Slide the rail inward slightly to access the mounting screws.
- Use a Phillips screwdriver to remove the screws holding the rail guide in place.
- Once the screws are out, lift the assembly up and out of the freezer compartment.
Tip: Hold the guide with one hand as you remove the final screw to prevent it from falling.
Step 3: Install the New Rail Guide Assembly
- Take your new freezer rail guide and line up the locating pin with the corresponding hole inside the freezer.
- Gently lift it into position.
- While holding it in place, use your Phillips screwdriver to reinstall the screws you just removed.
- Make sure it’s snug but don’t overtighten, you don’t want to crack the plastic.
Step 4: Reinstall the Drawers
- Start with the upper drawer.
- Make sure the notched points on the drawer line up with the rail guides.
- Slide the drawer in until you hear the front ends snap into place on both sides.
- Give it a light tug to confirm it’s locked in.
- Next, reinstall the middle drawer.
- Line up the rollers on each side with the drawer tracks.
- Push it straight back into place.
- Set it down so it hooks properly onto the freezer door.
Step 5: Wrap It Up
- Close the freezer door.
- Plug the refrigerator back in or switch the breaker back on.
- Wait a few minutes and slide the drawers in and out to confirm everything is moving smoothly.
More information
Thanks for reading! We hope this guide helped you replace the freezer rail guide assembly in your LG refrigerator.
If you still need some replacement parts, grab your model number and head over to AppliancePartsPros.com. We offer over two million parts and most orders arrive in two business days. If you need some help with finding the right part or placing an order, you can contact our team at 1 (877) 477-7278.
While you’re waiting for your new part to arrive, you can explore our DIY blog and watch thousands of video tutorials on our YouTube channel.
Be sure to follow us on Facebook, Twitter and Instagram to see our latest repair guides!
 https://www.appliancepartspros.com/b/wp-content/uploads/2023/03/232_making-your-home-appliances-last-longer-an_middle.png
640
1536
APP Expert
https://www.appliancepartspros.com/b/wp-content/uploads/2020/11/app-logo-std.png
APP Expert2023-03-16 07:40:402026-01-23 08:57:59Making Your Home Appliances Last Longer: An Overview of Average Lifespans
https://www.appliancepartspros.com/b/wp-content/uploads/2023/03/232_making-your-home-appliances-last-longer-an_middle.png
640
1536
APP Expert
https://www.appliancepartspros.com/b/wp-content/uploads/2020/11/app-logo-std.png
APP Expert2023-03-16 07:40:402026-01-23 08:57:59Making Your Home Appliances Last Longer: An Overview of Average Lifespans https://www.appliancepartspros.com/b/wp-content/uploads/2023/03/shutterstock_711445561-scaled.jpg
1706
2560
APP Expert
https://www.appliancepartspros.com/b/wp-content/uploads/2020/11/app-logo-std.png
APP Expert2023-03-08 11:43:452025-07-22 09:55:35Upgrade Your Kitchen: Learn How to Install a New Refrigerator in Just a Few Easy Steps!
https://www.appliancepartspros.com/b/wp-content/uploads/2023/03/shutterstock_711445561-scaled.jpg
1706
2560
APP Expert
https://www.appliancepartspros.com/b/wp-content/uploads/2020/11/app-logo-std.png
APP Expert2023-03-08 11:43:452025-07-22 09:55:35Upgrade Your Kitchen: Learn How to Install a New Refrigerator in Just a Few Easy Steps! https://www.appliancepartspros.com/b/wp-content/uploads/2023/03/224_refrigerator-door-shelf-bar-replacement-the_top.png
640
1536
APP Expert
https://www.appliancepartspros.com/b/wp-content/uploads/2020/11/app-logo-std.png
APP Expert2023-03-06 13:53:402026-01-26 08:27:05Refrigerator Door Shelf Bar Replacement: The Ultimate Guide for DIYers
https://www.appliancepartspros.com/b/wp-content/uploads/2023/03/224_refrigerator-door-shelf-bar-replacement-the_top.png
640
1536
APP Expert
https://www.appliancepartspros.com/b/wp-content/uploads/2020/11/app-logo-std.png
APP Expert2023-03-06 13:53:402026-01-26 08:27:05Refrigerator Door Shelf Bar Replacement: The Ultimate Guide for DIYersWith nearly a decade of experience in providing top-notch customer service regarding appliance parts and repair, Steven enjoys sharing practical advice, troubleshooting tips, and interesting information to help readers stay informed.