How to replace suspension rods in a top-load Maytag washer
Steven E / Thursday March 21, 2024
Is your Maytag washer making excessive noise or leaving its drum off-balance? This common issue is often due to worn-out suspension rods, but don’t worry—replacing them is easier than you think! Check out our step-by-step guide and watch the how-to video below to get your washer running smoothly again.
The suspension rods in a top-load Maytag washer are responsible for supporting and stabilizing the drum so your washer stays balanced during the wash and spin cycles.
You may need to replace the suspension rods if your washer vibrates excessively, bangs or thumps while running or has a drum that’s off-center or tilted.

The good news is that replacing the suspension rods is a relatively straightforward process that you can complete yourself, which will save you time and money.
You can find replacement suspension rods here. If you need other replacement parts for your Maytag washer, just enter your model number at AppliancePartsPros.com to find them. It’s that easy! Most orders arrive in just two business days, and we have thousands of guides to show you how to install your new parts.
What you need
- Replacement suspension rods (make sure it’s compatible with your model BEFORE installing)
- 1/4-inch nut driver
- Long flat-head screwdriver
- Two 1-ft sections of 4 x 4 wood
Read more: 10 Washing Machine Tips to Get Stains Out
Safety precautions
When working on any appliance, remember to keep safety first. Here are some tips to keep in mind:
- Always power off and unplug your appliance or switch off the circuit breaker before attempting any maintenance or replacement work. This keeps you safe by preventing any risk of electric shock.
- Turn off the water supply at the outlet before beginning repairs. Keep towels ready to catch any residual water in the system when removing parts.
- If the appliance has recently been used, give it plenty of time to cool down before working on it.
- Take your time while working to prevent accidents and personal injuries. Rushing is the enemy of precision.
- Work in a well-lit area so you can clearly see and access appliance parts.
- Keep your workspace free of clutter and other obstacles. Keep children and pets away from the work area.
- Never work on internal parts with wet hands. Make sure the work area is completely dry.
- Check the user manual to see if there are specific installation or safety instructions related to your appliance or replacement part.
- Be gentle when handling or removing parts. Excessive force might damage the appliance or cause personal injury.
- Wear insulated work gloves to protect your hands from sharp metal parts and debris.
- When working with wires, avoid touching any exposed wires or terminals. If you need to touch a wire, use a non-conductive tool or wear insulating gloves to prevent electrical shock.
- Consider wearing safety glasses and/or a dust mask when working with chemicals, dust or a large amount of debris to prevent irritation or injury.
Read more: Pros and cons of using fabric softener

How to replace the suspension rods
- Turn the washer off and unplug it from the power supply.
- Turn off the water supply to the washer.
- Tilt the washer back slightly to create enough space to place wood blocks under the tub. This will provide support and make it easier to remove the suspension rods later.
- Carefully lower the washer back down to its original position.
- Move to the back of the washer to access the harness cover and the 1/4-inch screws at the top panel hinges. Remove the screws and set them aside.
- Pull the top panel of the washer towards the front while simultaneously lifting it. As you do this, push the panel back to tilt it backward. This will allow you to access the suspension rods.
- Find the first suspension rod and lift it up. Remove the bearing and cup attached to the rod.
- Let the suspension rod drop down and pull it away from the tub. If it doesn’t come off easily, you can use a flat-blade screwdriver to press down on the top of the spring sleeve of the suspension rod and release it. Repeat this process for each suspension rod.
- To install the new suspension rods, lower each rod down beside the tub and position it in the mounting hole of the frame. While holding the rod up, angle it towards the mounting hole and install the suspension bearing and cup. Repeat this step for each suspension rod, one at a time.
- Once all the new suspension rods are in place, carefully set the top panel back down.
- Pull the top panel forward slightly, allow it to drop down a little, and then push it back to lock it in place.
- Reinstall the harness cover and the 1/4-inch screws at the top panel hinges.
- Tilt the washer back again to remove the wood blocks that were placed under the tub.
- Plug the washer back in or flip the breaker switch to restore power.
- Turn on the water supply to the washer.
Read more: 5 Ways To Keep Your Clothes Washer In Great Shape
Additional information
Thanks for reading! We hope this guide helped you replace the suspension rods on your Maytag washer.
If you still need some replacement parts, grab your model number and head over to AppliancePartsPros.com. We offer over two million parts and most orders arrive in two business days. If you need some help with finding the right part or placing an order, you can contact our team at 1 (877) 477-7278.
While you’re waiting for your new part to arrive, you can explore our DIY blog and watch thousands of video tutorials on our YouTube channel. We can also help you troubleshoot common washer problems here.
Be sure to follow us on Facebook, Twitter and Instagram to see our latest repair guides!
 https://www.appliancepartspros.com/b/wp-content/uploads/2022/04/shutterstock_1920889451.jpg
1000
1500
APP Expert
https://www.appliancepartspros.com/b/wp-content/uploads/2020/11/app-logo-std.png
APP Expert2023-01-03 16:00:002025-07-22 07:48:16How To Replace A Washer Timer
https://www.appliancepartspros.com/b/wp-content/uploads/2022/04/shutterstock_1920889451.jpg
1000
1500
APP Expert
https://www.appliancepartspros.com/b/wp-content/uploads/2020/11/app-logo-std.png
APP Expert2023-01-03 16:00:002025-07-22 07:48:16How To Replace A Washer Timer Image by rawpixel.com on Freepik
https://www.appliancepartspros.com/b/wp-content/uploads/2022/10/indian-woman-doing-laundry.jpg
1669
2500
APP Expert
https://www.appliancepartspros.com/b/wp-content/uploads/2020/11/app-logo-std.png
APP Expert2022-10-11 10:32:402023-02-01 13:06:44Is the All-In-One Washer Dryer a Pain to Maintain?
Image by rawpixel.com on Freepik
https://www.appliancepartspros.com/b/wp-content/uploads/2022/10/indian-woman-doing-laundry.jpg
1669
2500
APP Expert
https://www.appliancepartspros.com/b/wp-content/uploads/2020/11/app-logo-std.png
APP Expert2022-10-11 10:32:402023-02-01 13:06:44Is the All-In-One Washer Dryer a Pain to Maintain?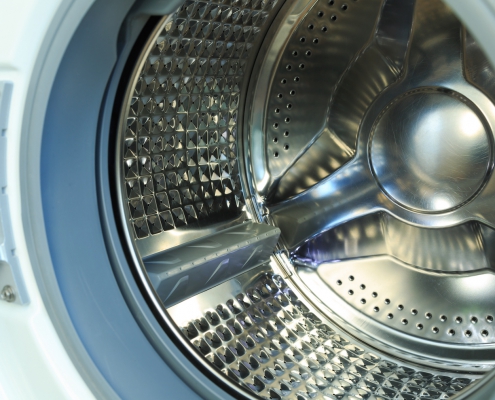 https://www.appliancepartspros.com/b/wp-content/uploads/2022/07/shutterstock_250543111.jpg
989
1500
APP Expert
https://www.appliancepartspros.com/b/wp-content/uploads/2020/11/app-logo-std.png
APP Expert2022-07-08 13:34:272025-07-21 11:30:22How To Replace a Washing Machine Rear Tub Seal (With Video!)
https://www.appliancepartspros.com/b/wp-content/uploads/2022/07/shutterstock_250543111.jpg
989
1500
APP Expert
https://www.appliancepartspros.com/b/wp-content/uploads/2020/11/app-logo-std.png
APP Expert2022-07-08 13:34:272025-07-21 11:30:22How To Replace a Washing Machine Rear Tub Seal (With Video!)With nearly a decade of experience in providing top-notch customer service regarding appliance parts and repair, Steven enjoys sharing practical advice, troubleshooting tips, and interesting information to help readers stay informed.