How to Troubleshoot F36 Error Code on KitchenAid Cooktops
Steven E / Friday May 9, 2025
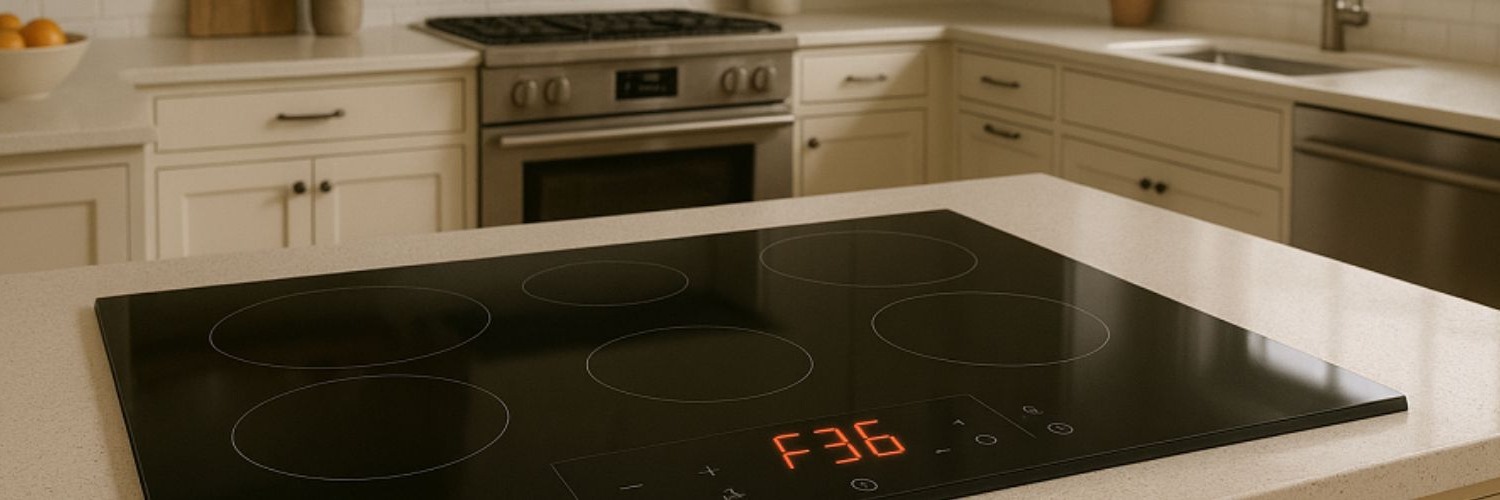
Got the F36 error code flashing on your KitchenAid ceramic cooktop with electronic touch controls? That one means there’s a temperature probe hardware error, basically, your cooktop can’t properly read surface temperature because the sensor is either faulty or can’t communicate with the control board. But don’t stress! We’ll walk you through what causes the F36 code, how to troubleshoot it, and when it might be time to replace a part.
If you find out that you need any replacement parts for your appliance while you’re troubleshooting, you can enter your model number at AppliancePartsPros.com to order them. Most orders arrive in just two business days, and we have thousands of free guides to show you how to install your new parts.
The information in this article may not apply to your specific appliance model. We recommend consulting your manufacturer’s documentation or contact us with any questions.
What is the F36 error code?
F36 indicates a “temperature probe hardware error” on KitchenAid ceramic cooktop models with electronic touch controls. These error codes occur when the control board detects a problem with the temperature probe circuit. This could indicate a faulty probe, wiring issue, or problem with the control board.

These cooktops have a temperature sensor located below the glass surface. The probe monitors the temperature of the entire cooktop during operation. It provides temperature feedback to the electronic control board. Accurate temperature monitoring is important for regulating the glass surface temperature and activating the hot surface indicator lights.
On a KitchenAid electronic ceramic cooktop, fault codes are displayed through a combination of LED lights on the two front burners.
- The rear burner LEDs will flash, indicating the cooktop is in a failure mode
- The front burner LEDs will light in a specific pattern to indicate the fault code number
For example, F36 produces:
- Rear burner LEDs flashing
- 3 LEDs lit on left front burner
- 6 LEDs lit on right front burner
This 3 and 6 LED pattern signifies fault code 36.
So if you see these alternating front and rear LED flashes, you can be certain the cooktop has detected an F36 temperature probe error.
Safety precautions
When working on any appliance, remember to keep safety first. Here are some tips to keep in mind:
- Always power off and unplug your appliance or switch off the circuit breaker before attempting any maintenance or replacement work. This keeps you safe by preventing any risk of injury from electric shock.
- Wear insulated work gloves to protect your hands from sharp metal parts, pinching hazards and debris.
- Take your time and don’t rush while working to prevent accidents and personal injuries.
- Work in a well-lit area so you can clearly see and access the interior parts.
- Clear your workspace of clutter and other obstacles. Keep children and pets away from the work area.
- Never work on internal parts with bare wet hands. Make sure the work area is completely dry.
- Check your user manual to see if there are specific installation or safety instructions for your part or appliance.
- Be gentle when handling or removing parts. Excessive force might damage the appliance or cause injury.
- Wear safety glasses when working with chemicals, dust or cleaning large debris to prevent injury.
- If the appliance has recently been used, give it plenty of time for any heating parts to cool down before working on it.
- Take pictures or make a note of wiring terminals or other connections before disconnecting to prevent any problems with reassembly.
- When working with wires, avoid touching any exposed wires or terminals. If you need to touch a wire, use a non-conductive tool or wear insulating gloves to prevent electrical shock.
Troubleshooting steps
When you encounter an F36 temperature probe fault, follow these steps to troubleshoot:
Step 1: Power cycle the cooktop
Power cycling the cooktop is often the first step in diagnosing an F36 or any other fault code. This helps to reset power to the control board and can clear any temporary errors causing the problem.
- Locate the circuit breaker for the cooktop and turn it off for 1 full minute. This cuts power to the entire appliance.
- If the cooktop is not hardwired, simply unplug it from the electrical outlet for 1 minute.
- Avoid powering down any other appliances on the same circuit to prevent resetting clocks, WiFi connections, etc.
- After 1 minute, turn the circuit breaker back on or plug the cooktop back in.
- Wait for the cooktop to reboot. Check if the F36 LED pattern returns once the control panel lights activate.
If F36 returns on the user interface right away, it indicates an underlying hardware issue exists, requiring further troubleshooting.
Step 2: Inspect wiring
If the F36 fault code remains even after replacing the probe and control board, inspect all related wiring:
- Visually inspect wires and terminals between the temperature probe and control module for damage.
- Check for any pinched, cut, or frayed wiring in the temperature probe circuit.
- Ensure wires are properly seated in their terminals with no loose connections.
- Repair any damaged probe wiring or faulty terminal connections found.
- Wire routing should match original path to prevent hot spots or abrasion.
Step 3: Check the temperature probe resistance
The temperature probe is the first component to test when diagnosing an F36:
- Locate the temperature probe secured below the ceramic glass cooktop surface.The probe is a small cylindrical component with two wiring leads.
- Use a multimeter to measure the resistance between the probe’s two terminals.
- Consult the cooktop schematic to confirm the expected resistance range, usually between 1,000 to 1,500 Ohms at room temperature.
- If resistance is outside the specified range, the probe is likely defective and should be replaced.
Step 4: Replace a faulty temperature probe
If the temperature probe resistance is out of specification, replace the faulty probe:
- Order an exact replacement probe for your specific cooktop make and model.
- Turn off cooktop power at the breaker or unplug the unit.
- Disconnect the probe leads from the control board terminals. Remove any mounting fasteners.
- Carefully lift the faulty probe off the cooktop surface and remove it from the appliance.
- Install the new replacement probe in the exact same position. Secure with fasteners.
- Reconnect the probe leads to the original terminals on the control board.
- Restore cooktop power and verify if the new probe resolved the F36 error.
Pro Tip: Order the correct part the first time confidently by clicking here and using our model specific website to order the correct part.
Step 5: Replace the control board
If the temperature probe tests okay but the F36 error persists, the electronic power control board likely has a fault:
- Order a replacement touch control module or main control board for your specific cooktop model.
- Turn off power and disconnect all wiring and probes from the faulty control board.
- Remove any mounting screws or brackets to extract the control board from the cooktop.
- Install the new power control boards in the same position and reconnect all original wiring.
- Restore power and check if cooktop now operates without any F36 temperature probe error.
Additional information
Thank you for reading! We hope you found this information useful to get your cooktop working again.
If you have any other appliance repair needs or projects, don’t hesitate to explore our thousands of free videos and troubleshooting guides available. If you need replacement parts or some extra help, grab your model number and head over to AppliancePartsPros.com, where you can chat with a pro, order parts, read our DIY blog, and more.
Be sure to subscribe to us on YouTube and follow us on Facebook, Twitter, and Instagram!
 https://www.appliancepartspros.com/b/wp-content/uploads/2023/08/tracybeard_photo_camera_35mm_film_photo_depth_of_field_detailed_4a0511b2-f4a3-4713-bf13-00d2bc703079.png
572
1020
Steven E
https://www.appliancepartspros.com/b/wp-content/uploads/2020/11/app-logo-std.png
Steven E2023-08-04 11:30:162023-08-04 11:30:23F09 Whirlpool Washer Error Code: A Troubleshooting Guide
https://www.appliancepartspros.com/b/wp-content/uploads/2023/08/tracybeard_photo_camera_35mm_film_photo_depth_of_field_detailed_4a0511b2-f4a3-4713-bf13-00d2bc703079.png
572
1020
Steven E
https://www.appliancepartspros.com/b/wp-content/uploads/2020/11/app-logo-std.png
Steven E2023-08-04 11:30:162023-08-04 11:30:23F09 Whirlpool Washer Error Code: A Troubleshooting Guide https://www.appliancepartspros.com/b/wp-content/uploads/2023/08/Error-Code-F9E1.png
609
1086
Steven E
https://www.appliancepartspros.com/b/wp-content/uploads/2020/11/app-logo-std.png
Steven E2023-08-04 10:03:072023-08-04 10:03:15Error Code F9E1: Long Drain in a Whirlpool Washer
https://www.appliancepartspros.com/b/wp-content/uploads/2023/08/Error-Code-F9E1.png
609
1086
Steven E
https://www.appliancepartspros.com/b/wp-content/uploads/2020/11/app-logo-std.png
Steven E2023-08-04 10:03:072023-08-04 10:03:15Error Code F9E1: Long Drain in a Whirlpool Washer https://www.appliancepartspros.com/b/wp-content/uploads/2023/08/tracybeard_A_middle_aged_man_with_messy_hair_and_a_worried_expr_d25576d5-f8c5-49ec-b6a9-842e52ed22b0.png
609
1086
Steven E
https://www.appliancepartspros.com/b/wp-content/uploads/2020/11/app-logo-std.png
Steven E2023-08-03 13:19:312023-08-03 13:19:48Maytag Dryer Code AF: A Troubleshooting Guide
https://www.appliancepartspros.com/b/wp-content/uploads/2023/08/tracybeard_A_middle_aged_man_with_messy_hair_and_a_worried_expr_d25576d5-f8c5-49ec-b6a9-842e52ed22b0.png
609
1086
Steven E
https://www.appliancepartspros.com/b/wp-content/uploads/2020/11/app-logo-std.png
Steven E2023-08-03 13:19:312023-08-03 13:19:48Maytag Dryer Code AF: A Troubleshooting GuideWith nearly a decade of experience in providing top-notch customer service regarding appliance parts and repair, Steven enjoys sharing practical advice, troubleshooting tips, and interesting information to help readers stay informed.