Pressure Washing Concrete: What You Need to Know
Steven E / Tuesday May 6, 2025
Concrete is tough, but dirt, mold, mildew, oil stains, and grime can take a toll on your driveway, sidewalk, or patio over time. What was once a bright, clean surface starts to look dull, stained, or downright dirty.
The good news? You don’t need to rip it all out or spend hours scrubbing on your hands and knees. A pressure washer can bring your concrete back to life in a matter of minutes, and it’s a project most DIYers can tackle in an afternoon.
We’ll walk you through everything you need to know about pressure washing concrete the right way, from tools and safety to step-by-step cleaning and pro tips for the best results.
Let’s get that concrete looking brand new again!
The information in this article may not apply to your specific appliance model. We recommend consulting your manufacturer’s documentation or contact us with any questions.
Why Pressure Wash Concrete?
Concrete is durable, but it’s also porous. Over time, it absorbs everything from car oil and rust to algae, moss, and mold, especially in shady or damp areas.
Pressure washing blasts all of that gunk out of the surface quickly, helping:
- Improve curb appeal
- Extend the life of your concrete
- Prevent slipping hazards from algae or mildew
- Prep surfaces for sealing, staining, or painting
Best of all? It’s satisfying as heck. Watching years of grime disappear in seconds is one of the most rewarding DIY jobs out there.
Tools and Supplies You’ll Need
Before you start spraying, make sure you’ve got the right gear:
Basic Tools:
- Pressure washer (gas or electric)
- Concrete cleaner or degreaser (optional but highly recommended)
- Garden hose with spray nozzle
- Broom or stiff brush
- Safety gear: eye protection, gloves, closed-toe shoes
Optional Upgrades:
- Surface cleaner attachment: Makes large areas faster and more even
- Turbo nozzle: Concentrates power for stubborn stains
- Extension wand: Helpful for driveways or large patios
Step 1: Choose the Right Pressure Washer
You don’t need a giant industrial machine to clean your patio, but you do want enough power to get the job done.
Recommended specs for concrete:
- PSI (pounds per square inch): At least 3,000 PSI is ideal
- GPM (gallons per minute): Look for 2.5 GPM or higher
- Gas washers are stronger and better for big jobs.
- Electric ones are quieter, easier to store, and fine for smaller areas like porches or short sidewalks.
If you don’t own a pressure washer, most hardware stores rent gas-powered models for a day.
Step 2: Prep the Area
Before you fire up your machine, take a few minutes to prep the space:
- Remove furniture, toys, planters, or anything loose
- Sweep the surface to clear away loose debris, leaves, or gravel
- Cover nearby plants or delicate surfaces (use tarps or plastic)
- Close windows and doors nearby, and maybe warn the neighbors
If you’re dealing with oil stains, rust, or mildew, now’s the time to apply a concrete cleaner or degreaser. Let it sit for 5–15 minutes (check the label), then scrub with a stiff brush.
Step 3: Set Up Your Pressure Washer
Read your machine’s manual before getting started, but here are the general steps:
- Connect your garden hose to the washer’s water inlet
- Attach the high-pressure hose to the spray gun
- Select your spray nozzle (start with a 25° or 40° tip)
- Turn on the water and check for leaks
- If using a gas-powered washer, fill it with fuel and oil
Start the machine and squeeze the trigger to release any air. You’re ready to clean!
Step 4: Start Pressure Washing
Time to get to the fun part!
Technique tips:
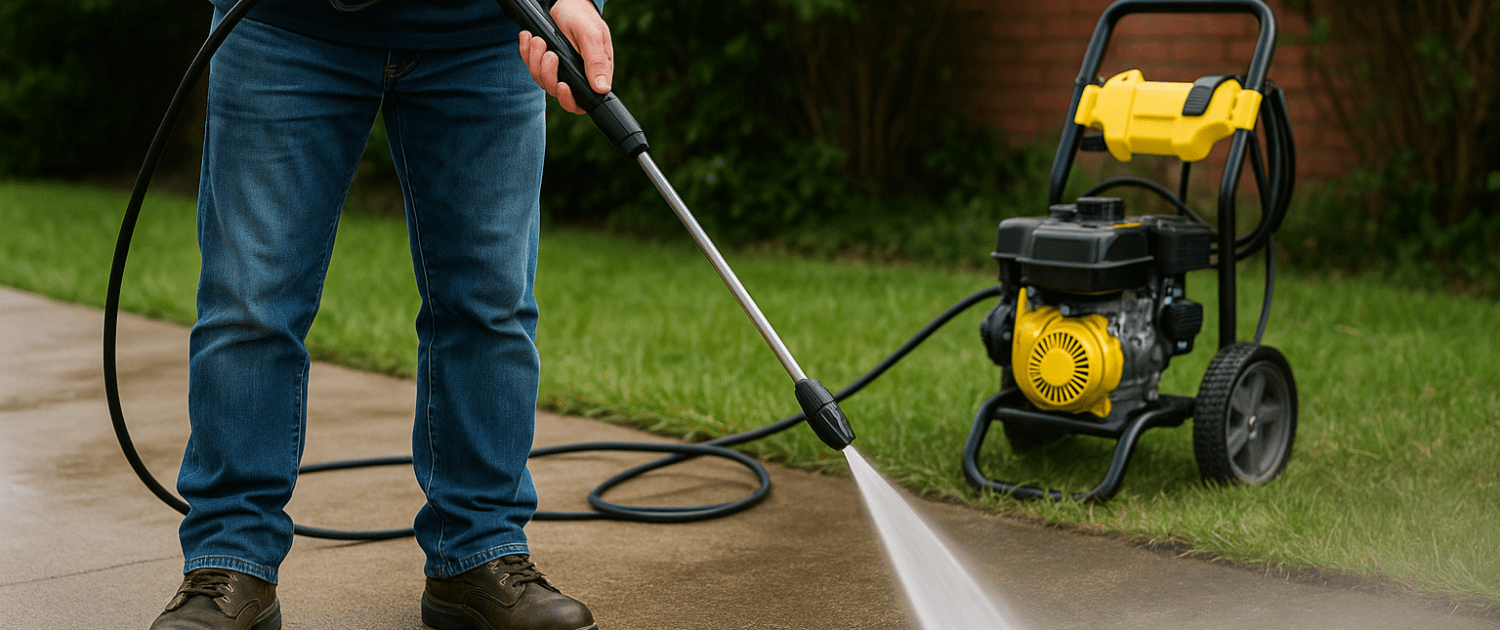
- Hold the wand 12–18 inches from the surface
- Start at the edge or corner and work in sections
- Keep the wand moving in slow, overlapping lines
- Avoid spraying one spot for too long, it can etch the concrete
- Work in the direction of any slopes or drainage paths
If using a surface cleaner attachment, move slowly across the surface in even passes, this makes the job faster and leaves fewer streaks.
Step 5: Tackle Stubborn Stains
Some stains need a little extra love. Here’s how to handle them:
Oil or Grease:
- Use a concrete degreaser or dish soap and hot water
- Scrub with a stiff brush, then rinse with high pressure
Rust:
- Apply a rust remover designed for concrete
- Let it sit, then scrub and rinse
Mildew or Algae:
- Mix 1 part bleach to 4 parts water
- Spray it on the affected area, let it sit 10–15 minutes
- Rinse thoroughly and avoid spraying onto grass or plants
Paint or Sealant:
- You may need a paint stripper and wire brush
- Consider a turbo nozzle for extra pressure
Step 6: Rinse and Inspect
Once you’ve cleaned the entire area, give it a thorough rinse with your pressure washer or a regular garden hose.
Let the surface dry for a few hours, then inspect:
- Any missed spots?
- Streaks from overlapping passes?
- Stains that need a second treatment?
It’s common to need a second pass over heavily stained areas. Don’t worry, your first run probably loosened up a lot of grime already.
Step 7: Consider Sealing the Concrete
Now that your concrete is squeaky clean, consider applying a concrete sealer to protect it.
Sealing helps:
- Prevent stains from soaking in
- Block water and ice damage
- Keep the surface cleaner longer
- Boost the color of decorative concrete
Wait at least 24–48 hours after pressure washing to apply a sealer, and always follow the manufacturer’s instructions. Sealers can be rolled or sprayed on, and most need reapplication every 1–3 years.
Tips for the Best Results
- Use the right nozzle: Start with a wide-angle tip (25° or 40°) and only switch to narrower ones (15° or 0°) for spot cleaning tough stains.
- Test an area first: Try a small, hidden patch to see how the concrete reacts, especially older or painted surfaces.
- Keep your distance: Holding the nozzle too close can etch or damage the surface.
- Use consistent strokes: Just like mowing the lawn, straight lines, slight overlaps, and no random zigzags.
Where To Find Us
If you need any replacement parts for your appliances, you can enter your model number at AppliancePartsPros.com to locate and order them quickly. Most orders arrive in just two business days, and we have tons of great information in our repair help section and YouTube videos to help you troubleshoot.
Stay connected with the latest DIY tips, tutorial videos, and repair guides by following us on Facebook, Instagram, and Twitter. We love hearing about your repair stories and successes. If you need more help or want personalized guidance, feel free to reach out. We’re ready to help you take on your next project with confidence!
With nearly a decade of experience in providing top-notch customer service regarding appliance parts and repair, Steven enjoys sharing practical advice, troubleshooting tips, and interesting information to help readers stay informed.


