Samsung Washer Not Filling? How to Diagnose and Fix the Problem Yourself
Steven E / Thursday December 18, 2025

Looking for the right part? Enter your appliance model number below to find the exact match and get your appliance running like new again!
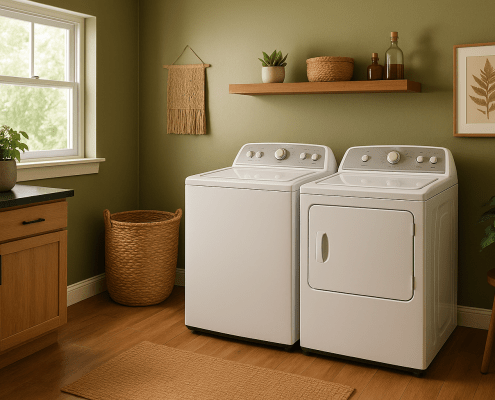
Few things are more frustrating than starting a load of laundry, walking away, and coming back to find your Samsung top-load washer barely filled—or worse, overflowing. If your washer isn’t filling at all, fills very slowly, or won’t shut the water off, the inlet valve is often the culprit.
Even if this is your first time working on an appliance, don’t worry. This repair is more approachable than it sounds, and with a little patience, most homeowners can handle it successfully. Let’s get your washer back to filling the way it should.

Common Symptoms of a Samsung Washer Not Filling Properly
Samsung top-load washers rely on an electronically controlled inlet valve to regulate water flow. When that valve fails, you’ll often notice one or more of the following symptoms:
- Washer won’t fill at all
- Washer fills very slowly
- Washer fills with only hot or only cold water
- Washer overfills and won’t shut off
- Error codes related to water supply or filling
What the Inlet Valve Does (and Why It Fails)
The inlet valve is an electrically controlled component located at the back of the washer where the water supply hoses connect. When the control board calls for water, it sends voltage to the valve’s solenoids, opening the valve and allowing water to flow into the tub.
Over time, inlet valves can fail due to:
- Mineral buildup from hard water
- Worn internal seals
- Electrical coil failure
- Debris clogging the valve screens
When this happens, the valve may not open, may not close fully, or may only allow a trickle of water through.
Tools You’ll Need and Safety
Tools Required
- Multimeter
- Phillips screwdriver
- Pliers
Important Safety Reminder
- Unplug the power cord or turn off the breaker supplying the washer
- You’ll also want to shut off the water supply before removing any hoses.
Accessing the Console and Back Panel
To test and replace the inlet valve, you’ll need to access the console area at the back of the washer.
Step-by-Step Access
- Use a Phillips screwdriver to remove the screws securing the console back panel
- Separate the back panel from the console and set it aside
- Remove the two screws securing the console to the rear panel
- Carefully rotate the console forward
This gives you access to the wiring and the inlet valve terminals.
Testing the Inlet Valve for Voltage
Testing the inlet valve helps confirm whether the problem is the valve itself or another component like the control board or wiring.
Important Note About Live Voltage Testing
This test involves live electricity. If you are not comfortable using a multimeter around live voltage, skip this step and move on to replacing the valve if symptoms point strongly in that direction.
Extreme caution should always be used to prevent electrical shock, which can result in serious injury.
How to Test Inlet Valve Voltage
- Plug the washer back in temporarily
- Set your multimeter to AC volts (V with a wavy line)
- Start a fill cycle
- Place one probe on each terminal of the inlet valve solenoid
What You Should See
- Hot water fill: About 120 volts AC at the hot valve
- Cold water fill: About 120 volts AC at the cold valve
Interpreting the Results
- Voltage present, no water flow: The valve receiving voltage has failed and should be replaced
- No voltage present: The issue may be the control board, wiring, or a sensor
Once you’ve taken your reading, stop the cycle and unplug the washer again.
Deciding If the Inlet Valve Has Failed
If voltage is reaching the valve but water is not flowing correctly, the diagnosis is clear—the inlet valve has failed.
In some cases, you may also notice:
- Water leaking through the valve when the washer is off
- The washer slowly filling even when not in use
These are additional signs that the valve is no longer sealing properly and needs replacement.
Removing the Old Inlet Valve
Once you’ve confirmed the inlet valve needs to be replaced, it’s time to remove it.
Step-by-Step Removal
- Unplug the washer
- Turn off both hot and cold water supply valves
- Disconnect the water hoses using pliers if needed
- Label or note the wire connections to the inlet valve
- Disconnect the wires from the valve terminals
- Remove the Phillips screw securing the mounting bracket
- Rotate the valve upward
- Pull the valve out of the washer
Take a moment to inspect the valve screens. You’ll often see sediment or debris that contributed to the failure.
Choosing the Correct Replacement Inlet Valve
Samsung washers use model-specific inlet valves, so it’s important to order the correct part.
When ordering:
- Use your washer’s full model number
- Match the valve configuration (hot, cold, or dual)
- Verify hose and electrical connector locations
If you already have the replacement part, you’re ready to move on. If not, AppliancePartsPros.com makes it easy to find the exact inlet valve for your model, and most orders arrive within just a few days.
Installing the New Inlet Valve
Installing the new inlet valve is straightforward and mirrors the removal process.
Step-by-Step Installation
- Position the new inlet valve in place
- Rotate it down into its mounting position
- Secure it with the mounting bracket and Phillips screw
- Reconnect the electrical wires to the correct terminals
- Reattach the water supply hoses
- Turn the water supply back on
Before restoring power, check the hose connections for leaks.
Reassembling the Console
With the new inlet valve installed, it’s time to put everything back together.
- Rotate the console back into position
- Secure it with the two screws you removed earlier
- Reattach the console back panel
- Tighten all screws snugly
Once everything is secure, plug the washer back into the outlet.
Final Testing and Checks
Now comes the moment of truth.
Run a Test Fill
- Start a normal wash cycle
- Observe the washer during the fill phase
- Confirm that water flows in quickly and evenly
- Make sure the washer stops filling at the proper level
Check again for leaks around the inlet valve and hose connections.
If everything looks good, your repair is complete.
When the Inlet Valve Isn’t the Issue
If your washer still won’t fill and the valve tests good, other components may be involved, such as:
- Water level pressure switch
- Control board
- Wiring harness
- Door or lid switch
Further testing would be required to pinpoint the exact cause, but replacing the inlet valve first is often the right starting point.
Where To Find Us
If you need any replacement parts for your appliances, you can enter your model number at AppliancePartsPros.com to locate and order them quickly. Most orders arrive in just two business days, and we have tons of great information in our repair help section and YouTube videos to help you troubleshoot.
Stay connected with the latest DIY tips, tutorial videos, and repair guides by following us on Facebook, Instagram, and Twitter. We love hearing about your repair stories and successes. If you need more help or want personalized guidance, feel free to contact or call us at 877-477-7278. We’re ready to help you take on your next project with confidence!
Since 1999, AppliancePartsPros.com has helped millions of people repair their broken appliances by providing high-quality original parts at well below retail prices, free support and troubleshooting, and award-winning customer service from an expert, friendly, US-based customer support team!
 https://www.appliancepartspros.com/b/wp-content/uploads/2025/12/20250421_1329_Modern-Earthy-Laundry-Room_simple_compose_01jscp8j11fcybbjrf866fwzna.png
1024
1536
Steven E
https://www.appliancepartspros.com/b/wp-content/uploads/2020/11/app-logo-std.png
Steven E2025-12-18 12:21:192025-12-18 12:21:25Samsung Washer Not Filling? How to Diagnose and Fix the Problem Yourself
https://www.appliancepartspros.com/b/wp-content/uploads/2025/12/20250421_1329_Modern-Earthy-Laundry-Room_simple_compose_01jscp8j11fcybbjrf866fwzna.png
1024
1536
Steven E
https://www.appliancepartspros.com/b/wp-content/uploads/2020/11/app-logo-std.png
Steven E2025-12-18 12:21:192025-12-18 12:21:25Samsung Washer Not Filling? How to Diagnose and Fix the Problem Yourself https://www.appliancepartspros.com/b/wp-content/uploads/2025/12/20250418_1140_Compact-Laundry-Setup_simple_compose_01js4rvt4ge4bv2ffq8fmsfkgb.png
1024
1536
Steven E
https://www.appliancepartspros.com/b/wp-content/uploads/2020/11/app-logo-std.png
Steven E2025-12-17 12:26:552025-12-17 12:27:02Why Your LG Front Load Washer Is Damaging Clothes (And How to Fix It)
https://www.appliancepartspros.com/b/wp-content/uploads/2025/12/20250418_1140_Compact-Laundry-Setup_simple_compose_01js4rvt4ge4bv2ffq8fmsfkgb.png
1024
1536
Steven E
https://www.appliancepartspros.com/b/wp-content/uploads/2020/11/app-logo-std.png
Steven E2025-12-17 12:26:552025-12-17 12:27:02Why Your LG Front Load Washer Is Damaging Clothes (And How to Fix It)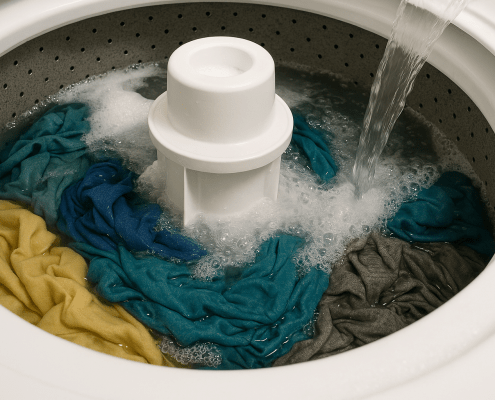 https://www.appliancepartspros.com/b/wp-content/uploads/2025/10/20250616_1418_Overflowing-Washer-Scene_simple_compose_01jxwzahqhf89t78s5f50308cs.png
1024
1536
Steven E
https://www.appliancepartspros.com/b/wp-content/uploads/2020/11/app-logo-std.png
Steven E2025-10-01 13:08:432025-10-01 13:09:16LG Washer Won’t Start Filling? Watch This!
https://www.appliancepartspros.com/b/wp-content/uploads/2025/10/20250616_1418_Overflowing-Washer-Scene_simple_compose_01jxwzahqhf89t78s5f50308cs.png
1024
1536
Steven E
https://www.appliancepartspros.com/b/wp-content/uploads/2020/11/app-logo-std.png
Steven E2025-10-01 13:08:432025-10-01 13:09:16LG Washer Won’t Start Filling? Watch This!With nearly a decade of experience in providing top-notch customer service regarding appliance parts and repair, Steven enjoys sharing practical advice, troubleshooting tips, and interesting information to help readers stay informed.
Steve E. You have the best step-by-step video on how to remove and replace the water inlet valve on the whirlpool top load washer. I’m still waiting for my part but I have the old one out and it’s ready to go when the new one comes in. Thank you very much.