Whirlpool Washer Not Filling? Replace the Water Valve 285805
Steven E / Thursday June 19, 2025
Is your Whirlpool washer refusing to cooperate, leaving you with either a stubborn dry cycle or an unexpected indoor flood? Don’t worry—your washing machine woes are likely due to a faulty water inlet valve, and we’ve got you covered with a simple DIY fix. Watch our step-by-step how-to video below and let us guide you to a worry-free laundry day without having to rely on costly repairs!
Looking for the right part? Enter your appliance model number below to find the exact match and get your appliance running like new again!
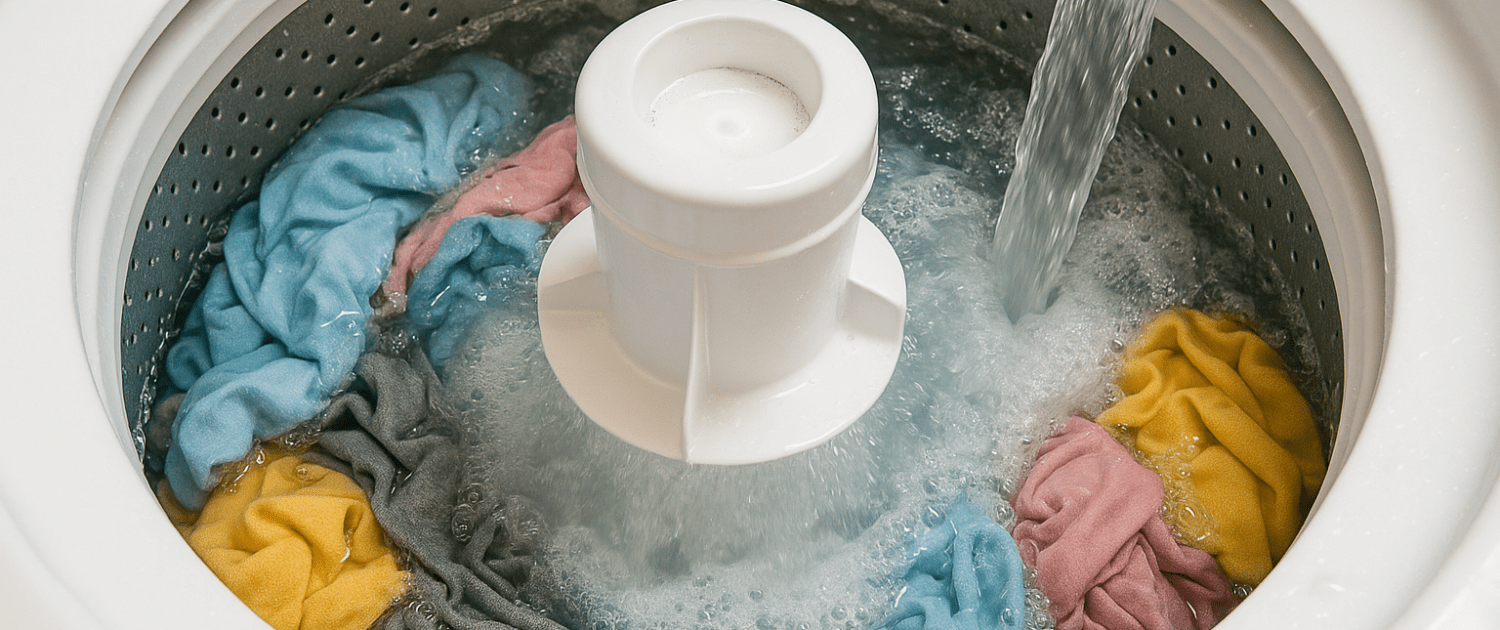
If your Whirlpool washer isn’t filling properly, is filling too slowly, or won’t stop filling at all, the water inlet valve could be the issue. Part number 285805 controls the flow of hot and cold water into your machine during each cycle. When it fails, you might end up with no water or a flood. The good news is that replacing the water valve is a pretty simple fix that most DIYers can handle with just a few basic tools. In this guide, we’ll walk you through how to remove the old valve and install a new one step by step. Let’s get started.

Watch here: How to replace the water valve on a washer
The information in this article may not apply to your specific appliance model. We recommend consulting your manufacturer’s documentation or contact us with any questions.
Safety first
- Always power off and unplug your appliance or switch off the circuit breaker before you attempt any maintenance or replacement work. This keeps you safe by preventing any risk of electric shock.
- If the appliance has recently been used, give it plenty of time to cool down before working on it.
- Take your time while working to prevent accidents and personal injuries. Rushing is the enemy of precision.
- Work in a well-lit area so you can clearly see and access appliance parts.
- Keep your workspace free of clutter and other obstacles. Keep children and pets away from the work area.
- Check the user manual to see if there are specific installation or safety instructions related to your appliance or replacement part.
- Be gentle when handling or removing parts. Excessive force might damage the appliance or cause personal injury.
- Wear insulated work gloves to protect your hands from sharp metal parts and debris.
- When working with wires, avoid touching any exposed wires or terminals. If you need to touch a wire, use a non-conductive tool or wear insulating gloves to prevent electrical shock.
- Turn off the water supply at the outlet before beginning repairs. Keep towels ready to catch any residual water in the system when removing parts.
What You’ll Need
Before starting this repair make sure to gather all the necessary tools and parts:
- Water inlet valve kit part #285805– Take your model number to AppliancePartsPros.com to locate the correct part for your unit.
- Flathead screwdriver
- Phillips screwdriver
- 1/4-inch nut driver or socket
- Pliers
Step 1- Access the control panel
- Locate the control panel screws. These are typically found at the top-front or top-rear edges of the panel.
- Using your Phillips screwdriver, carefully remove the screws. Set them aside in a safe place.
- Slide the control panel forward slightly to release the tabs.
- Tilt the panel back and lift it up and off the washing machine. Take care not to damage any delicate control board components underneath.
Step 2- Remove the washing machine body
- Look for two spring clips securing the tub to the frame, located on the upper-left and upper-right sides.
- Insert a flathead screwdriver into the slots and carefully pry these clips loose.
- Lift up slightly on the lid of the washing machine with one hand to tilt the body. Grip the body securely and rock it forward slowly. You want the tub to lean out at about a 45-degree angle. This will provide enough clearance to maneuver it out.
- Shift the machine’s body to the side while lifting upwards at the same time. Make sure to carry it slowly and steadily. Any residual water left in the hoses will likely pour out now, so your towels and bucket will come in handy to prevent spills.
- Set down the washer body gently to access the back of the tub and valve components.
Step 3- Remove the faulty water inlet valve
- Locate the valve mounted to the upper rear of the tub. It has two water line connections (hot and cold) and an electrical plug or two.
- Use your pliers to compress the hose clamps so you can detach the hoses from the bad valve. Allow any remaining water to drain into your bucket.
- Label each hose with tape so you know to reconnect the hot and cold lines properly later.
- Disconnect the valve’s electrical plugs (push in the tabs and pull outward gently). Make sure you know which connector goes to which terminal if they’re different sizes.
- Using your small wrench or socket, remove the single screw that mounts the valve bracket to the washer frame.
- With all hoses and wires detached, you can now pull the valve straight out and remove it.
Step 4- Install the new water valve
- Insert the new valve straight back into the open port on the washer’s rear panel where the previous one sat.
- Re-secure the valve mount using your small wrench and screw from the kit or the one you removed earlier.
- Reconnect the electrical lines and plugs, matching hot to hot and cold to cold. Consult any labels you made if needed. Push the connectors straight on until they click securely.
- Re-attach the water inlet lines to the corresponding valve ports, matching hot to hot and cold to cold as labeled. The lines should screw straight on by hand initially before being tightened down fully with your pliers.
- Make sure all connections are snug – hoses, valves, plugs, wires, everything. No loose bits should remain.
Step 5- Replace the washer body
- Lift the washer body up at about a 45-degree angle, just as we removed it. Make sure not to tug or strain any of your nice new valve connections!
- Position the bottom lip on the underside of the tub so it slides under the upper frame.
- Rotate the body back downwards gently, aligning the securing clips on the top corners.
- You’ll feel the body settle back into place on the locking mounts as everything lines back up.
- Take your flathead screwdriver and press down on those upper spring clips to fasten everything together tightly.
- Wipe up any remaining dampness with your handy towels and do a quick check that everything sits neatly where it should.
Carefully lowering that washing machine body back onto its frame completes our major reassembly. Just take it nice and slow.
Step 6- Finish up
- Replace the control panel on the front of the washer. Align it properly before sliding it back on and replacing those small screws from the very first step.
- Restore power to the unit
- Restore water flow by turning your shutoff valves back on slowly. Check for leaks!
- Run a test cycle! Add some towels and make sure cold and hot water flow into the tub properly.
More information
Thanks for reading! We hope this guide helped you replace the water valve in your Whirlpool washer.
If you still need some replacement parts, grab your model number and head over to AppliancePartsPros.com. We offer over two million parts and most orders arrive in two business days. If you need some help with finding the right part or placing an order, you can contact our team at 1 (877) 477-7278.
While you’re waiting for your new part to arrive, you can explore our DIY blog and watch thousands of video tutorials on our YouTube channel.
Be sure to follow us on Facebook, Twitter and Instagram to see our latest repair guides!
 https://www.appliancepartspros.com/b/wp-content/uploads/2024/10/8.jpg
1080
1080
Steven E
https://www.appliancepartspros.com/b/wp-content/uploads/2020/11/app-logo-std.png
Steven E2025-03-13 05:47:452025-03-13 05:47:53Troubleshooting error code bE2 on a Samsung top load washer
https://www.appliancepartspros.com/b/wp-content/uploads/2024/10/8.jpg
1080
1080
Steven E
https://www.appliancepartspros.com/b/wp-content/uploads/2020/11/app-logo-std.png
Steven E2025-03-13 05:47:452025-03-13 05:47:53Troubleshooting error code bE2 on a Samsung top load washer https://www.appliancepartspros.com/b/wp-content/uploads/2024/10/7.jpg
1080
1080
Steven E
https://www.appliancepartspros.com/b/wp-content/uploads/2020/11/app-logo-std.png
Steven E2025-03-13 05:45:282025-03-13 05:45:36Troubleshooting error code 9E1 on a Samsung top load washer
https://www.appliancepartspros.com/b/wp-content/uploads/2024/10/7.jpg
1080
1080
Steven E
https://www.appliancepartspros.com/b/wp-content/uploads/2020/11/app-logo-std.png
Steven E2025-03-13 05:45:282025-03-13 05:45:36Troubleshooting error code 9E1 on a Samsung top load washer https://www.appliancepartspros.com/b/wp-content/uploads/2024/10/6.jpg
1080
1080
Steven E
https://www.appliancepartspros.com/b/wp-content/uploads/2020/11/app-logo-std.png
Steven E2025-03-13 05:33:222025-03-13 05:33:29Troubleshooting error code LE on a Samsung top load washer
https://www.appliancepartspros.com/b/wp-content/uploads/2024/10/6.jpg
1080
1080
Steven E
https://www.appliancepartspros.com/b/wp-content/uploads/2020/11/app-logo-std.png
Steven E2025-03-13 05:33:222025-03-13 05:33:29Troubleshooting error code LE on a Samsung top load washerWith nearly a decade of experience in providing top-notch customer service regarding appliance parts and repair, Steven enjoys sharing practical advice, troubleshooting tips, and interesting information to help readers stay informed.