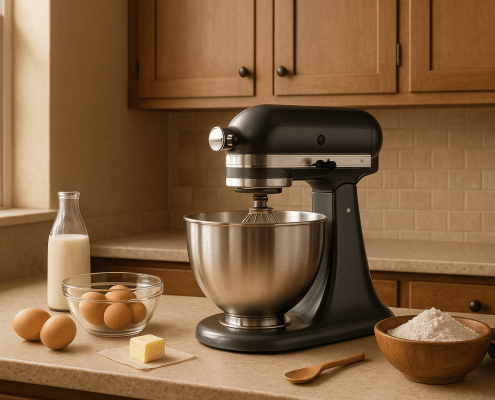
How To Replace A Mixer Speed Control Plate
APP Expert / Tuesday October 25, 2022
Is your trusty stand mixer acting up with erratic speeds or refusing to start? Fear not, because we’ve got a simple DIY solution for you! Learn how to replace a faulty speed control plate and save on costly professional repairs—just watch the how-to video right below and transform your kitchen companion back to its optimal performance.
Professional repairs for stand mixers can be quite expensive, so it’s a good thing a lot of the problems with this kitchen must-have multitool have fairly easy DIY repair solutions. In this guide, we’ll walk you through fixing a common issue with stand mixers: replacing a failed speed control plate. Keep reading to learn how!
Article Contents
Signs Of A Damaged Speed Control Plate
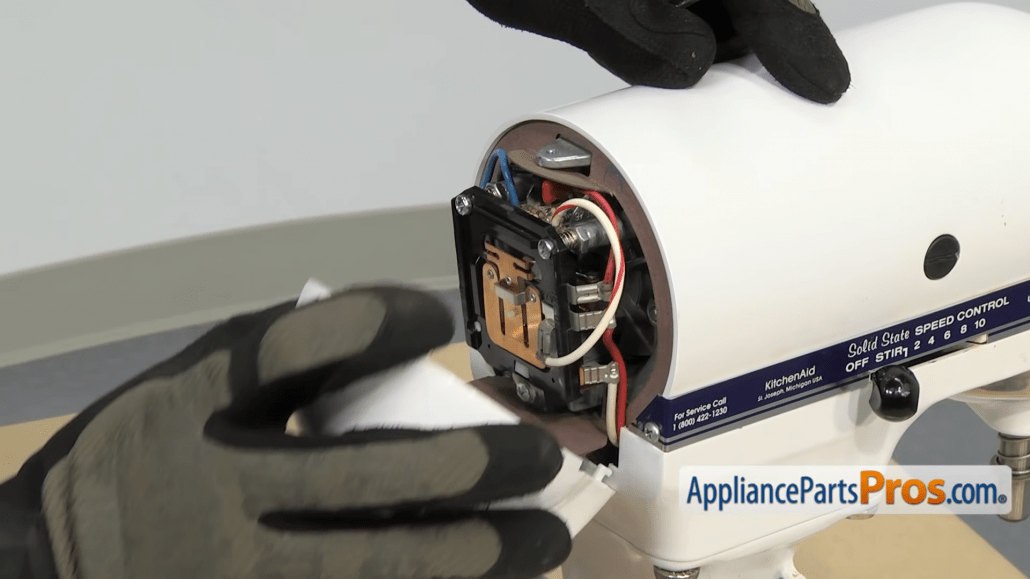
The speed control plate in your stand mixer consists of a number of contacts that, as the name implies, control the speed of your mixer. If your mixer is no longer activating when turned on, or if you are no longer able to control the speed of the mixer – for instance, if it’s always on high no matter the setting, or if it seems to be changing speeds erratically – there’s a good chance that a failed or failing speed control plate is to blame.
Excessive noise while running is also a sign that the speed control plate is failing. However, several parts can cause your mixer to be noisier than it should be, so be sure to check over all parts when diagnosing the issue if this is one of your symptoms.
Finding The Right Replacement Part
To get a compatible OEM replacement part, you’ll need your mixer’s model number. You can generally find this on the base of the mixer. Take care when flipping it over!
With the model number in hand, getting a compatible part is a snap! Type the model number into our search bar at AppliancePartsPros.com and you’ll be presented with a list of compatible mixer parts. Order online through us, and you can have the part to your door in as little as two days!
How To Replace A KitchenAid Stand Mixer Speed Control Plate
In this guide, we’re walking you through how to replace a damaged speed control plate in certain Whirlpool, Maytag, KitchenAid, Jenn-Air, Amana, Magic Chef, Admiral, Norge, Roper, Sears and Kenmore brand stand mixers. While this tutorial covers the vast majority of popular mixer brands, and may be helpful regardless of the brand of your appliance, the instructions may not perfectly match up to mixers made by companies outside the Whirlpool family of brands.
Tools for the Job
Be sure to have all of these items ready before you start any repairs:
- A compatible replacement speed control plate (part no. WPW10119326 in our video)
- Phillips and flathead screwdrivers
- Needle-nose pliers
- An 11/32-inch open-end wrench
- Pliers
- A dish towel or rag that you don’t mind potentially getting greasy
- A ruler
Before You Begin…
For safety in any DIY repair project, ensure that your appliance is turned off and completely disconnected from power before you begin any maintenance. For a stand mixer specifically, unplugging its electrical cord from the wall outlet should be sufficient. Also make sure to remove any attachments, like the bowl and paddle.
Replacing A KitchenAid Stand Mixer Speed Control Plate
Replacing the speed control plate in a stand mixer isn’t a tough job, just a bit of a fiddly one. Set aside about 30 to 45 minutes to complete this repair.
Step One: Disassemble the exterior to reach the speed control plate
Start by removing the back cover on the head of the mixer. This is held in place by a single Phillips head screw. With the screw out, rotate the cover down and then lift it out of place. Be careful not to pull it too hard if it resists, as it’s held in place by a couple of plastic mounting legs that can snap if mishandled.
With the cover off, the next part to remove is the decorative metal strip around the mixer head. To do this, remove the two Phillips screws on either side of the back of the mixer that are pinning the strip down. It should then come away by hand.
Step Two: Remove the motor housing seal
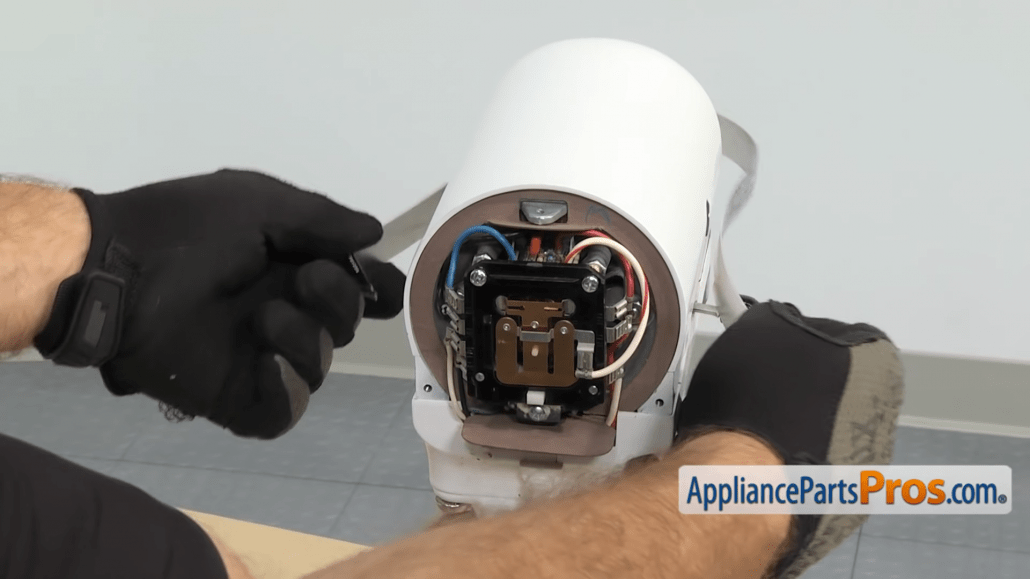
At the back opening, surrounding the speed control plate, there should be a cardboard ring. This ring acts like a seal, muffling noise while the mixer is running. It will need to be removed to replace the speed control board.
First, check your speed control board. It should be labeled to indicate which wire goes where based on its color. If it isn’t, take a picture now so that you have it as a reference when reassembling everything.
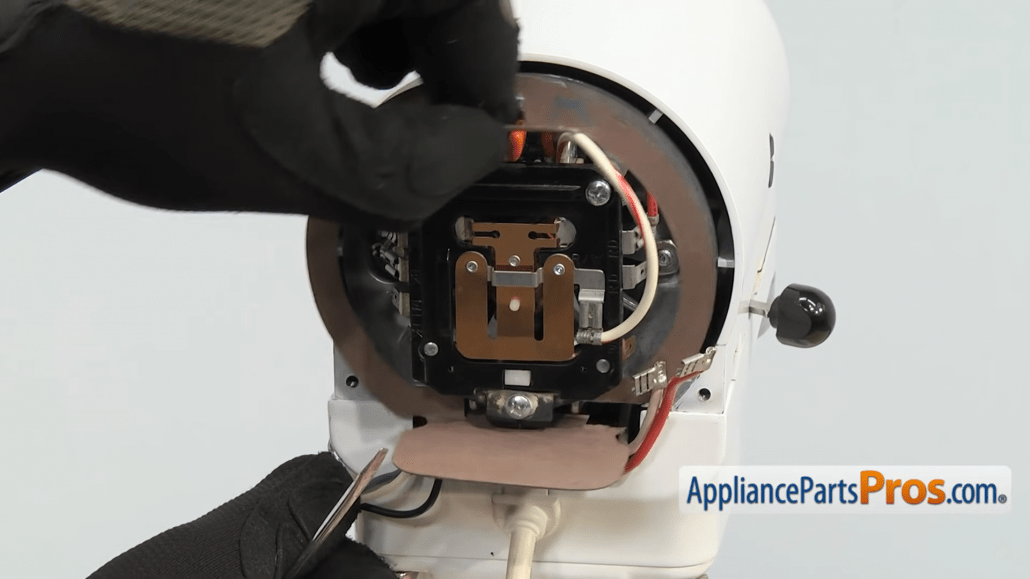
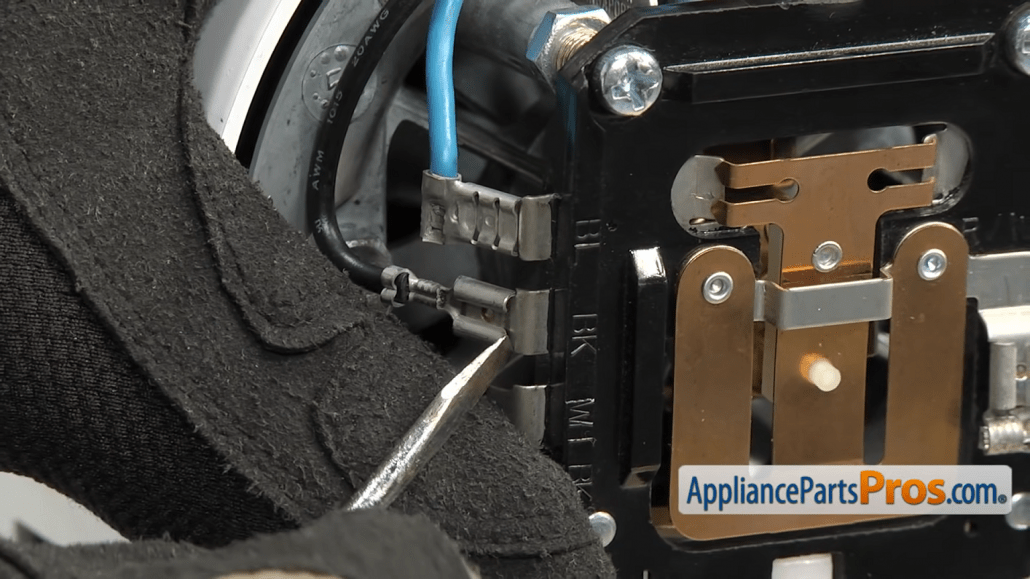
Next, disconnect the grounding wire and the bottom two wires on either side of the board. You can do this by popping most of them off with a flathead screwdriver. A Phillips screwdriver will be needed to disconnect the grounding wire. Once all wires are disconnected, carefully move them out of the way.
With the wires out of the way, the motor housing seal can be removed and set aside. If it is damaged or missing, now would be a good time to replace it with a new motor housing seal. You can also check out our video guide to replacing a motor housing seal on our YouTube channel!
Step Three: Remove the retaining spring from the speed control plate
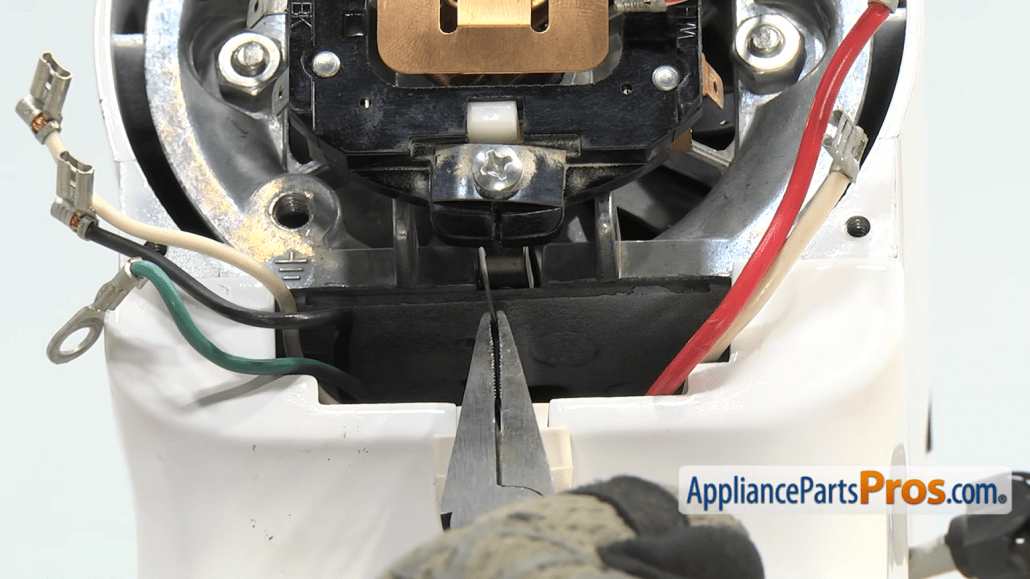
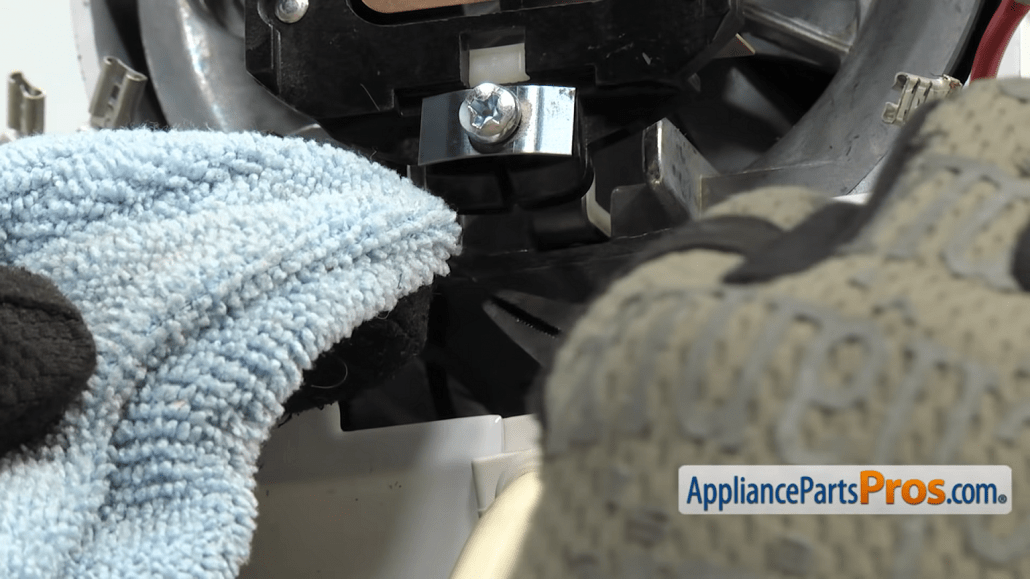
Have your towel and needle-nose pliers ready for this step! At the bottom of the speed control plate is a spring which you will need to remove with a pair of needle-nose pliers.
Do not let this spring slip away into the machine! You’ll have to disassemble much more of the mixer if this happens. To keep it from getting away, use your rag or towel as an anchor. Hook the spring into the towel, and let the towel hold the spring.
Step Four: Removing the remaining speed control board wires
There should be four more wires still connected to your speed control board at this point, assuming you haven’t disconnected them already. You can go ahead and remove those now. Again, to make this process easier, pop each wire off with a flathead screwdriver or pair of needle-nose pliers.
Step Five: Measure the distance of the upper two screws
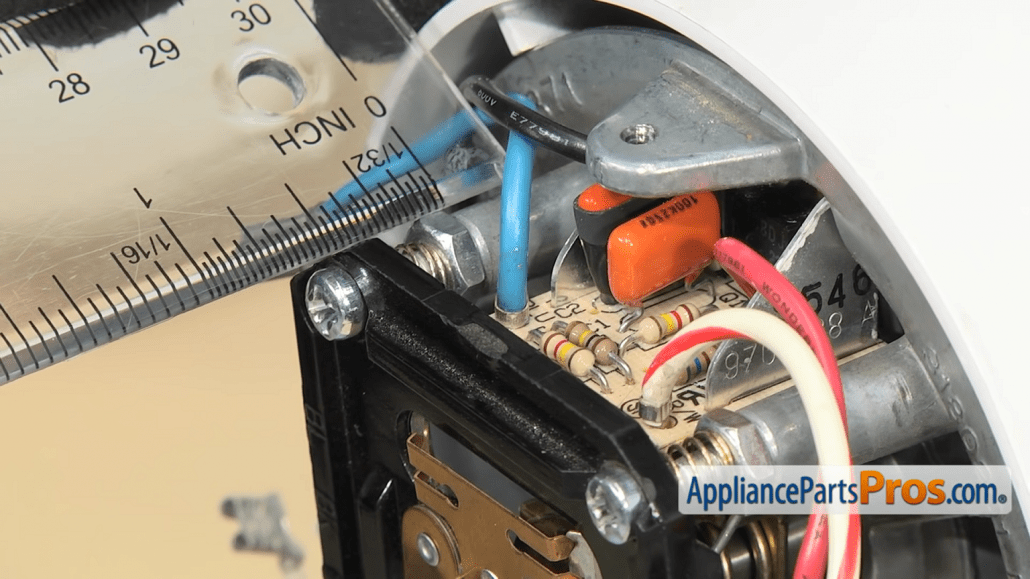
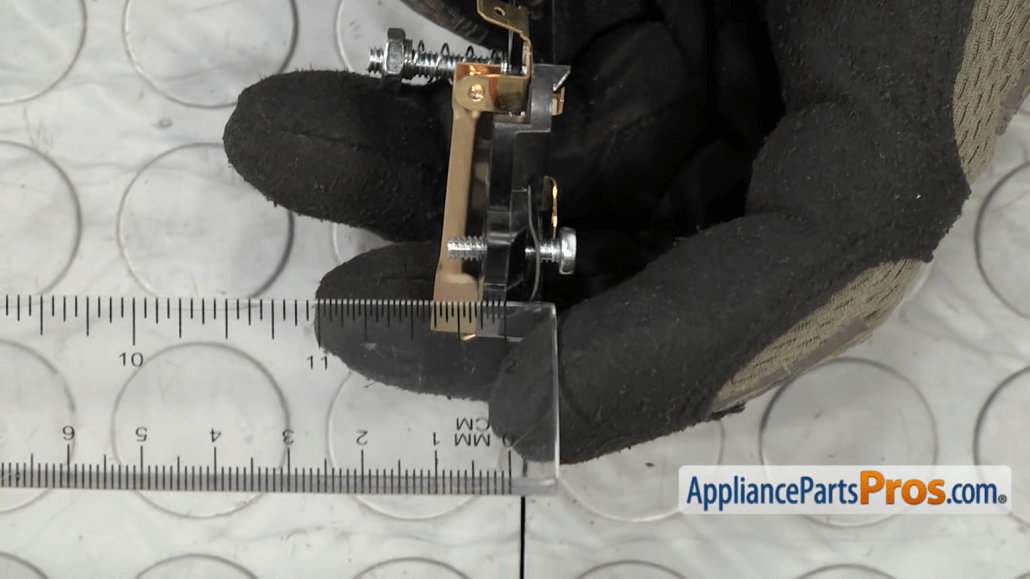
The speed control board is held in place by a few spring-loaded speed control bolts. These bolts should be adjusted to a specific length. Consult your appliance’s manual for the default length (ours was ¾-inch), but you should also measure these bolts yourself, and write that number down.
To do this, use your ruler to measure the distance between the end of the mounting post for the screw to the back of the speed plate. When you install the new plate, you’ll want to make sure it is installed with the bolts at the same length.
Step Six: Remove the old speed control plate
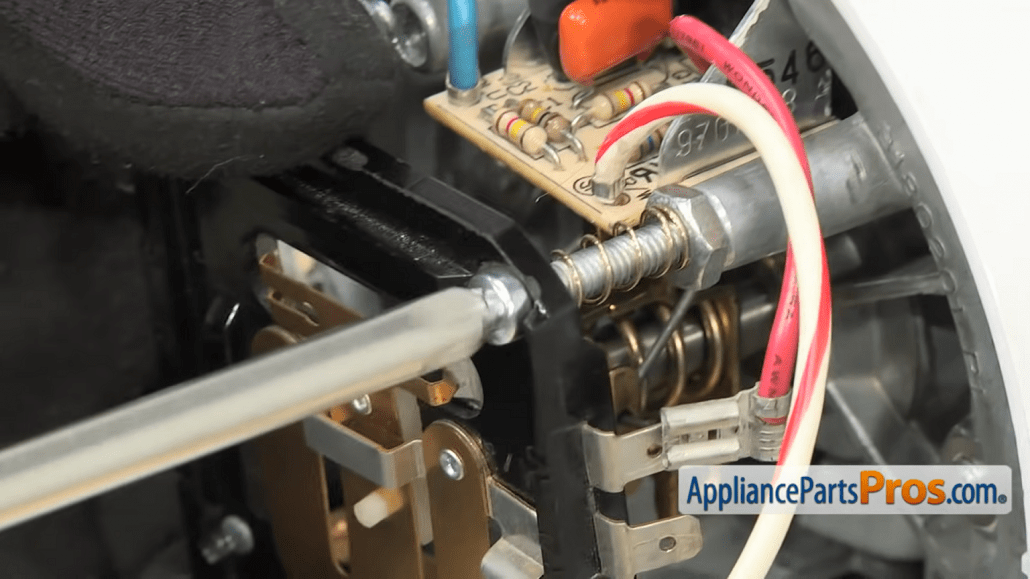
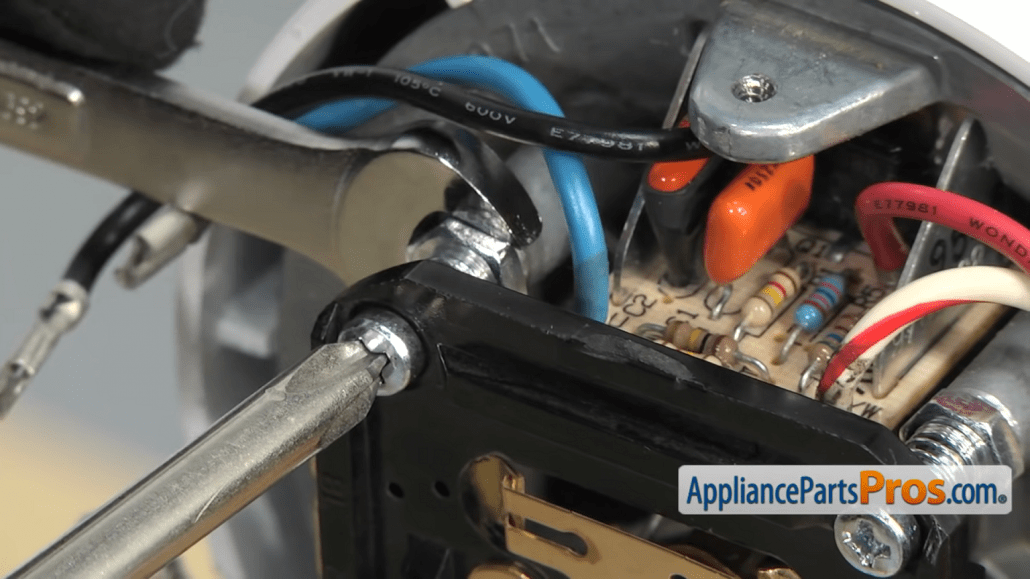
With the distances of the speed control bolts recorded, you can now remove the old speed control plate. Use a Phillips screwdriver to loosen each bolt one at a time, taking care not to lose the nut at the end. Once they’re both loosened, the old speed control plate should come away by hand.
Step Seven: Prep the new speed control plate
You may need to do a bit of prep work for your new speed control board. Take care of the following, if necessary:
- First of all, on the old board, measure the distance the bottom screw juts out from the plastic plate. Write this number down. On ours, the distance was 9/32-inch.
- Next, check the bottom screw on your new speed control board. Does it have a metal spring lock mechanism creating space between the board and the screw itself? If not, you’ll need to remove the spring lock mechanism from the old board and install it on the new board.
- Adjust the lower screw on the new control plate until it is the same length as the lower screw was on the old speed control plate.
Step Eight: Mount the new speed control board on the mixer
Seat the new speed control board onto the back of the mixer. The white adjuster lever on the back of the mixture should fit onto an opening in the center of the speed control board.
Once it’s seated, tighten down the two upper bolts. Don’t screw them in all the way – shoot for roughly the same distance as the bolts were on the old speed control board. They don’t have to be perfect right away. When the board is secure enough that you don’t need to hold it in place, you can use your ruler to adjust the bolts to the proper length.
To secure these bolts, use your 11/31-inch wrench to snug the locking nuts down. You may need to keep the bolts from spinning while you do this. Steady each one with a Phillips screwdriver. Once the nuts are secure, be sure to double-check the length with your ruler.
Step Nine: Reattach the top four wires to the speedplate
Slide each one on by hand, then push them on the rest of the way with a flathead screwdriver. If any of them seem loose, you can use your needle-nose pliers to gently press and tighten them.
Step Ten: Reattach the bottom retaining spring to the plate
Retrieve the spring by carefully lifting the towel out of the mixer and grabbing the spring hook with the needle-nose pliers as soon as you are able. You can then set the towel aside and seat the spring on the bottom of the new speed control plate. Make sure it’s properly seated on the groove just below the lower screw.
Step Eleven: Reinstall the motor compartment seal and lower wires
Carefully line it back up, move the lower wires out of the way, then press it into place. Once it’s properly seated, attach each of the four lower wires using the same method you used when reattaching the upper wires. Don’t forget to reattach the ground wire as well and screw it down!
Step Twelve: Reinstall the trim band
Line the trim band up at the front, making sure it’s seated properly, then wrap the end tabs around the back of the mixer. Once it’s properly seated, you can reinstall the two screws that held it in place.
Step Thirteen: Test and adjust the speed of the mixer
In order to ensure everything is properly calibrated, you’ll need to test and potentially make a few more adjustments at this point. So, first, make sure your mixer’s speed lever is in the off position and then plug it back in.
At the lowest speed setting, your mixer should be doing one full turn per second. You can test this by setting your mixer to Stir and counting out how many revolutions you get in 15 seconds. At speed setting six, your mixer should be doing 180 revolutions per minute. So you should be counting 45 revolutions across 15 seconds when set to speed six. If it’s not hitting one revolution per second on Stir and 45 revolutions across 15 seconds at speed six, you’ll need to adjust.
The upper screws control the slower speeds while the lower screw controls speed ratings for setting six and above. Loosening the screws or adjusting them out increases speed, while tightening them slows it down. If you do need to adjust, do so in quarter turns.
Don’t forget to check out our tutorial video for a detailed look at how this is done!
Step Fourteen: Reinstall the back cover
Seat the back cover from the bottom, making sure the motor compartment seal and all wires are in place, and then rotate it up. Finish up the job by installing the Phillips screw at the top of the mixer’s back cover. You’re all done!
Wrapping Up
Fixing your stand mixer yourself can net you some serious savings, and the work isn’t half as hard as it might seem! We hope this guide has helped you solve issues with your mixer’s speed control board. If you need any more help, don’t hesitate to get with us for additional technical advice! At AppliancePartsPros.com, we’re happy to help you fix your appliances yourself.
If you need any replacement parts for your appliances, you can enter your model number at AppliancePartsPros.com to locate and order them quickly. Most orders arrive in just two business days, and we have tons of great information in our repair help section and YouTube videos to help you troubleshoot.
Stay connected with the latest DIY tips, tutorial videos, and repair guides by following us on Facebook, Instagram, and Twitter. We love hearing about your repair stories and successes. If you need more help or want personalized guidance, feel free to contact or call us at 877-477-7278. We’re ready to help you take on your next project with confidence!
Since 1999, AppliancePartsPros.com has helped millions of people repair their broken appliances by providing high-quality original parts at well below retail prices, free support and troubleshooting, and award-winning customer service from an expert, friendly, US-based customer support team!
Hi! I’m Matt H., and I’m thrilled to be your guide through the world of appliance repair with over 25 years of invaluable experience in the industry.
From the early days of my career, I have been deeply passionate about appliances and their inner workings. Over the years, I’ve seen it all – from vintage models to the latest cutting-edge technology – and I’ve dedicated myself to mastering the art of repair. With a toolbox in one hand and a wealth of knowledge in the other, I’ve tackled every challenge that has come my way, learning and growing with each repair.
Join me as we dive into the intricacies of appliance repair. From step-by-step repair guides to explanations of common problems and their solutions, I’ll be here to simplify the repair process and empower you with the knowledge you need to keep your appliances running smoothly.
Feel free to explore our blog, ask questions, and leave comments – this platform is a space for learning, sharing, and growing together. Let’s work together to ensure that your appliances continue to serve you for years to come.
Thank you for joining me on this journey, and I look forward to being your go-to resource for all things related to appliance repair!

