DIY MrCool Units: Do Your Own Heating and Air Conditioning
Steven E / Thursday June 1, 2023
With summer heat just around the corner, you might want to consider a do-it-yourself project to beat the heat!
MRCOOL offers a diverse range of air conditioners and heat pumps suitable for both residential and commercial applications. What sets their products apart is the ease with which they can be installed. Designed to require minimal tools and no special knowledge or experience, MRCOOL’s DIY systems provide a hassle-free installation process. Not only do these systems offer energy-efficient solutions, helping to reduce electricity bills, but they also provide advanced features to enhance user convenience such as Wi-Fi compatibility, voice control, remote access, and more.
In this article, we will delve into the benefits of MRCOOL’s DIY products and explore how individuals utilize these innovative solutions. Whether you’re seeking cost-effective cooling or efficient heating options, MRCOOL’s DIY systems provide a reliable and customizable solution that you can easily install yourself for a comfortable living or working space.
What is MRCOOL?
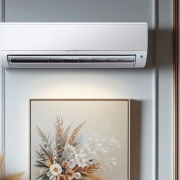
MRCOOL is an innovative ductless system for air conditioning and heating available as DIY kits. MRCOOL kits offer a high-efficiency heat pump with variable-speed operation. It allows the user to control temperature and humidity levels. These systems are designed to be easy to install with minimal disruption of existing home architecture. With the potential for significant energy savings, MRCOOL systems provide an efficient way to heat and cool homes.

The MRCOOL system consists of outdoor condensers, indoor air handlers, wall-mounted thermostats, and installation accessories. Depending on the model chosen, these components may either come pre-assembled or need assembly by the user. The different models also vary in capacity. They also have features such as Wi-Fi compatibility and many zone options. Installation can be done by one or two people. This depends on the size of the system and the complexity of the installation process.
Benefits Of Installing A MRCOOL System
Installing a MRCOOL DIY system offers homeowners many benefits. It is easy to set up, saves money, and provides optimal cooling.
First, the MRCOOL DIY system is easy to install. It requires no tools or complicated wiring and the components are simple to assemble. The instructions are straightforward. They can be followed by anyone with basic technical knowledge. Installing an MRCOOL system can save money in several ways:
- Lower electricity bills – The system uses less energy than traditional air conditioning systems. It helps reduce monthly electricity bills.
- Reduced maintenance costs – The system does not need complex wiring or professional installation. There are no contractor fees or service charges for maintenance.
Increased home value – Installing a high-efficiency air conditioning system can boost a home’s resale value.
Finally, installing an MRCOOL DIY System ensures optimal cooling throughout the house. This is due to its design which distributes cool air throughout each room of the house. This ensures that all areas of the house remain comfortable during hot days and nights.
Types Of MRCOOL Systems
MRCOOL offers a variety of do-it-yourself systems designed to make installation easy and simple. The company has two types of DIY systems – multi-zone and single-zone. Multi-zone systems are ideal for larger homes that need many air conditioning units in different areas or rooms. Single-zone systems are great for smaller homes that need only one air conditioning unit.
Multi-zone MRCOOL systems come with all the necessary components to install up to four indoor air handlers. It also comes with one outdoor condenser unit. Easy-to-follow instructions for each step of the installation process come with the unit. This makes it easy for homeowners to install it themselves. The system supports up to five zones. These allow homeowners to customize their needs across their homes as needed.
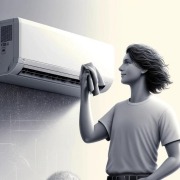
Single-zone MRCOOL DIY systems come with all the necessary components for installation. It includes an outdoor condenser unit and an indoor wall unit. The system is designed for easy installation. It’s perfect for those who want to save money by doing the job themselves. Additionally, the system can be upgraded in the future if you ever decide you need more cooling power or coverage in your home.
Selecting The Right Model For Your Home
With a variety of models and sizes, there are many factors to consider. The most basic component of the MRCOOL DIY Mini Split is the air handler. This houses all the electrical components that make installation easy. It’s important to select a handler that is the right size for your home. The size of the space that needs cooling should be considered when choosing an air handler. Identify obstacles that might affect airflow in the room or area.
The next component is the heat pump. This comes in either an indoor or outdoor unit. It depends on how much cooling is required and where it will be installed. They are more efficient since they don’t need extra ventilation for their operation. Outdoor units may also provide better efficiency if used in locations with warmer climates. It’s important to consider local climate conditions when selecting a heat pump model. Local climate will impact its performance and energy efficiency levels.
To select a model based on your cooling needs, it’s also important to consider installation requirements. These include access to power outlets and placement of components within your home or work environment.
Measuring For Proper Installation
The MRCOOL system consists of various components. These include outdoor condensers, indoor air handlers, wall-mounted thermostats, and installation accessories. When installing an MRCOOL DIY, it’s crucial to take accurate measurements of the necessary space. This helps to ensure a successful installation. For the outdoor unit, take measurements of the installation area. Maintaining proper clearance from combustible materials. Consider the electrical conduit or line set as well.
For indoor components, there should be enough space between the evaporator coil and the air handler cabinet. There should also be enough space between the air handler and the ceiling. Be aware of any other obstructions. Factor in extra components such as condensate pumps or zone controllers. Proper measurements can help avoid issues during installation and ensure a successful project. Having accurate measurements also allows for adequate preparation and research before beginning the installation process.
Gather Necessary Parts, Tools, And Equipment
To begin an MRCOOL DIY mini-split installation, gather the necessary parts and equipment. Basic components include indoor and outdoor units, connecting refrigerant lines, and wiring. You might also need extra items such as mounting brackets depending on the model. Tools for cutting and drilling, as well as caulk and sealants, should also be on hand. Remote controllers with wall-mounted thermostats are also necessary for convenient wireless access. If the model includes a heat pump, extra insulation, and a drain line will also be required for proper installation.
The installation process of the MRCOOL system requires special tools and equipment. These include tools such as a screwdriver, drill, extension cords, adjustable wrench, pliers, and wire cutters. Connect the digital assistant to the internet to access the MRCOOL app. The app provides installation instructions and troubleshooting tips. Gathering supplies such as screws, adhesive strips, and mounting brackets in advance. Gathering in advance ensures that all parts are ready when needed during installation. It may also be necessary to buy extra parts such as filters and hoses. This can be because they are not included in the unit or for replacement during installation.
Prepare Your Living Space
Before installing a new MRCOOL, it is important to prepare the living space for the installation. This includes assessing any potential hazards and addressing them. Additionally, it requires a certain amount of planning to ensure that the installation will be successful. Planning will help provide perfect comfort in the home.
Take the following steps before proceeding with the installation of a MRCOOL DIY:
- Clear away any obstacles:
- Remove furniture or other items that may impede access to the installation location.
- Make sure there are no combustible materials near the area where indoor and outdoor units will be placed.
- Inspect power sources:
- Make sure all electrical wiring is up to code.
- Check that applicable circuit breakers can handle additional load from MRCOOL DIY.
It is also important to have an understanding of local building codes, zoning ordinances, and regulations. Understanding helps avoid any potential issues with installing a new MRCOOL DIY unit. Taking these steps before starting the installation process will help ensure that everything goes as well as resulting in optimal performance from your new star-rated DIY system. With this preparation complete, it is time to move on to installing the outdoor unit.
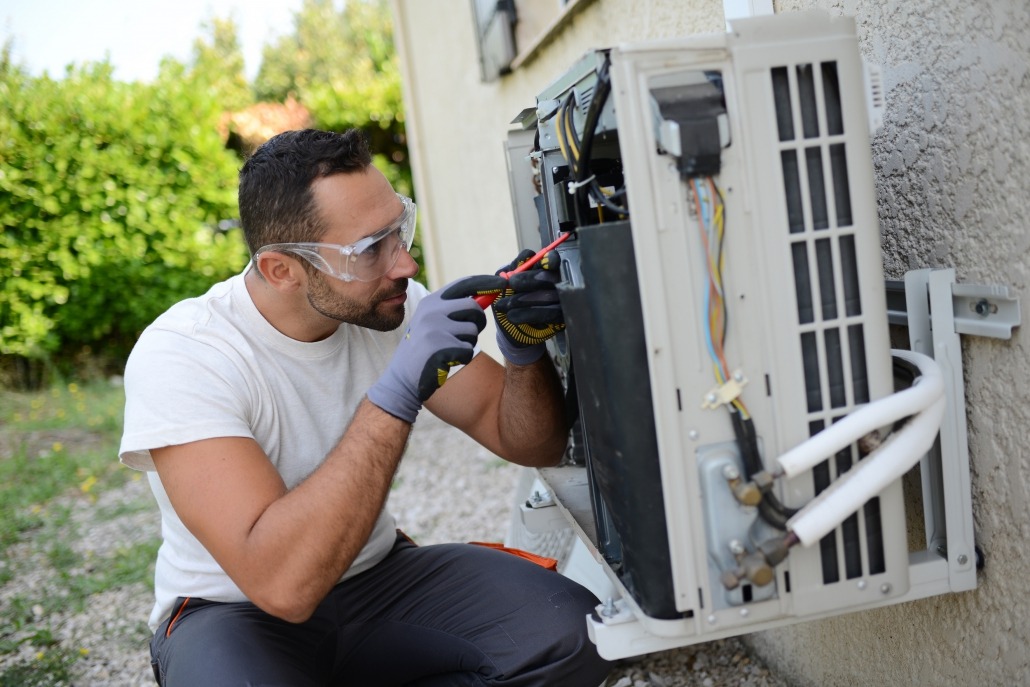
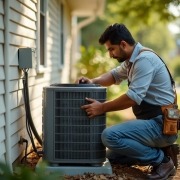
Install The Outdoor Unit
Installing a MRCOOL DIY Ductless Heat Pump is a straightforward and easy task. With the right tools, one can do the process in no time. As with any installation, it is important to be mindful of safety measures during the entire process. Take higher mechanical protection precautions when installing the outdoor unit. This helps ensure that the heat pump operates efficiently for many years to come.
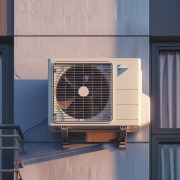
The first step in installing the outdoor unit of a MRCOOL Heat Pump is to locate a suitable spot for its installation. The location should be away from any external sources of obstruction like trees or bushes. Additionally, it should have enough space for optimal ventilation and cooling effects as well as access to a power source.
Once the location is identified, one needs to mount the outdoor unit onto its base plate at an appropriate height above ground level. Secure it tightly with screws. After that, connect wires from indoor units and other components such as relays and contactors to the outdoor unit’s terminal board. This will enable power flow between all components of the system. To ensure that everything is correct, one should consult their owner’s manual before proceeding further.
Finally, mount all covers securely into place. This will protect all internal components from dust and debris. It also preserves their functionality over time. With these steps complete, one can then move on to connecting the indoor units to their respective outdoor units.
Connect The Indoor Unit To The Outdoor Unit
Connecting the indoor unit to the outdoor unit is an essential step in installing an MRCOOL heat pump system. This process involves connecting all the necessary tubing, wires, and electrical components. Before connecting the two units, it is important to ensure that they are both level and secure.
To begin, it is necessary to locate a suitable location for both the indoor and outdoor units. This should be somewhere that allows easy access to the electrical outlets. It needs to also have adequate ventilation for the proper operation of both units. It is also important to consider any potential obstructions in the area where the two units will be installed. These may interfere with their operation.
Once everything is in place, it is time to connect all the tubing, wires, and electrical components between the two units. It’s important to make sure that all connections are properly sealed and insulated for optimal performance. Additionally, take extra measures such as using waterproof tape or heat shrink tubing to protect against any moisture damage or corrosion over time. Here are some tips for this step:
- Install all wiring according to the manufacturer’s instructions
- Check connections for loose cables or connections
- Ensure all tubes have been correctly connected and fastened
- Follow safety protocols when dealing with electricity
Seal And Insulate All Tubing And Wiring
Sealing and insulation of all tubing and wiring is an essential step to the installation of the MRCOOL DIY 3rd and 4th gen. Before connecting the indoor unit to the outdoor unit, it is important to seal each joint between the tubing. This will help ensure that no moisture can seep into the system and cause damage. In addition, apply insulation over any exposed wires or tubing to protect against short circuits, electrical shocks, and potential fire hazards.
Secure the internet connection for multiple rooms before sealing and insulating tubing/wiring. Achieve connectivity in rooms by either connecting a wireless router or wiring extra adapters into the main router. Ensuring a secure connection with minimal drop-offs is key for optimal comfort in all rooms.
To prevent any damage, it is important to test each component of the system before completing the full installation. This includes testing all connections from both indoor and outdoor units. It also includes checking for proper airflow from vents in each room.
Start-Up And Test The System
Starting up and testing the system can be an intimidating process, but don’t worry. The following is a step-by-step guide to ensure that your new system is set up correctly:
- Check all connections and make sure the system components have been properly installed according to directions.
- Turn on all power switches to ensure that all components are receiving power.
- Confirm that all connections have been made tightly and securely.
- Verify that the thermostat settings are correct for the ideal system performance.
NOTE: It is important to make sure you thoroughly read through any instructions before getting started and if any questions arise along the way, consult a professional for assistance. This ensures you get the best out of your new equipment in terms of both safety and performance.
Troubleshooting & Maintenance Tips
An astounding 82% of air conditioning systems need some form of cooling maintenance at least once a year. MRCOOL installations are no exception to this rule. To ensure that your system runs, it is important to be proactive in troubleshooting and maintaining the unit.
The first step in troubleshooting is to inspect the inside unit for any signs of dust or dirt buildup. If you find any, use a vacuum cleaner with a brush attachment to remove the debris from the unit’s coils and fins. Additionally, check if the filter needs cleaning or replacing. Make sure you follow the manufacturer’s instructions when replacing filters.
You can also pair your installation with Google Assistant devices. To enable voice commands via your smartphone or other compatible devices. This allows you to conveniently adjust settings from afar and helps you stay on top of any issues that may arise within your system.
Final Thoughts On DIY MRCOOL Installation
MRCOOL DIY systems feature makes installation and maintenance easy even for the non-professional. If anything should go wrong, the original registered owner is provided with a limited warranty. This covers any defects in material and workmanship. Additionally, MRCOOL systems are compatible with Amazon Alexa and Android smart devices. These both it possible to control your system from anywhere by voice command.
Maintenance of the DIY series is simple. The manufacturer recommends tuning up the system at least once a year or as needed. This includes checking all the wiring to ensure it is secure and without fraying, cleaning or replacing air filters regularly, and replacing batteries if necessary. It is also important to test for leaks and check for signs of wear in all components of the system.
The MRCOOL DIY series offers a wide range of advantages for those interested in installing their own HVAC system. They include ease of installation, cost savings, and reliable service backed by a limited warranty. In addition to these benefits, MRCOOL provides comprehensive instructional guides and online resources to help make sure your DIY installation goes smoothly.
More Information
If you are interested in learning more about the installation as well as purchasing a MRCOOL unit, feel free to check out our other blog post by clicking here. This blog post breaks down step-by-step installation instructions as well as links with specific sizes to purchase. If you have any other questions, don’t hesitate to contact us at AppliancePartsPros.com. Additionally, click here to purchase a unit.
With nearly a decade of experience in providing top-notch customer service regarding appliance parts and repair, Steven enjoys sharing practical advice, troubleshooting tips, and interesting information to help readers stay informed.


Leave a Reply
Want to join the discussion?Feel free to contribute!