A Simple Guide to Dishwasher Drain Cleaning in Minutes
Steven E / Wednesday April 16, 2025
When your dishwasher isn’t draining properly, it can quickly disrupt your daily routine. Instead of scrambling for expensive repairs, you can take a DIY approach to clear clogs and restore efficiency. We’ll cover some effective, step-by-step methods that you can use to get your dishwasher back in top shape. Let’s roll up our sleeves and get into it!
Common Causes of Dishwasher Drain Issues
Over time, your dishwasher drain can become clogged due to several reasons. The most common causes include:
- Food Debris: Leftover particles and large chunks from un-rinsed dishes can settle into the filter and drain.
- Grease Buildup: Oils and fats from food solidify inside the filter, pump, and drain hose.
- Mineral Deposits: Hard water often leaves behind mineral buildup and scale in critical areas.
- Foreign Objects: Small items like plastic pieces, glass shards, or even label remnants can obstruct the drain.
- Kinked Drain Hose: A bent or crushed hose restricts water flow, causing backups in the system.
- Clogged Garbage Disposal Inlet: If your dishwasher drains through the disposal, any clogs there can block proper drainage.
- Blocked Air Gap: An air gap fixture on your countertop might accumulate debris, leading to poor water flow.
1: Clean the Dishwasher Filter
The filter’s job is to trap food particles and prevent them from reaching the pump and drain. Over time, however, its buildup of debris can cause water to have difficulty exiting the dishwasher.
- Remove the Bottom Dish Rack: This gives you full access to the filter assembly.
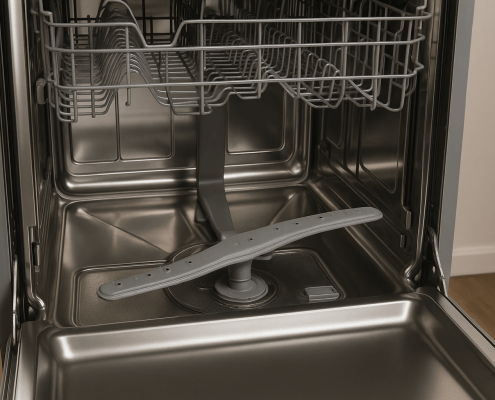
- Locate the Filter: Look to the area on the bottom of the dishwasher, usually beneath the lower spray arm. You might see a cylindrical filter paired with a flat mesh screen.
- Unlock and Remove the Filter: Following the manufacturer’s instructions (usually involving a twist or a simple click), gently remove the filter.
- Rinse Under Hot Running Water: Use an old toothbrush and a small amount of dish soap to scrub away persistent grease or food residue. Avoid any abrasive scrubbers that might damage the mesh.
- Clean the Sump: While the filter is out, wipe down the area where it sits (the sump) with a damp cloth or paper towel to remove any loose debris.
- Reinstall the Filter: Ensure the filter is securely locked into place before resuming normal use.
2: Clear the Drain Basket / Sump Area
Even if the filter is in good condition, larger debris like glass shards, plastic pieces, or even leftover bones may settle in the sump area. These blockages can impede water flow, causing standing water and odors.
- Inspect the Sump: With the filter removed, shine a flashlight into the sump area to search for any visible obstructions.
- Remove Standing Water: Use paper towels or a wet/dry vacuum (suitable for water) to soak up any accumulated water.
- Manually Remove Debris: Gently pick out any large particles or sharp objects. Always use caution to prevent injury.
- Check the Lower Spray Arm: If possible, detach the lower spray arm for better access and to ensure no debris is hidden underneath.
3: Use a Vinegar and Baking Soda Flush
A mixture of vinegar and baking soda is a tried-and-true natural cleaning solution. It’s effective at breaking down grease, mild clogs, and even neutralizes odors, all without harsh chemicals.
- Empty the Dishwasher: Make sure no dishes are inside, as you want the mixture to work directly on the drain build-up.
- Add Baking Soda: Pour around 1 cup of baking soda into the bottom of the dishwasher, concentrating near the drain/filter area.
- Add Vinegar: Slowly pour 1 to 2 cups of white vinegar over the baking soda. Watch as it fizzes, this reaction helps to loosen grease and residue.
- Let It Sit: Allow the mixture to work for 10-20 minutes. This waiting period enables the chemical reaction to break down dirt.
- Flush with a Hot Cycle: Run a hot water or “rinse-only” cycle so the mixture can fully clear out the drain.
4: Inspect the Garbage Disposal Connection
For many dishwashers, the drainage system connects to the garbage disposal. If the disposal is clogged or improperly set up, it can cause backflow into your dishwasher.
- Identify the Connection: Locate where the dishwasher drain hose connects to your garbage disposal. Typically, this is on the side of the disposal unit.
- Test the Disposal: Run cold water and briefly activate the disposal to clear out any food waste.
- Check the Knockout Plug: If your dishwasher is new or if problems persist, the inlet may still have a knockout plug. Important: Ensure that both the dishwasher and disposal power are off before proceeding.
- Disconnect the Hose: With a bucket and towels on hand, remove the drain hose from the disposal to inspect the connection.
- Remove Any Obstructions: Look inside the inlet port for any residual plastic or food debris. If you find a plastic plug, use a screwdriver and hammer to gently dislodge it, knocking it into the disposal, and then remove any pieces with pliers.
- Reconnect Securely: Once the inlet and hose are clear of clogs, reconnect them firmly.
5: Clean the Air Gap (If Applicable)
An air gap is a small fixture on your countertop that keeps wastewater from re-entering your dishwasher. Over time, sediments and debris can clog this device, affecting overall drainage.
- Locate the Air Gap: Find the air gap, usually mounted near the sink. It often has a decorative metal cover.
- Remove the Cover: Gently pull off or unscrew the metal cap.
- Unscrew the Internal Cap: Remove the plastic cap beneath the metal cover so you can easily access the tubes inside.
- Clean the Tubes: Use a stiff brush (a bottle brush or pipe cleaner works well) or, if needed, a piece of wire to dislodge any debris from the tubes. Make sure both the inner and outer tubes are thoroughly cleared.
- Reassemble the Air Gap: Once clean, piece the air gap back together by reinstalling the plastic cap and metal cover.
6: Check and Clear the Dishwasher Drain Hose
The drain hose is a key player in your dishwasher’s function. Over time, grease, food particles, and mineral deposits can accumulate inside it. Additionally, a kink or sharp bend in the hose can significantly restrict water flow.
- Prepare Your Workspace: Ensure the power to the dishwasher is off. Locate the drain hose running from the dishwasher to the sink area. This hose might connect to an air gap, trash disposal, or a branch in the sink drain.
- Inspect the Hose Visually: Check for any obvious kinks or bends. A straight, unobstructed hose is key for efficient drainage.
- Position a Bucket: Place a bucket or shallow pan beneath the connection point to catch any water that may leak during the cleaning process.
- Disconnect the Hose: Remove the hose clamp (using a screwdriver or pliers as necessary) and slowly disconnect the hose from its connection point.
- Examine the Hose End: Look inside the hose and at the connector for any visible blockages. Use your hands or a small tool to remove any debris gently.
- Test the Hose: Blow through the hose from the dishwasher side. Resistance indicates a likely clog.
- Clear the Clog: If necessary, gently insert a flexible drain snake or a straightened coat hanger (use caution to avoid puncturing the hose) to dislodge the blockage. If the clog is tenacious, take the hose outside and flush it with a garden hose.
- Reconnect the Hose: Once clear, securely fasten the hose back using the hose clamp. Ensure that the hose forms a high loop under the counter, which helps prevent backflow.
7: Use a Commercial Dishwasher Cleaner
Specialized dishwasher cleaners are formulated to combat hard water scale, soap scum, and persistent buildup throughout the dishwasher, including the drain line. These cleaners are ideal for routine maintenance and for addressing minor residual blockages that other methods might miss.
- Purchase a Suitable Cleaner: Look for a commercial dishwasher cleaner brand such as Affresh, Finish, or Lemi Shine. These products are designed specifically for dishwashers and are widely available.
- Follow the Manufacturer’s Instructions: Typically, you will place the cleaner (in tablet, powder, or liquid form) into the empty dishwasher. Be sure to read all instructions before starting.
- Run a Hot Water Cycle: Activate the hottest cycle available, which allows the cleaner to break down and flush away mineral deposits, soap scum, and grease inside the machine and along the drain line.
- Enjoy a Fresher Dishwasher: After the cycle, you should notice improved performance and a fresher smell, a sign that your dishwasher’s internal passages are clear.
Keep In Touch
Keeping your dishwasher draining properly doesn’t have to be complicated. With just a few minutes of simple cleaning, you can prevent clogs, eliminate odors, and keep your appliance running like new with no fuss.
If you need any replacement parts for your appliances, you can enter your model number at AppliancePartsPros.com to locate and order them quickly. Most orders arrive in just two business days, and we have tons of great information in our repair help section and YouTube videos to help you troubleshoot.
Stay connected with the latest DIY tips, tutorial videos, and repair guides by following us on Facebook, Instagram, and Twitter. We love hearing about your repair stories and successes. If you need more help or want personalized guidance, feel free to reach out. We’re ready to help you take on your next project with confidence!
The information in this article may not apply to your specific appliance model. We recommend consulting your manufacturer’s documentation or contact us with any questions.
With nearly a decade of experience in providing top-notch customer service regarding appliance parts and repair, Steven enjoys sharing practical advice, troubleshooting tips, and interesting information to help readers stay informed.


