Dishwasher Not Drying Dishes Properly: Top 5 Reasons and Fixes (With Video!)
APP Expert / Tuesday November 9, 2021
Tired of opening your dishwasher only to find a soggy mess instead of sparkling, dry dishes? You’re not alone, and the good news is, there’s a solution at hand. Discover the common culprits causing this household headache and watch our simple step-by-step video below to learn how to DIY your way to perfectly dry dishes every time.
A dishwasher that is no longer drying dishes properly can be a real drag. No one wants to grab a towel and dry dishes before putting them away. Outside of improper loading of the dishwasher, there are five components that are commonly associated with a dishwasher not drying adequately. Unplug your dishwasher and turn off the water supply to start working to diagnose the problem. Once your dishwasher is safe to work with, proceed with this easy guide to figure out which part is having trouble and save money fixing it yourself.
Once you have identified the part needed for your dishwasher, search below using your specific dishwasher model number to identify the exact part needed:
1. Heating Element
The heating element in the dishwasher is responsible for generating all of the heat for both the washing and drying cycles. If the element goes bad, it may result in the dishes not drying properly or leaving water droplets. You can test the heating element for continuity using a multimeter, but be sure to disconnect the appliance from the power supply first.
Once the dishwasher is unplugged, located the heating element in the bottom of the washer tub. Some heating elements are covered while others are left exposed. If yours has a cover you will need to remove it to test the unit. Then, take off the lower access panel so that you can disconnect the wires going to the heating element. This will allow you to test the terminals using a multimeter.
Set the multimeter to Rx1 and touch the terminals with the probes. Determine what reading you should be looking for by checking your owner’s manual because all models are different. The reading should not be zero or infinity, as both of those results point to a defective part. If you do get a bad reading, you will need to replace the heating element.
2. High Limit Thermostat
The dishwasher has a high limit thermostat built in as a safety feature to keep the dishwasher from getting too hot. In the event that the thermostat is malfunctioning, the heat could be shut off before the dry cycle is completed. You can test this part with a multimeter to ensure that it is not the problem.
Unplug your dishwasher and then determine the location of your high limit thermostat. In most dishwashers, the part can be found by removing the lower access panel. Remove the thermostat from the unit and check for visual signs of damage or disrepair. Set the multimeter to the Rx1 setting and check the terminals of the thermostat. Make sure that the thermostat is at room temperature when testing. You should get a reading of infinity.
Another test is to put the thermostat next to a warm lamp, which should cause it to read at zero. If you get anything other than these two readings, the thermostat is likely faulty and will need to be replaced in order for the drying function to work properly.
3. Main Control Board
In the event that the electronic panel becomes damaged or shorts out, you may not be able to properly activate the dry cycle. The main control board acts as the brains of the dishwasher and tell the unit when to switch cycles and turn on and off the heated drying cycle. You may find that the display or button is defective, or that there is damage or a defect in the control board that is causing the drying cycle not to work as it should.
Unplug the dishwasher from the wall and then take the time to remove the inner panel on the door, which will provide you with access to the electronic control board and digital display panel or control panel that handles the various functions of the machine. Look for obvious signs of damage, loose or missing wires, shorted connections, corrosion, and other potential issues that could arise. Any of these could indicate a problem with the control board.
These parts are not easy to test so it is best to check every other possible issue first and make sure that you rule the rest out. Even if you don’t see any physical signs of damage, an improperly working dishwasher could still point to a damaged control board. If nothing else has resolved the issue or if you see obvious damage on your electronic parts, they will need to be replaced.
4. Active Vent
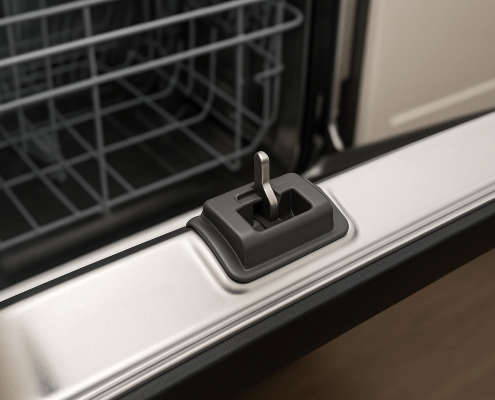
This is the vent that opens to allow the hot moist air circulation into the dishwasher. This happens during the drying cycle. The part usually consists of the plastic body and the wax motor that makes the vent open and close. It’s usually located in the control panel or behind the front panel.
If the vent isn’t opening or has failed, it could be causing the dishes not to dry properly. Inspect the vent for visual damage first and if nothing is found, test is using a multimeter. You’ll need to check your tech sheet to figure out which reading you should expect. If the reading is incorrect, this means the motor is bad and your active vent will need to be replaced.
5. Touch Pad
This is what you use to select a wash cycle on the dishwasher. It’s part of the control panel, and may even come as an individual stick-on piece. They are located on the front of the unit or the top of the control panel. This could be due to the touch pad failing that doesn’t allow the heating element to turn on. You will have to get the tech sheet and run the diagnostic test specified for your model. In the event that the touch pad fails the test, it could be a sign that the unit needs replaced.
Where To Find Us
If you need any replacement parts for your appliances, you can enter your model number at AppliancePartsPros.com to locate and order them quickly. Most orders arrive in just two business days, and we have tons of great information in our repair help section and YouTube videos to help you troubleshoot.
Stay connected with the latest DIY tips, tutorial videos, and repair guides by following us on Facebook, Instagram, and Twitter. We love hearing about your repair stories and successes. If you need more help or want personalized guidance, feel free to contact or call us at 877-477-7278. We’re ready to help you take on your next project with confidence!
Since 1999, AppliancePartsPros.com has helped millions of people repair their broken appliances by providing high-quality original parts at well below retail prices, free support and troubleshooting, and award-winning customer service from an expert, friendly, US-based customer support team!
Hi! I’m Matt H., and I’m thrilled to be your guide through the world of appliance repair with over 25 years of invaluable experience in the industry.
From the early days of my career, I have been deeply passionate about appliances and their inner workings. Over the years, I’ve seen it all – from vintage models to the latest cutting-edge technology – and I’ve dedicated myself to mastering the art of repair. With a toolbox in one hand and a wealth of knowledge in the other, I’ve tackled every challenge that has come my way, learning and growing with each repair.
Join me as we dive into the intricacies of appliance repair. From step-by-step repair guides to explanations of common problems and their solutions, I’ll be here to simplify the repair process and empower you with the knowledge you need to keep your appliances running smoothly.
Feel free to explore our blog, ask questions, and leave comments – this platform is a space for learning, sharing, and growing together. Let’s work together to ensure that your appliances continue to serve you for years to come.
Thank you for joining me on this journey, and I look forward to being your go-to resource for all things related to appliance repair!


