DIY Dryer Troubleshooting: What Is Causing Slow Drying Times?
Samantha Bullington / Friday September 1, 2023

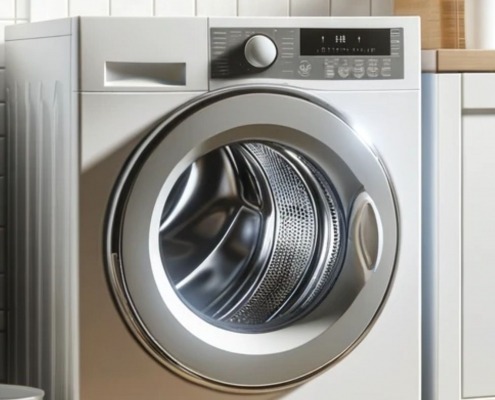
The hypnotic tumbling of wet clothes in your dryer once signaled the end was near for your never-ending laundry days. But lately, you’ve noticed slow drying times, sometimes double or triple a normal load’s time. Instead of neatly dried clothes ready to be folded, you’re faced with frustrating damp piles needing yet another spin.
If your dryer’s suddenly slacking in the drying department, there are easy troubleshooting steps and maintenance tasks that can help you get it back up to speed. By understanding the common causes of this issue coupled and using a bit of targeted detective work, you can get to the bottom of what’s slowing down your dryer.
WATCH: Electric Dryer NOT Drying or Taking Too Long – TOP 7 Reasons & Fixes
What to know about dryer cycle times
It’s important to know how long a drying cycle should take before diagnosing your machine.

Drying time can vary due to factors like the type of appliance you have (gas, electric, etc.), whether it’s vented or ventless (such as a heat pump model), what you’re drying, and how big your load is.
Some things to keep in mind:
- Regular dryers are faster than energy-efficient ones, and vented dryers are quicker than ventless models.
- Lighter fabrics dry faster than bulky items like towels or jeans.
- A common vented electric dryer should take around 30-45 minutes to dry a medium load on regular heat. If the load is heavy and includes cotton or denim, it might take up to an hour to dry.
- If your laundry load is taking longer than an hour to dry, that’s a sign something isn’t right with the machine and requires attention.
WATCH: Gas Dryer NOT Drying or Taking Too Long – TOP 7 Reasons & Fixes
Why your laundry isn’t drying quickly
When your drying cycles start dragging on, there are several common culprits to blame.
SAFETY FIRST: Before inspecting any appliance, removing parts, or attempting repairs, be sure the machine is off and disconnected from the power source. If you have a gas dryer, be sure to turn off the gas valve on the wall.
Disrupted airflow
Lint, the tiny fibers that separate from laundry, inevitably builds up in a dryer. Lint is very flammable, making it a leading cause of dryer and home fires every year.
Don’t let lint accumulate! Make sure to keep dryer parts clean and as lint-free as possible. You should thoroughly clean the inside of your dryer, the blower housings, and the ducting from the back of the dryer to the wall and from the wall to the outside of the house at least once a year.
Here are some ways lint debris can contribute to longer drying times:
Clogged lint screen
The lint screen on your dryer prevents lint and debris from clogging internal workings as air circulates through. Over time, lint inevitably builds up on the screen itself, obstructing airflow and preventing moisture from escaping efficiently, which slows down drying.
Make sure to clean the lint off the screen with a brush or towel after every load of laundry. You should also check the screen for any damage and the housing seals for any gaps that can allow lint to bypass the filter and make repairs as necessary.
Blocked vent duct
Dryers expel hot wet air outside through a vent duct, but lint and other debris can gather inside the duct over time. Heavy vent duct blockages can restrict airflow, forcing the dryer to work extra hard to push moisture out.
Use a vacuum hose to clean out the vent duct once a year by detaching the duct and vacuum from both the dryer and vent hood ends. It’s recommended to use the rigid metal style of ducting to prevent lint buildup and the accidental crushing of the duct. Be sure to check the manufacturer’s instructions before attempting to install new venting.
Unbalanced dryer
When a dryer rocks and vibrates excessively on an uneven floor, it can disrupt airflow and lead to slow drying times. The drum needs to glide smoothly for optimal results.
Make sure the dryer is level by using a bubble leveler on the top. Adjust the legs up or down or add shims if needed to stabilize.
Damaged or clogged blower wheel
The blower wheel circulates warm air through the dryer and out the exhaust vent. It can be found either behind the front panel or behind the rear panel inside the blower housing.
Check the blower wheel for lint clogs and clear them if they’re found. It’s also important to make sure the blower wheel is still well attached to the motor shaft. You can confirm this by spinning the blower, which should make the motor and drum turn. If it doesn’t turn, the blower wheel needs to be replaced.
Worn drum seals
Laundry tumbles in a drum lined with felt seals that prevent the heated air inside from escaping. When the seals become damaged or degraded, they can form gaps that allow air to leak out instead of drying your laundry.
You’ll have to take the dryer apart to inspect the felt drum seals for cracking or gaps and check the drum rim for missing seal strips. Depending on the type of dryer you have, there could be one felt seal on the front panel and another on the back of the drum, one seal on just the front panel or two seals on either side of the drum itself. If you find any worn or damaged seals, replace them immediately. You can find replacement seals at AppliancePartsPros.com by entering your dryer’s model number.
Failing heating element (in electric models)
Electric dryers rely on the heating element to raise the interior air temperature high enough to remove moisture. The heated air then moves into the dryer’s drum. The heating element is made up of a wire coiled inside a metal box, and some units have dual coils.
If the element fails partially or fully, drying times will increase dramatically. You can test the element with a multimeter to make sure it’s carrying electrical current correctly.
Failing gas valve solenoids (in gas models)
The gas valve solenoids are part of the burner assembly and help open up the gas valve so the gas can flow through. The solenoids, located on top of the gas valve, may eventually stop working after one or two heat cycles, which can increase the drying time until they fail.
Bad solenoids can be hard to test since they can have continuity but still fail. You can use a multimeter to test them. Be sure to refer to the manufacturer’s instructions before testing.
Failing thermistor
The thermistor is a sensor that’s responsible for communicating the temperature inside the dryer’s drum. These are usually found in modern dryers with a control board. The thermistor can be found on the blower housing.
To test it, refer to your owner’s manual to see if there’s a diagnostic mode on your dryer. If there’s no diagnostic mode, you’ll have to refer to a temperature and ohm reading chart in the manual before testing with a multimeter.
Failing cycling thermostat
The cycling thermostat controls the temperature in the dryer by cycling the heat on and off. These devices are rated for certain temperatures, usually somewhere between 135-165 degrees Fahrenheit. You can find the cycling thermostat on the blower housing or by the heat source, depending on the dryer model.
When the cycling thermostat fails, the dryer usually won’t heat. A longer drying time could indicate that it’s not cycling properly, though this would be unusual. You can test it with a multimeter after removing it from the dryer.
Moisture sensor (in dryers with auto or timed dry feature)
The moisture sensor lets the dryer know how wet the laundry is and adjusts the drying time as needed. If the sensor isn’t sending the correct signal, it could cause an increase in drying time. For the sensor to work correctly, it has to be clean, the dryer must be level, and there has to be enough wet laundry in the dryer to hit the sensor.
You can find the moisture sensor on the bulkhead in the back of the dryer or on the front of the lint screen housing. Inspect it and clean it with rubbing alcohol if necessary. If it’s damaged, you’ll need to replace it.
Maintain your dryer
You don’t have to continue accepting damp laundry that never seems to fully dry in your dryer. With regular appliance maintenance and immediate attention when the drying time seems slow, you can quickly fix minor problems before they turn into headaches.
We hope this information helped you troubleshoot your dryer! Be sure to follow us on Facebook and subscribe to our YouTube channel for more tips and video guides.
 https://www.appliancepartspros.com/b/wp-content/uploads/2024/01/Copy-of-IMAGE-TEMPLATE-FOR-BLOG-2.jpg
1080
1920
Steven E
https://www.appliancepartspros.com/b/wp-content/uploads/2020/11/app-logo-std.png
Steven E2024-01-18 08:55:562025-07-25 11:16:51How to reverse the door swing on a Whirlpool dryer
https://www.appliancepartspros.com/b/wp-content/uploads/2024/01/Copy-of-IMAGE-TEMPLATE-FOR-BLOG-2.jpg
1080
1920
Steven E
https://www.appliancepartspros.com/b/wp-content/uploads/2020/11/app-logo-std.png
Steven E2024-01-18 08:55:562025-07-25 11:16:51How to reverse the door swing on a Whirlpool dryer https://www.appliancepartspros.com/b/wp-content/uploads/2024/01/Copy-of-Copy-of-Copy-of-Copy-of-IMAGE-TEMPLATE-FOR-BLOG.jpg
1080
1920
Steven E
https://www.appliancepartspros.com/b/wp-content/uploads/2020/11/app-logo-std.png
Steven E2024-01-12 09:27:152025-07-25 11:12:33How to replace drum W10549614 in an electric Whirlpool dryer
https://www.appliancepartspros.com/b/wp-content/uploads/2024/01/Copy-of-Copy-of-Copy-of-Copy-of-IMAGE-TEMPLATE-FOR-BLOG.jpg
1080
1920
Steven E
https://www.appliancepartspros.com/b/wp-content/uploads/2020/11/app-logo-std.png
Steven E2024-01-12 09:27:152025-07-25 11:12:33How to replace drum W10549614 in an electric Whirlpool dryer https://www.appliancepartspros.com/b/wp-content/uploads/2024/01/Copy-of-Copy-of-IMAGE-TEMPLATE-FOR-BLOG-2.jpg
1080
1920
Steven E
https://www.appliancepartspros.com/b/wp-content/uploads/2020/11/app-logo-std.png
Steven E2024-01-10 13:06:452025-07-25 10:20:09Whirlpool dryer keypad not working: A troubleshooting guide
https://www.appliancepartspros.com/b/wp-content/uploads/2024/01/Copy-of-Copy-of-IMAGE-TEMPLATE-FOR-BLOG-2.jpg
1080
1920
Steven E
https://www.appliancepartspros.com/b/wp-content/uploads/2020/11/app-logo-std.png
Steven E2024-01-10 13:06:452025-07-25 10:20:09Whirlpool dryer keypad not working: A troubleshooting guideHey there, I’m Samantha and I’m super excited to be a part of the Appliance Parts Pros team! With 9 years of experience, I’ve had the awesome opportunity to assist countless customers in troubleshooting their home appliances and finding DIY repair solutions.