Electric Oven Not Heating When Broiling: Top 5 Reasons & Fixes (With Video!)
APP Expert / Monday August 1, 2022
Is your electric range’s broiler acting up, leaving your meals half-baked or charred beyond recognition? Discover the solution to your broiling woes with our step-by-step guide that will have your broiler back in perfect working order in no time. For an engaging and detailed walkthrough, be sure to check out our how-to video just below.
Need a replacement part for your oven? Search below using your specific oven model number to identify the exact part needed:
Trouble with your electric range’s broiler? Whether it’s struggling to reach the right temperature or won’t heat up at all, we here at AppliancePartsPros.com are ready to help you out. When a broiler goes bad, it’s usually because of one of five components in your range. Luckily, they’re all easy to test and replace – you can do it yourself in under an hour with a few tools and our step-by-step guide.
Keep reading for some help troubleshooting an electric oven broiler that isn’t heating, and don’t forget to check out our companion video for an in-depth look at each test!
Troubleshooting An Electric Broiler That Isn’t Heating
Our troubleshooting guide will walk you through the common broiler issues experienced in all major electric range brands, including Whirlpool, Samsung, Maytag, GE, and LG. No matter the make or model of your electric stove, our tutorial should help you fix your heating element issues!
Your Diagnostic Tool Kit
While you won’t need all of these tools for every test, you should have these items on hand to do a full diagnostic:
- A Multimeter – almost all of our tests require the use of a multimeter that can check Voltage and continuity
- A Phillips screwdriver or nut driver, whichever is needed to remove panels on your range
- Clothespins
- Needle-nose pliers
- Your appliance’s manual and tech sheet
Before you begin…
For your safety, be sure to disconnect the range from power either by unplugging it or flipping the circuit breaker. Never perform maintenance on an appliance that is still receiving power – you could seriously injure yourself. If at any point during these tests you need to restore power to the appliance, we’ll make it clear in the guide below when you should turn it on and shut it back off.
1. The Power Supply
Your appliance may not even be the problem, so let’s start by testing the power source. Ranges and ovens require a full 240 Volts to function properly, and if they aren’t able to pull that amount from the wall outlet, they will struggle to work. If the power supply is causing your heating issues, you may notice that the rest of the stove seems to still be working – for instance, the lights may come on and the display may respond to user input – but nothing will heat up.
To test your range’s power supply, you’ll need a multimeter, but let’s start off our test at the circuit breaker. Check to see if it’s flipped. Even if it hasn’t been flipped, reset it now, and see if you’re still having heating issues. If the heating issues persist, it’s time to put that multimeter to work.
- Set your multimeter to Volts AC. Make sure that your range is unplugged.
- Test each side of the outlet your range is usually plugged into. The black probe goes in the top opening, and the red probe in either the left or right opening.
- Each side should read about 120V, adding up to a total of 240V combined. The reading may fluctuate up or down by about 10%, so don’t worry if you’re getting a reading a couple numbers above or below 240V total.
If the reading you get is significantly below 240V, your power supply is the problem. It could be an issue with just the socket or, unfortunately, the circuit breaker may need to be replaced. Either way, only pursue these sorts of repairs yourself if you have electrical work experience and are confident you can complete the job yourself. Otherwise, contact a professional electrician for assistance.
2. The Broil Element
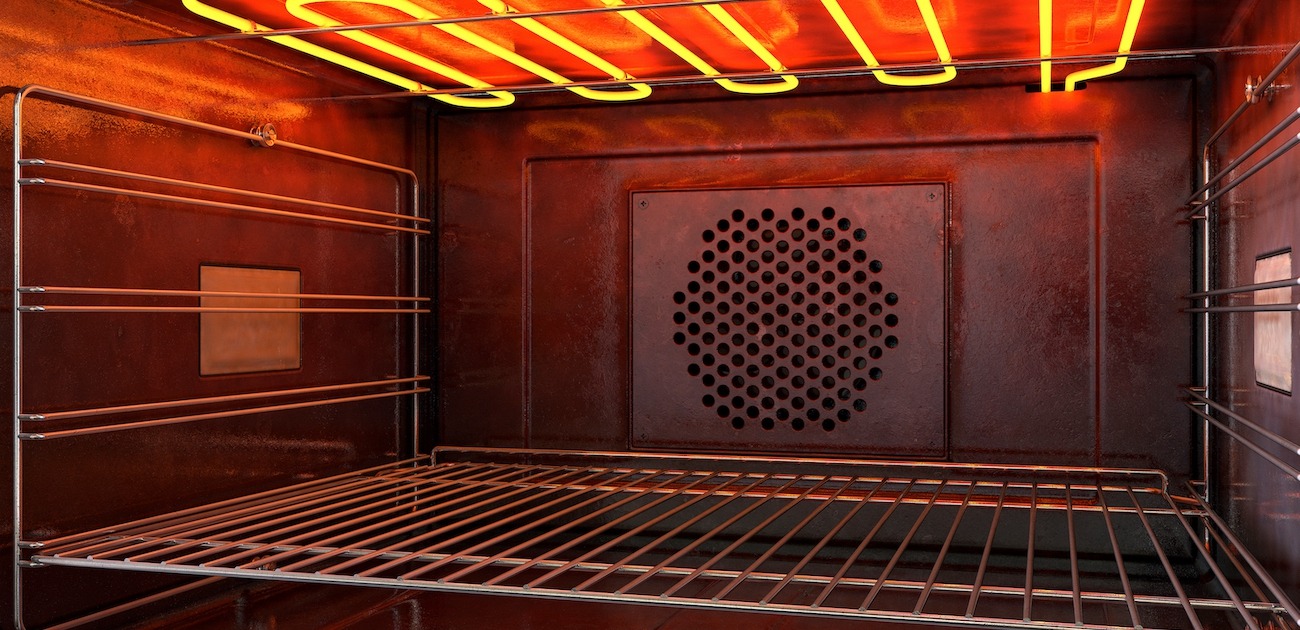
While the broiler’s heating element should last the lifetime of your appliance, it’s possible that the element can burn or short out, leaving it too damaged to function, so we’ll check that next. In an electric oven, the broiler is powered by a calrod heating element that is generally installed on the ceiling of the oven compartment and is held in place by a few screws.
You’ll need your multimeter to completely test the broil element, but start off with a visual inspection.
- Run your hand over the broil element. Look for holes, cracks, swelling, or burn marks. If you see anything like this, you should replace the component.
- Remove the mounting screws that hold the element in place. There are usually two along the back wall and one or two on the ceiling of the oven.
- Pull the bake element forward, taking care not to lose the wires as you disconnect them. Use a couple of clothespins to secure the wires and keep them from falling back into the wall of the oven.
- Attach a probe to each terminal to test for continuity. If the element doesn’t have continuity, it’s bad and must be replaced.
3. The Oven Temperature Sensor
The oven temperature sensor is a resistor that measures the temperature inside the oven in Ohms and reports this data to the control board. The control board then uses this information to adjust the bake and broil elements to maintain a proper temperature. Most oven temperature sensors consist of a small metal rod attached to a mounting plate with two wires at the back. They are usually mounted in the upper left or right corner of the oven.
Temperature sensors can fail gradually, so if you have been experiencing inconsistent temperatures in the oven, or if the oven has been taking longer than usual to heat up recently, there’s a good chance the sensor is the root of your oven’s problems. Even if you didn’t notice these issues before it stopped working, though, it may be worth it to check the sensor, anyway.
To test the temperature sensor, you’ll need your multimeter, the oven’s tech sheet, a thermometer that can measure ambient air temperature, and access to the back of your range.
- The oven temperature sensor is a resistor which reports a certain ohms reading based on the temperature of the air around it, so your oven should be room temperature when you test this component. You’ll also want to place a thermometer in the oven cavity to get an accurate measure of the temperature in the oven for your test.
- Grab your oven’s tech sheet. There should be a table for the temperature sensor that lists which temperature corresponds to which ohms reading. Make note of which ohms value you’ll need to match the current temperature in your oven.
- Set your multimeter to ohms.
- Disconnect the temperature sensor’s wires.
- Touch one of the multimeter’s test probes to each of the sensor’s terminals. Check the multimeter for the ohms reading, and check the temperature inside the oven. If you’re not getting a reading at all, then the sensor has definitely failed and needs to be replaced.
- If the reading you’ve gotten from the sensor is significantly off from the actual temperature, the sensor is failing and should be replaced anyway to ensure your oven works correctly.
4. The Thermal Fuse
All ranges come with a safety component that cuts power to the appliance if it exceeds a certain temperature. The thermal fuse breaks by design, protecting your oven and your home from far worse damage by stopping the appliance before it can exceed safe temperatures. If the thermal fuse has blown, it will stop your oven from working entirely. You can usually find your range’s thermal fuse on the back of the appliance, behind an access panel. They’re generally either round or rectangular in shape, and almost always feature two wire terminals to connect to power.
If your range isn’t heating, the thermal fuse may have failed or blown. This is especially common if the oven’s self-cleaning function has been run for too long. However, keep in mind that if a thermal fuse has blown, it’s probably because another part of the oven is also malfunctioning, and you may need to test more than just the fuse.
For now, let’s focus on testing the thermal fuse. You’ll need your multimeter. Set it to continuity.
- Check your manual to verify where the thermal fuse is located in your range. It’s most likely behind a metal panel on the back of your range. If this is the case, you’ll need a screwdriver or nut driver to remove the panel.
- Disconnect the wires from your range’s thermal fuse.
- With your multimeter set to continuity, touch the probes together to make sure the tool is working.
- Touch a test probe to each terminal. If the thermal fuse does not have continuity, it has failed and will need to be replaced.
If you replace your range’s thermal fuse and the new fuse blows soon after it’s been installed, it’s possible that another component is malfunctioning, causing the thermal fuse to trigger. Check out our blog and our YouTube channel for additional oven troubleshooting tutorials if you’re having this issue!
5. The Oven Control Board
Finally, it could be the brains of the appliance giving you grief. The oven’s control board takes readings from user input and sensors found throughout the appliance and uses that information to control the range’s functions. You can usually find the control board mounted in the middle of the oven’s control panel. If the control board is malfunctioning or has failed, it can cause a host of issues at once. In addition to your broiler not working, you may also notice issues with the oven’s bake feature, with timers, or with the responsiveness of the touchpad. To test your control board, you’ll need to enter your appliance’s diagnostic mode and check for error codes. How this is done depends on your appliance’s brand and model number, but you can generally find full instructions on the tech sheet or in the range’s manual.
Finding The Right Replacement Part
Chances are, you’ve found a component that needs to be swapped out, so what’s your next step? Get your appliance’s model number. You’ll need it to track down a compatible replacement part. You can find the complete model number for your range on a label somewhere on the appliance. Check the following places:
- Open the oven door and check around the frame.
- Open the broiler or range drawer and check along the sides or on the inside of the door, itself.
- Lift the cooktop and check beneath that.
- Check the exterior of the stove, it could be on the sides or back, behind the main control panel.
Once you have the model number, type it in at AppliancePartsPros.com. You’ll be presented with a list of genuine OEM replacement parts compatible with your appliance, and you can have the one you need shipped to you in just a few days!
Wrapping Up
We hope our guide has helped you to diagnose and fix your oven broiler issues. The next time you need quick tips, great tutorials, or genuine replacement parts, why not head back our way? Check out our blog and our YouTube channel for a variety of specific repair tutorials for major appliance brands, and visit our site for tips and advice from other do-it-yourselfers just like you. AppliancePartsPros.com has your back for all your DIY appliance repair needs!
Hi! I’m Matt H., and I’m thrilled to be your guide through the world of appliance repair with over 25 years of invaluable experience in the industry.
From the early days of my career, I have been deeply passionate about appliances and their inner workings. Over the years, I’ve seen it all – from vintage models to the latest cutting-edge technology – and I’ve dedicated myself to mastering the art of repair. With a toolbox in one hand and a wealth of knowledge in the other, I’ve tackled every challenge that has come my way, learning and growing with each repair.
Join me as we dive into the intricacies of appliance repair. From step-by-step repair guides to explanations of common problems and their solutions, I’ll be here to simplify the repair process and empower you with the knowledge you need to keep your appliances running smoothly.
Feel free to explore our blog, ask questions, and leave comments – this platform is a space for learning, sharing, and growing together. Let’s work together to ensure that your appliances continue to serve you for years to come.
Thank you for joining me on this journey, and I look forward to being your go-to resource for all things related to appliance repair!


