Electric Range Element Won’t Heat: Top 7 Reasons & Fixes (With Video!)
APP Expert / Wednesday July 13, 2022
Is your oven refusing to heat up, leaving your dinner plans in the cold? Don’t fret, because AppliancePartsPros.com is here to guide you through the seven most common causes of heating issues in electric ranges and how to tackle them head-on. Dive into our expert how-to video below for a step-by-step walkthrough and some crucial safety tips to get your appliance back to top performance in no time!
Once you have identified the part needed for your range, search below using your specific range model number to identify the exact part needed:
Whether you’re dealing with oven heating issues or a dead cooktop, AppliancePartsPros.com is here to help! Today, we’re troubleshooting an electric range that won’t heat up. We’ll cover the seven most common causes of heating problems in electric ovens and stoves, how to test them, and what needs to be fixed. Don’t forget to check out our companion video for a detailed look at each step and some additional safety tips!
Ready? Let’s go!


Troubleshooting A Range Element That Won’t Heat
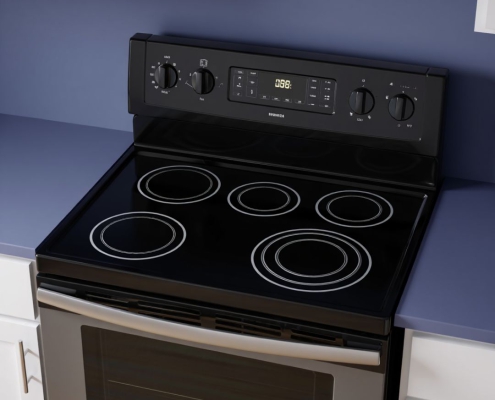
This guide will walk you through issues experienced with all major brands of electric range, including Whirlpool, Samsung, Maytag, GE, and LG. No matter the make and model of your electric stove, this guide should help you fix your heating element issues!
Your Diagnostic Tool Kit
While you won’t need all of these tools for every test, you should have these items on hand to do a full diagnostic:
- A Multimeter – almost all of our tests require the use of a multimeter that can check Voltage and continuity
- Flathead screwdriver
- Needle-nose pliers
- A Phillips screwdriver or nut driver, whichever is needed for your oven to remove outer panels
Before you begin…
Avoid a nasty shock! Be sure to disconnect the range from power either at the wall outlet or the circuit breaker. If at any point during these tests you need to restore power to the appliance, we’ll make it clear in the guide below when you should turn it on and shut it back off.
1. The Power Supply
The problem may not be your range at all! Ranges and ovens require a full 240 Volts to function properly, and if they aren’t able to pull that amount from your home’s wiring, the heating elements will struggle to work.
If the power supply is causing your heating issues, you may notice that the rest of the stove seems to still be working – the lights, for instance, may come on, and the display may respond to user input – but nothing will heat up.
To test this out, you’ll need a multimeter, but let’s start off with the circuit breaker. Check to see if it’s flipped. Even if it hasn’t, reset it, and see if you’re still having heating issues. If the heating issues persist, it’s time to put that multimeter to work.
- Set your multimeter to Volts AC. You’re going to be testing the outlet that your range is usually plugged into, so make sure it’s unplugged.
- Test each side of the outlet. The black probe goes in the top opening, and the red probe in either the left or right opening.
- Each side should read about 120V, adding up to a total of 240V combined. The reading may fluctuate up or down by about 10%, so don’t worry if you’re getting a reading a couple numbers above or below 240V total.
If the reading you get is significantly below 240V, your power supply is the problem. It could be an issue with just the socket or, unfortunately, the circuit breaker may need to be replaced. Either way, only pursue these sorts of repairs yourself if you have electrical work experience and are confident you can complete the job yourself. Otherwise, contact a professional electrician for assistance.
2. The Thermal Fuse
All ranges come with a safety component that kills power to the elements if the appliance exceeds a certain temperature. This thermal fuse protects the rest of your appliance from damage by breaking itself when things get too hot. You can usually find your range’s thermal fuse on the back of the appliance, behind an access panel. They’re generally either round or rectangular in shape, and almost always feature two wire terminals to connect to power.
If your range isn’t heating, the thermal fuse may have failed or blown. This is especially common if the oven’s self-cleaning function has been run for too long.
To test the thermal fuse, you’ll need your multimeter. We’ll be testing for continuity.
- Check your manual to verify where the thermal fuse is located on your range. It’s most likely behind a metal panel on the back of your range. If this is the case, you’ll need a screwdriver or nut driver to remove the panel.
- Disconnect the wires from your range’s thermal fuse.
- Grab your multimeter and set it to continuity, then touch the probes together to make sure the tool is working.
- Touch a test probe to each terminal. If the thermal fuse does not have continuity, it has failed and will need to be replaced.
If you replace your range’s thermal fuse and the new fuse blows soon after it’s been installed, it’s possible that another component is malfunctioning, causing the thermal fuse to trigger. Check out our blog and our YouTube channel for additional oven troubleshooting tutorials if you’re having this issue!
3. Infinite Switches
The infinite switch goes by many names. Most brands will refer to it as an infinite heat switch, but terms like dual element switch and surface burner switch are also common. No matter the name, this component serves the same purpose: it’s what you turn to power the heating elements.
Infinite switches are usually square in shape, consisting of a metal shaft, plastic housing, a number of terminals on the bottom and contacts inside. They are always just behind the range’s control panel, either at the back of the cooktop or just above the oven, connected to a knob.
If just one of your heating elements isn’t working, it could be that the contacts inside the corresponding switch have failed. To test this component, we’ll be using a multimeter to check for continuity.
- You’ll need to gain access to the inside of your control panel. How you get in there will depend on the model of your range. If your control panel is at the back of the cooktop, you’ll likely just need to remove a rear access panel. If your control panel is above the oven, you may need to remove the entire cooktop.
- Make note of where all the wires are connected on the switch you’re about to test. Take a picture of the connected switch with your phone, or write down which wires go where.
- Disconnect the wires from the switch you’re testing. A flathead screwdriver or a pair of needle-nose pliers can help if they’re difficult to remove.
- Check for the terminal labeled P, this is the terminal for the indicator light. We won’t be testing that one.
- First, touch testing probes to the terminals labeled L1 and H1. With the switch on the control panel in the OFF position, it should not have continuity. Turn the switch all the way to high and check the multimeter again. It should have continuity now.
- Turn the switch back to the OFF position.
- Now, touch the testing probes to the L2 and H2 terminals. In the OFF position, there shouldn’t be continuity, and in the HIGH position, there should be continuity.
If the switch fails either of these tests, the contacts inside are sticking and the part will need to be replaced.
4. Surface Element Receptacles
Each of your cooktop heating coils plugs into a surface element receptacle. The receptacle generally consists of a housing and two wire terminals that the surface heating element plugs into. If a given receptacle has failed, that particular element won’t heat up when turned on. In some instances, it may also be loose or wobbly.
If you’ve recently cleaned your cooktop, including removing the heating elements and the drip pan, it could be that the heating element simply wasn’t plugged back in properly. Start out by trying to reseat it and testing it out, then disconnect the range from power once more if that wasn’t the issue.
To test the part:
- Remove the surface heating element and drip pan to reach the receptacle. It should be held in place by a single mounting screw, which should also be removed. With the screw out, you can pull the receptacle out enough to see it.
- Inspect the receptacle. You’re checking for signs of scorching, burn marks, or a lingering burnt plastic smell. If you see any of these, there’s a good chance the receptacle needs to be replaced.
- Check the surface heating element itself. If the terminals have signs of scorching, this is a sign that the receptacle is damaged. If the terminals are badly burnt, there’s a good chance the element will also need to be replaced.
5. The Surface Elements
The surface element is that coiled calrod circle that glows red hot to heat your food. Surface heating elements generally come in two sizes – 6 and 8 inch. Each surface heating element should have two wire terminals that plug into the receptacle beneath the cooktop. If you’re not getting any heat from a given spot on the cooktop, it could be that the surface element itself has failed. Here’s how to test the surface element out:
- Start with a visual inspection. Check both sides of the coils and the terminals. You’re looking for scorch marks, blackened spots, swelling, or holes in the coils. If there’s any obvious damage, the surface element should be replaced. If the terminals are badly scorched, there’s a good chance that the corresponding receptacle needs to be replaced as well.
- If the element appears to be in good shape, you can also test it for continuity. Touch a probe from your multimeter to each of the element’s terminals. It should have continuity, and if it doesn’t, the heating element has failed.
6. The Bake Element
Electric ovens use calrod-type heating elements to heat the interior. This baking element is generally found at the bottom of the oven, and is usually visible, although it may be beneath a cover.
While they’re intended to last the lifetime of your appliance, bake elements can fail. Sometimes, the damage is obvious – for example, after running the self-cleaning function, it’s not unusual to find your bake element has cracked or completely fallen apart due to high heat exposure.
To test out your bake element, you’ll need a multimeter, screwdriver, and a couple of clothes pins.
- Start with a visual inspection. Look for holes, cracks, swelling, or burn marks on the element. If you see anything like this, you should replace the component.
- If there’s no obvious damage, grab your multimeter and set it to continuity.
- Remove the screws holding the oven bake element to the wall of the oven.
- Take care when pulling the element away from the oven wall. As you disconnect each wire, you’ll want to clip a clothespin to it to keep it from falling into the back of the oven wall. If one of the wires hooked up to the oven bake element manages to slip back into the oven wall, you will need to disassemble the back of the oven to get them out. Be extremely careful here or you’ll wind up turning a 10 minute test into an hour long ordeal!
- With the bake element disconnected, attach a probe to each terminal to test for continuity. If the element doesn’t have continuity, it’s bad and will need to be replaced.
7. The Broil Element
Like the oven bake element, the oven broil element is a calrod heater. It generally has a few more turns than the bake element and is usually mounted to the top of the oven, held in place by a few screws.
Like the oven’s bake element, the broil element shouldn’t fail within the standard lifespan of your appliance, but it can. Testing out the broil element is much the same as the bake element:
- Again, start with a visual inspection. Look for holes, cracks, swelling, or burn marks. If it looks okay, grab your multimeter to test the element for continuity.
- Remove the mounting screws that hold the element in place. There are usually two along the back wall and one or two on the ceiling of the oven.
- Pull the bake element forward, taking care not to lose the wires as you disconnect them. Use those clothespins again to secure the wires and keep them from falling back into the wall of the oven.
- Attach a probe to each terminal to test for continuity. If the element doesn’t have continuity, it’s bad and must be replaced.
Finding The Right Replacement Part
To track down a compatible replacement part to fix your issue, you’ll need the appliance’s model number. You can find it on a label somewhere on the appliance. Check the following places:
- Open the oven door and check around the frame.
- Open the broiler or range drawer and check along the sides or on the inside of the door, itself.
- Lift the cooktop and check beneath that.
- Check the exterior of the stove, it could be on the sides or back, behind the main control panel.
Once you have the model number, head over to AppliancePartsPros.com and type it in. You’ll be presented with a list of genuine OEM replacement parts compatible with your appliance, and you can have the one you need shipped to you in just a few days!
Wrapping Up
If our guide has helped you diagnose your range’s heating issues, don’t close this window just yet! AppliancePartsPros.com has your back well beyond a troubleshooting tutorial. Check out our blog and our YouTube channel for a variety of specific repair tutorials for major appliance brands, and visit our site for tips and advice from other do-it-yourselfers just like you. With AppliancePartsPros.com on your side, you’ll have your oven back in working order in no time at all!
Stay connected with the latest DIY tips, tutorial videos, and repair guides by following us on Facebook, Instagram, and Twitter. We love hearing about your repair stories and successes. If you need more help or want personalized guidance, feel free to contact or call us at 877-477-7278. We’re ready to help you take on your next project with confidence!
 https://www.appliancepartspros.com/b/wp-content/uploads/2025/04/APP-blog-square-15.jpg
1080
1080
Steven E
https://www.appliancepartspros.com/b/wp-content/uploads/2020/11/app-logo-std.png
Steven E2025-04-04 06:34:172025-08-07 06:47:14How to test the main control board on a Samsung range
https://www.appliancepartspros.com/b/wp-content/uploads/2025/04/APP-blog-square-15.jpg
1080
1080
Steven E
https://www.appliancepartspros.com/b/wp-content/uploads/2020/11/app-logo-std.png
Steven E2025-04-04 06:34:172025-08-07 06:47:14How to test the main control board on a Samsung range https://www.appliancepartspros.com/b/wp-content/uploads/2025/04/APP-blog-square-14.jpg
1080
1080
Steven E
https://www.appliancepartspros.com/b/wp-content/uploads/2020/11/app-logo-std.png
Steven E2025-04-04 06:19:272025-04-04 06:19:36How to test the warming element wiring on your Samsung range
https://www.appliancepartspros.com/b/wp-content/uploads/2025/04/APP-blog-square-14.jpg
1080
1080
Steven E
https://www.appliancepartspros.com/b/wp-content/uploads/2020/11/app-logo-std.png
Steven E2025-04-04 06:19:272025-04-04 06:19:36How to test the warming element wiring on your Samsung range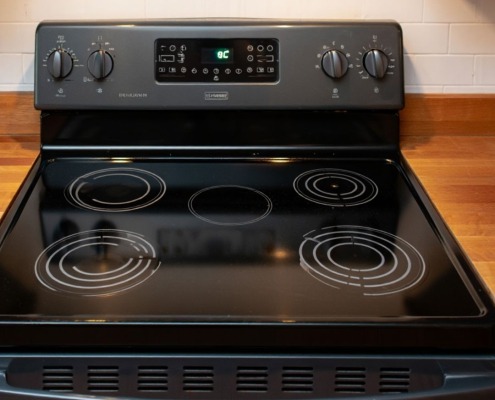 https://www.appliancepartspros.com/b/wp-content/uploads/2025/04/APP-blog-square-12.jpg
1080
1080
Steven E
https://www.appliancepartspros.com/b/wp-content/uploads/2020/11/app-logo-std.png
Steven E2025-04-04 05:43:442025-04-04 05:43:53Troubleshooting a Whirlpool electric range oven that will not heat
https://www.appliancepartspros.com/b/wp-content/uploads/2025/04/APP-blog-square-12.jpg
1080
1080
Steven E
https://www.appliancepartspros.com/b/wp-content/uploads/2020/11/app-logo-std.png
Steven E2025-04-04 05:43:442025-04-04 05:43:53Troubleshooting a Whirlpool electric range oven that will not heatHi! I’m Matt H., and I’m thrilled to be your guide through the world of appliance repair with over 25 years of invaluable experience in the industry.
From the early days of my career, I have been deeply passionate about appliances and their inner workings. Over the years, I’ve seen it all – from vintage models to the latest cutting-edge technology – and I’ve dedicated myself to mastering the art of repair. With a toolbox in one hand and a wealth of knowledge in the other, I’ve tackled every challenge that has come my way, learning and growing with each repair.
Join me as we dive into the intricacies of appliance repair. From step-by-step repair guides to explanations of common problems and their solutions, I’ll be here to simplify the repair process and empower you with the knowledge you need to keep your appliances running smoothly.
Feel free to explore our blog, ask questions, and leave comments – this platform is a space for learning, sharing, and growing together. Let’s work together to ensure that your appliances continue to serve you for years to come.
Thank you for joining me on this journey, and I look forward to being your go-to resource for all things related to appliance repair!