Fall Home Appliance Maintenance Checklist
Samantha Bullington / Tuesday August 15, 2023

The cool breezes and falling leaves of autumn usher in an ideal time to prep your home for the coming winter. An often overlooked part of fall home readiness involves appliance maintenance and repair. Your hardworking appliances need some extra care before the brutal cold and holiday bustle hits. Don’t get caught off guard by an appliance failure at the worst possible moment. Investing a little time in your appliances now pays off all winter long. This fall appliance checklist covers all the cleaning, safety checks, and tune-ups you should perform to keep your household appliances running smoothly.
Why Fall Home Appliance Maintenance Matters
As summer ends and fall arrives, it’s important to give some extra care to our hardworking appliances. Doing maintenance now helps keep appliances running properly all season. It makes appliances last longer, work better, and prevents big problems later. Getting your home appliances ready for the busier fall and winter months also makes them perform their best when you need them most. So, while you’re getting your home ready for fall, remember to take care of your appliances too. Spend a little time on them now to avoid problems later.
Deep Clean Your Refrigerator Inside and Out
The refrigerator, a workhorse of the modern kitchen, often goes unnoticed until it starts causing problems. However, implementing regular cleaning and maintenance routines can ensure that this essential appliance continues to function smoothly. As the fall season approaches, it’s an opportune time to give your fridge some much-needed attention:
- Begin with a thorough interior cleaning – Take the time to wipe down shelves, drawers, and surfaces. Remove expired or unused items to create more space and maintain proper air circulation. A well-organized interior contributes to efficient cooling performance.
- Check the door seals – The rubber gasket around the door is crucial for maintaining an airtight seal. Inspect it carefully for any cracks or gaps that might be allowing cold air to escape. A damaged gasket can lead to temperature inconsistencies and increased energy consumption.
- Clean the condenser coils on the back – Over time, dust and debris accumulate on the condenser coils located on the rear of the fridge. This buildup restricts the release of heat and forces the compressor to work harder. Using the brush attachment of your vacuum, gently clean the coils to ensure efficient heat dissipation and prevent the compressor from straining.
- Verify temperature – Your refrigerator’s temperature impacts both food freshness and energy efficiency. Use a thermometer to monitor the interior temperature. If necessary, adjust the settings to maintain the recommended temperature range for optimal food storage conditions.
Just follow these steps to make sure your fridge works well and doesn’t have problems later. Keeping it clean and working right helps it last longer and saves money on repairs. Remember to take care of your fridge when getting ready for the new season.

Prevent Dryer Fires with Proper Vent Cleaning
Your clothes dryer venting system can accumulate lint over time, which poses a fire hazard. Minimize this risk with proper dryer vent maintenance this fall:
- Disconnect the dryer vent – To begin the maintenance process, carefully detach the flexible vent tube from both the back of the dryer and the exterior vent hood. This separation allows you to access and thoroughly clean the entire venting pathway.
- Clean lint from ducts – The lint that accumulates within the dryer venting ducts can obstruct airflow and increase the chances of a fire. Equip yourself with a specialized dryer vent brush designed to navigate the curves and length of the ducting system. Gently insert the brush and maneuver it through the vent to dislodge and remove built-up lint.
- Check flaps and dampers- Proper ventilation relies on the smooth operation of vent flaps and dampers. They are responsible for directing the airflow and preventing backdrafts. Inspect each vent flap to ensure that it opens and closes smoothly. This guarantees uninterrupted airflow and helps prevent potential issues arising from poor ventilation.
- Reconnect tightly – After completing the cleaning process, it’s crucial to securely reconnect all the venting components. Ensure that the vent tube is properly attached to both the dryer and the exterior vent hood.
Just follow these things to keep your dryer safe and make it last longer. Cleaning the vent helps prevent fires and keeps your dryer working well. Remember to clean it every fall to stay safe and keep your dryer running smoothly.
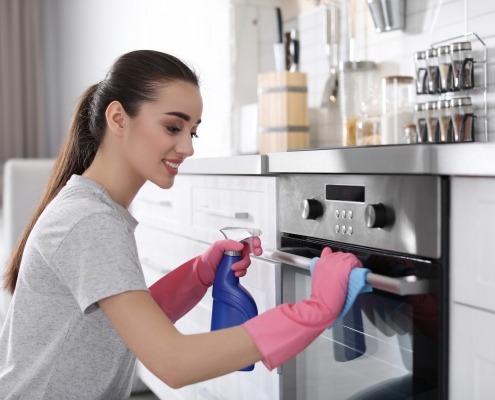
Rinse Away Residue in Your Oven
With all the yummy fall baking ahead, be sure your oven is ready for pie-making! Give it a deep clean now:
- Attack baked-on grime – Use a stiff brush and oven degreaser to tackle sticky spills and residue on oven walls and racks.
- Inspect heating elements – Check that the bake and broiler heating elements are intact and functioning, with no visible damage. A well-maintained heating system guarantees consistent and even cooking results.
- Assess door hinges – Assess that the oven door opens smoothly. If you notice any signs of wear or difficulty, consider replacing worn hinges. This proactive step prevents potential future issues and ensures that your oven remains user-friendly.
- Replace knobs if needed – Upgrade to new oven knobs if existing ones are cracked or loosening.
Remember to follow these steps in your fall maintenance routine to get your oven ready for the cooking season. A well-kept oven makes your cooking better and helps you create delicious fall dishes that everyone will love.
Restore Your Dishwasher’s Shine
Getting ready for the holidays means your dishwasher needs some attention. Grease and minerals can make it less effective over time. Keep it working well with these easy steps:
- Clean the food filter – The dishwasher’s efficiency relies on a clean and functional food filter located at the bottom. Begin by removing the filter and thoroughly washing away the accumulated debris. This simple step enhances water circulation and prevents clogs, allowing your dishwasher to work its magic on your dishes.
- Scrub the spray arms – The spray arms spread water for washing dishes. But they can get gunked up. Take them off and clean them with soapy water and a toothbrush. This helps water flow better and makes sure your dishes get cleaned well.
- De-lime the interior – Mineral buildup and ugly marks from hard water can mess up your dishwasher. But you can fix it easily by running a cycle with vinegar. Vinegar breaks down the yucky stuff, making your dishwasher look and work great again.
- Drain any backed-up water- A surefire way to undermine your dishwasher’s efficiency is by allowing water to back up due to clogs. Address this potential problem by dislodging debris from the drain pump and drain hose. A thorough cleanse prevents water accumulation and ensures that your dishwasher can operate smoothly.
Cleaning your dishwasher doesn’t just give you clean dishes – it also helps your kitchen run smoothly and saves energy. Follow these steps regularly for an easy kitchen cleanup routine. This way, your dishes will come out of the dishwasher looking great and ready for your holiday meals.
Freshen Up Your Garbage Disposal
To keep your kitchen smelling good and your food prep easy, taking care of your garbage disposal is a must. If you’ve noticed bad smells or gunk building up, don’t stress – you can fix it and make it work better with these simple steps:
- Deodorize – A simple yet effective method to eliminate odors is by utilizing the natural power of lemons. Grind used lemon rinds in the disposal. As they are broken down, they release their pleasant citrus aroma, leaving your disposal smelling fresh and inviting. This deodorizing trick not only masks odors but also imparts a delightful fragrance to your kitchen.
- Remove stubborn residues – Your garbage disposal can get messy with time, making it work worse. Solve this by putting ice cubes in the disposal and grinding them up. The ice cubes clean the messy parts, making your disposal work better. It’s like giving your disposal a cleaning boost for smoother operation.
- Disinfect drain lines – To stop bad smells and germs, clean its pipes. Pour baking soda and vinegar down the drain, wait a bit, and then rinse with cold water. This makes sure your disposal stays clean and your kitchen smells good.
- Ensure normal operation – After you’re done, make sure your disposal is acting right. Turn it on and listen for weird noises or shaking. A good disposal should work quietly and smoothly.
Your kitchen’s garbage disposal is super helpful for making mealtime easier and cleaner. When you use these easy steps to freshen it up, you’re getting rid of bad smells and making it work better too. Keeping your garbage disposal clean and in good shape means you can toss food scraps without worries.
Where To Find Us
If you need any replacement parts for your appliances, you can enter your model number at AppliancePartsPros.com to locate and order them quickly. Most orders arrive in just two business days, and we have tons of great information in our repair help section and YouTube videos to help you troubleshoot.
Stay connected with the latest DIY tips, tutorial videos, and repair guides by following us on Facebook, Instagram, and Twitter. We love hearing about your repair stories and successes. If you need more help or want personalized guidance, feel free to contact or call us at 877-477-7278. We’re ready to help you take on your next project with confidence!
Since 1999, AppliancePartsPros.com has helped millions of people repair their broken appliances by providing high-quality original parts at well below retail prices, free support and troubleshooting, and award-winning customer service from an expert, friendly, US-based customer support team!
 https://www.appliancepartspros.com/b/wp-content/uploads/2022/01/shutterstock_1149361112.jpg
1000
1500
APP Expert
https://www.appliancepartspros.com/b/wp-content/uploads/2020/11/app-logo-std.png
APP Expert2022-01-20 13:07:402022-01-20 13:07:4510 Tips and Tricks to Clean Your Appliances
https://www.appliancepartspros.com/b/wp-content/uploads/2022/01/shutterstock_1149361112.jpg
1000
1500
APP Expert
https://www.appliancepartspros.com/b/wp-content/uploads/2020/11/app-logo-std.png
APP Expert2022-01-20 13:07:402022-01-20 13:07:4510 Tips and Tricks to Clean Your Appliances https://www.appliancepartspros.com/b/wp-content/uploads/2022/01/shutterstock_757818340.jpg
1000
1500
APP Expert
https://www.appliancepartspros.com/b/wp-content/uploads/2020/11/app-logo-std.png
APP Expert2022-01-10 12:16:422022-01-10 12:22:337 Space-Saving Tips For Small Kitchens
https://www.appliancepartspros.com/b/wp-content/uploads/2022/01/shutterstock_757818340.jpg
1000
1500
APP Expert
https://www.appliancepartspros.com/b/wp-content/uploads/2020/11/app-logo-std.png
APP Expert2022-01-10 12:16:422022-01-10 12:22:337 Space-Saving Tips For Small Kitchens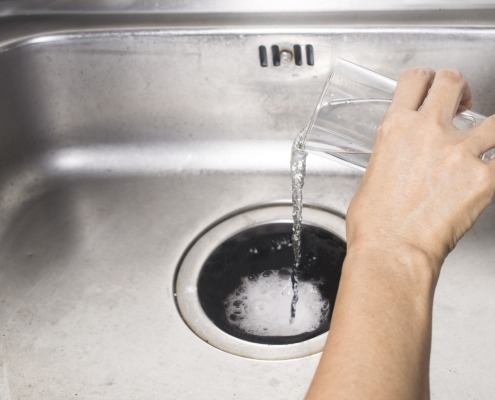 https://www.appliancepartspros.com/b/wp-content/uploads/2021/09/shutterstock_736841149.jpg
997
1500
APP Expert
https://www.appliancepartspros.com/b/wp-content/uploads/2020/11/app-logo-std.png
APP Expert2021-09-28 13:59:002021-09-29 14:58:33How to Clean a Garbage Disposal That Smells Bad
https://www.appliancepartspros.com/b/wp-content/uploads/2021/09/shutterstock_736841149.jpg
997
1500
APP Expert
https://www.appliancepartspros.com/b/wp-content/uploads/2020/11/app-logo-std.png
APP Expert2021-09-28 13:59:002021-09-29 14:58:33How to Clean a Garbage Disposal That Smells BadHey there, I’m Samantha and I’m super excited to be a part of the Appliance Parts Pros team! With 9 years of experience, I’ve had the awesome opportunity to assist countless customers in troubleshooting their home appliances and finding DIY repair solutions.