Freezer Too Cold: Top 5 Reasons & Fixes (With Video!)
APP Expert / Wednesday July 27, 2022
Is your freezer transforming your groceries into a frosty fortress? An overzealous freezer isn’t just a hassle for your favorite ice cream; it can drain energy and risk the health of your appliance. Discover how to troubleshoot and tackle this chilly challenge in a few simple steps by watching our handy video just below!
Once you have identified the part needed for your freezer, search below using your specific refrigerator model number to identify the exact part needed:
It may seem like the biggest problem you’ll face with a freezer that’s too cold inside is hard-to-scoop ice cream, but it takes a lot of energy to maintain those freezing temperatures, and that puts strain on the rest of your appliance. Don’t live with extra icy build up in your freezer or condensation on the door – you can diagnose and fix the problem yourself in about an hour or so, and AppliancePartsPros.com is here to show you how to do it!
In this tutorial, we’re troubleshooting the five most common causes of a freezer that is too cold. Don’t forget to check out our video for some additional tips not featured in this article!


Can A Freezer Be Too Cold?
To keep food safe and frozen for long term storage, the FDA recommends that you keep your freezer at or below 0°F (-18°C). Any warmer, and the food inside will start to thaw, but what happens if your freezer is hitting extremely low temperatures? Can a freezer be too cold?
Yes, absolutely. While a deep freeze can technically prolong the life of stored food, maintaining that low temperature is going to be taxing on the appliance’s components. This is particularly true of the freezer compartments included in refrigerators – a freezer that’s too cold can weaken refrigerator parts and also affect the temperature of the fresh food compartment. If you’re seeing a great deal of icy build up on food or on the walls and ceiling of your freezer, there’s a good chance the interior is too cold.
Troubleshooting A Freezer That’s Too Cold
Our guide covers temperature issues in all major refrigerator brands, including GE, Frigidaire, Whirlpool, Maytag, LG, Kenmore/Sears, Samsung, and more. No matter the make and model of your fridge, this guide should help you to get the temperature in your freezer back on track!
For your safety, be sure to shut off power to the appliance by either unplugging it or flipping the circuit breaker before you begin any diagnostic tests. Also shut off the water supply via the valve beneath your kitchen sink.
Your Diagnostic Tool Kit
Gather up the following items before you begin. While you won’t necessarily need every tool here for each test, this kit will allow you to complete a full diagnostic:
- Appliance manual and tech sheets
- A multimeter
- Phillips & flathead screwdrivers
- Needle-nose pliers
- You may potentially also need wire cutters and wire nuts or butt connectors for testing the temperature sensor.
1. Temperature Sensor
Most refrigerators have a number of sensors used to monitor the temperature in the appliance. These components usually consist of a plastic sensor bulb connected to a wire harness. Temperature readings are reported to the control board, which then triggers the compressor to run as needed if the interior of the appliance grows too warm. If the temperature sensor is malfunctioning and reporting an incorrect temperature range or if it has failed completely, it may cause the compressor to run unnecessarily, which will drive down the temperature in your freezer.
For our purposes, we’re focusing on the freezer temperature sensor. Depending on your refrigerator’s model, you’ll likely find it behind the back panel, inside an air duct, or behind an access panel. To track yours down, refer to the appliance’s manual. It’ll have diagrams that will pinpoint exactly where the sensor is.
Once you have access to the temperature sensor, here’s how to test it:
- Follow the sensor to its nearest connection point. With luck, it’ll end in a plug, which you can disconnect either by hand or with needle-nose pliers. If the wire does not end in a plug, you will need a pair of wire cutters to cut it out for testing.
- Now, use your thermometer to test the ambient air temperature near the sensor.
- Grab your appliance’s tech sheet and consult the temperature sensor table. It will list a number of temperatures and a corresponding Ohms value.
- Set your multimeter to Ohms, then touch the probes to the wiring harness pins or bare wires on the sensor. The Ohms reading you get should be close to the Ohms reading that corresponds with the current temperature in your refrigerator. If it’s way off or if you aren’t getting a reading at all, the temperature sensor is bad and must be replaced.
- If the sensor is in good shape, you can either plug it back in or reconnect it using butt connectors or wire nuts.
2. Cold Control
The cold control allows you to set the temperature inside your freezer. It consists of a long temperature sensor bulb, terminals, a shaft that connects to the corresponding knob on the control panel, and a set of contacts that tell the refrigerator when to run the compressor.
If you’ve noticed issues with the compressor running constantly, it could be the cold control causing problems. There are a few things you can do to test it:
- First, while the fridge has power and the condenser is running, knock on the area around the cold control knob lightly to see if it jostles the contacts inside free. If the condenser turns off, tighten the knob. While it temporarily fixes your problem, this could still be a sign that your cold control is failing and likely needs to be replaced.
- If that test wasn’t illuminating, there’s still more to do, so unplug your refrigerator again. You should never work on an appliance that is receiving power.
- Turn the cold control to the off position to start.
- Remove the control panel and disconnect the wires from the cold control. You may also need to remove the knob and mounting screws to gain full access to the control’s switch.
- Test the cold control with a multimeter set to continuity. Touch a probe to each of the metal terminals on the side of the cold control. It should not have continuity at this point.
- Turn the cold control into an on position and test with the multimeter again. This time, it should have continuity. If not, the part needs to be replaced.
- Check the sensor bulb for signs of damage, and the surrounding area for any oily residue from the bulb. If the sensor is leaking or has broken, the entire part will need to be replaced.
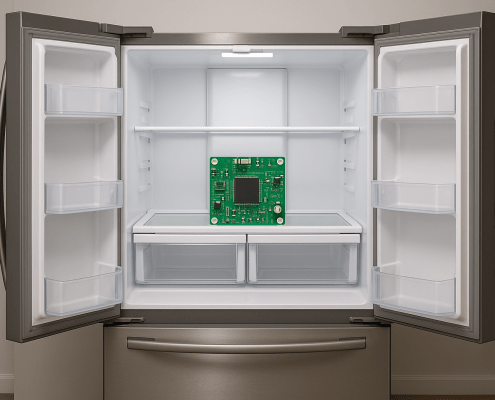
3. Main Control Board
All of your refrigerator’s functions are managed by the main control board. It receives information from the appliance’s sensors and uses that data to activate and deactivate features like the compressor and the defrost cycle. Typically, if your control board is failing, you’ll likely experience a number of your refrigerator’s features malfunctioning. For example, there may be issues with the lights in addition to the compressor never shutting off – which can cause the freezer to run too cold. Being that there are so many different refrigerator control board designs, you’ll need to consult your appliance’s manual and tech sheet to locate the component and find exact diagnostic instructions. Run the tests as outlined on the tech sheet to determine whether your refrigerator’s control board needs to be replaced.
4. Air Damper
The air damper connects the fresh food compartment to the freezer, allowing cold air to circulate from the freezer into the refrigerator, an efficient way of maintaining temperature in both compartments. While there are many different air damper styles, almost all of them rely on a door powered by a small motor. This door opens and closes, allowing cold air into the fresh food compartment or sealing it into the freezer.
If the door gets stuck in the closed position, this can lock cold air in the freezer, causing its temperature to drop lower than it should. You may also notice that the fresh food compartment is unusually warm, if this is the case.
You’ll find the air damper on the wall shared by the freezer and fresh food compartment. Its mechanical parts are generally hidden behind a cover that you may need a Phillips or flathead screwdriver to remove. Remove the cover to begin your tests:
- Start by checking for ice or blocked vents. Sometimes, the doorway can get stuck because of frost build up. Check around the fridge for other vents and make sure they aren’t iced over or blocked by food. These vents should have an inch or so of room for proper air flow.
- Next, remove the damper to check the door for damage. If the door is broken or cracked, the entire damper should be replaced.
- If everything looks okay, grab your multimeter and your refrigerator’s tech sheet to check for continuity! Because there are so many air damper designs, you’ll need to check that tech sheet for which circuits to test. Touch one probe to each of the appropriate circuits to test that the damper can carry a charge.
- If you have a newer refrigerator, you may also be able to run a diagnostic from your refrigerator’s control board. Again, you’ll need to check your appliance’s manual and tech sheet for specific instructions.
5. Temperature Control Board
Some refrigerators, particularly newer models, monitor and manage their internal temperature with a dedicated control board separate from the main board. These boards often feature a digital display, and are usually found in the dispenser assembly or behind the control panel inside the refrigerator. Naturally, if the temperature control board fails, your refrigerator’s internal temperatures are going to be off. LIke the main control board, though, entering diagnostic mode and testing this part will depend on the make and model of your appliance. Grab your manual and your tech sheet to track down specific steps for testing this part on your fridge.
Finding The Right Replacement Part
After running our suggested tests, you’ve likely found yourself in need of a replacement for a failed component. Luckily, finding a compatible part is quick and easy with AppliancePartsPros.com on your side!
To track that part down, start with your refrigerator’s model number. You’ll find it on a sticker somewhere on the body of the appliance. Check the following places:
- On the exterior door or sides of the appliance
- Inside the door or on the door frame
- On the interior ceiling of the freezer or refrigerator compartment
- On the inside wall of either compartment
- On the fridge floor, beneath the crisper drawers
- Behind the kickplate at the bottom of the appliance
Once you’ve got that model number, you can search for the right part online at AppliancePartsPros.com. Order online and have the part you need to your door in as little as two days!
Wrapping Up
From that first diagnostic test to the final install of a new component, AppliancePartsPros.com is here to help you fix and maintain your appliances. Whether you’re looking for replacement parts or need tips on cleaning and upkeep, we’ve got you covered! Check out our site, blog, and YouTube channel for more great tips, tutorials, and genuine OEM replacement parts.
 https://www.appliancepartspros.com/b/wp-content/uploads/2025/06/20250618_1057_Refrigerator-Control-Panel_simple_compose_01jy1rkhd5fzgb4n1cr7rbcgkp.png
1024
1536
Steven E
https://www.appliancepartspros.com/b/wp-content/uploads/2020/11/app-logo-std.png
Steven E2025-06-19 05:43:592025-08-20 09:58:31How to Replace GE Fridge Main Control Board WR55X10942C
https://www.appliancepartspros.com/b/wp-content/uploads/2025/06/20250618_1057_Refrigerator-Control-Panel_simple_compose_01jy1rkhd5fzgb4n1cr7rbcgkp.png
1024
1536
Steven E
https://www.appliancepartspros.com/b/wp-content/uploads/2020/11/app-logo-std.png
Steven E2025-06-19 05:43:592025-08-20 09:58:31How to Replace GE Fridge Main Control Board WR55X10942C https://www.appliancepartspros.com/b/wp-content/uploads/2025/06/20250602_1036_Modern-Kitchen-Fridge_simple_compose_01jwrh1dh6efb8dyks4ttypqpp.png
1024
1536
Steven E
https://www.appliancepartspros.com/b/wp-content/uploads/2020/11/app-logo-std.png
Steven E2025-06-19 05:34:432025-08-20 09:39:43Guide to Replace Freezer Rail 241514601 on a Frigidaire Fridge
https://www.appliancepartspros.com/b/wp-content/uploads/2025/06/20250602_1036_Modern-Kitchen-Fridge_simple_compose_01jwrh1dh6efb8dyks4ttypqpp.png
1024
1536
Steven E
https://www.appliancepartspros.com/b/wp-content/uploads/2020/11/app-logo-std.png
Steven E2025-06-19 05:34:432025-08-20 09:39:43Guide to Replace Freezer Rail 241514601 on a Frigidaire Fridge https://www.appliancepartspros.com/b/wp-content/uploads/2025/06/20250617_1528_Refrigerator-Freezer-Open_simple_compose_01jxznrehvfn38yba21fgqxcnd.png
1024
1536
Steven E
https://www.appliancepartspros.com/b/wp-content/uploads/2020/11/app-logo-std.png
Steven E2025-06-19 05:31:482025-08-20 09:32:39How to Replace LG Fridge Freezer Rail Guide AEC73337402
https://www.appliancepartspros.com/b/wp-content/uploads/2025/06/20250617_1528_Refrigerator-Freezer-Open_simple_compose_01jxznrehvfn38yba21fgqxcnd.png
1024
1536
Steven E
https://www.appliancepartspros.com/b/wp-content/uploads/2020/11/app-logo-std.png
Steven E2025-06-19 05:31:482025-08-20 09:32:39How to Replace LG Fridge Freezer Rail Guide AEC73337402Hi! I’m Matt H., and I’m thrilled to be your guide through the world of appliance repair with over 25 years of invaluable experience in the industry.
From the early days of my career, I have been deeply passionate about appliances and their inner workings. Over the years, I’ve seen it all – from vintage models to the latest cutting-edge technology – and I’ve dedicated myself to mastering the art of repair. With a toolbox in one hand and a wealth of knowledge in the other, I’ve tackled every challenge that has come my way, learning and growing with each repair.
Join me as we dive into the intricacies of appliance repair. From step-by-step repair guides to explanations of common problems and their solutions, I’ll be here to simplify the repair process and empower you with the knowledge you need to keep your appliances running smoothly.
Feel free to explore our blog, ask questions, and leave comments – this platform is a space for learning, sharing, and growing together. Let’s work together to ensure that your appliances continue to serve you for years to come.
Thank you for joining me on this journey, and I look forward to being your go-to resource for all things related to appliance repair!