GE Freezer Handle WR12X10966 Loose or Broken? Fix It Fast
Steven E / Wednesday June 18, 2025
Is your GE freezer door handle hanging by a thread or completely broken off, leaving you frustrated every time you open the fridge? Don’t worry, replacing it is easier than you think and can make your fridge look and function like new again. With just a few basic tools and our simple how-to video below, you’ll have that handle fixed in no time!
Looking for the right part? Enter your appliance model number below to find the exact match and get your appliance running like new again!
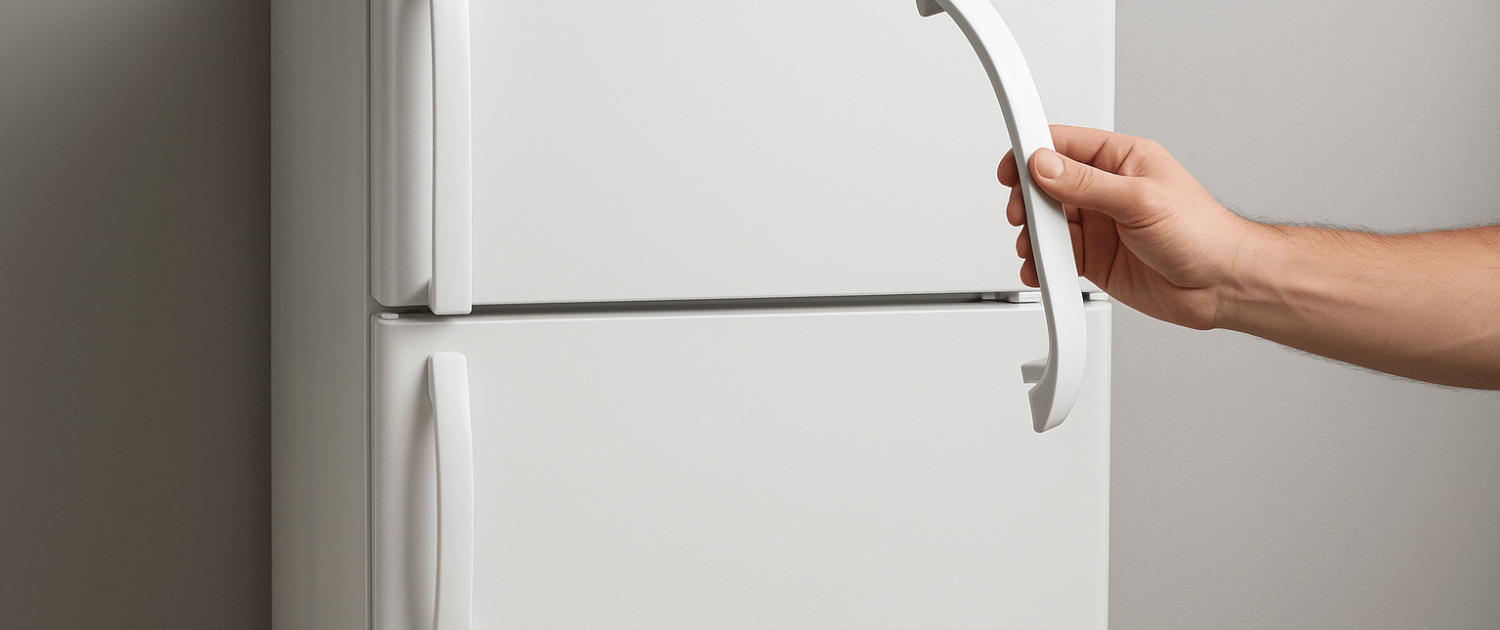
If the freezer door handle on your GE refrigerator has come loose, cracked, or broken off completely, it’s probably time for a replacement. Part number WR12X10966 is designed to fit many GE fridge models and can be swapped out with just a few basic tools. Replacing the handle is a quick fix that can instantly improve both the look and function of your fridge. In this guide, we’ll walk you through the steps to remove the old handle and install the new one with ease. Let’s get started.

Watch here: How to install a freezer door handle on a refrigerator
The information in this article may not apply to your specific appliance model. We recommend consulting your manufacturer’s documentation or contact us with any questions.
Why would the freezer handle need to be replaced?
The handles on freezer doors get a lot of action! They tend to loosen up and wear out as time goes by. Here are some reasons why GE refrigerator handles often end up breaking:
- Repeated opening/closing strains the mounting points.
- Moisture corrodes metal screws, and brackets.
- Jarring the handle by accident cracks weak points.
- The plastic eventually grows brittle and splits.
Luckily, replacing this part is fast and simple.
Tools and materials needed
Before starting this refrigerator repair project, make sure you have the following tools and parts on hand:
- Phillips head screwdriver
- Freezer door handle part #WR12X10966– Take your model number to AppliancePartsPros.com to locate the correct part for your unit.
- Protective gloves (optional)
Safety first
When working on any appliance, always keep safety first to avoid personal injury or damage to the appliance or parts. Here are some safety tips to keep in mind:
- Always power off and unplug your appliance or switch off the circuit breaker before you attempt any maintenance or replacement work. This keeps you safe by preventing any risk of electric shock.
- If the appliance has recently been used, give it plenty of time to cool down before working on it.
- Take your time while working to prevent accidents and personal injuries. Rushing is the enemy of precision.
- Work in a well-lit area so you can clearly see and access appliance parts.
- Keep your workspace free of clutter and other obstacles. Keep children and pets away from the work area.
- Check the user manual to see if there are specific installation or safety instructions related to your appliance or replacement part.
- Be gentle when handling or removing parts. Excessive force might damage the appliance or cause personal injury.
- Wear insulated work gloves to protect your hands from sharp metal parts and debris.
- Consider wearing safety glasses and/or a dust mask when working with chemicals, dust or a large amount of debris to prevent irritation or injury.
Replacement Steps
- Use care when removing the old bracket. Age and stress can cause the plastic to crack easily.
- Do not over-tighten the new handle screws.
- Check alignment as you go and make any adjustments before fully secured.
- Open the fresh food door.
- Use the Phillips screwdriver to remove the two screws on the bottom of the freezer handle.
- Use the Phillips screwdriver to remove the screw on the top of the handle.
- Pull the handle off the door.
- Line up the handle with the screw holes on the bottom of the freezer door.
- Use the Phillips screwdriver to install the screws on the bottom, do not tighten them all the way in case you need to adjust the handle.
- Line up the handle with the top screw hole.
- Use the Phillips screwdriver to secure the handle at the top.
- Now you can go back and tighten the bottom screws.
- Check that the handle is secure.
- Close the fresh food door.
- Restore power.
More information
Thanks for reading! We hope this guide helped you replace the freezer door handle in your GE refrigerator.
If you still need some replacement parts, grab your model number and head over to AppliancePartsPros.com. We offer over two million parts and most orders arrive in two business days. If you need some help with finding the right part or placing an order, you can contact our team at 1 (877) 477-7278.
While you’re waiting for your new part to arrive, you can explore our DIY blog and watch thousands of video tutorials on our YouTube channel.
Be sure to follow us on Facebook, Twitter and Instagram to see our latest repair guides!
 https://www.appliancepartspros.com/b/wp-content/uploads/2025/04/APP-blog-square-31.jpg
1080
1080
Steven E
https://www.appliancepartspros.com/b/wp-content/uploads/2020/11/app-logo-std.png
Steven E2025-04-07 06:45:432025-04-07 06:45:52What error code 39e on a Samsung refrigerator means
https://www.appliancepartspros.com/b/wp-content/uploads/2025/04/APP-blog-square-31.jpg
1080
1080
Steven E
https://www.appliancepartspros.com/b/wp-content/uploads/2020/11/app-logo-std.png
Steven E2025-04-07 06:45:432025-04-07 06:45:52What error code 39e on a Samsung refrigerator means https://www.appliancepartspros.com/b/wp-content/uploads/2025/03/APP-blog-square1.jpg
1080
1080
Steven E
https://www.appliancepartspros.com/b/wp-content/uploads/2020/11/app-logo-std.png
Steven E2025-04-01 06:31:162025-08-07 06:25:53How to replace the water inlet valve in a Whirlpool refrigerator
https://www.appliancepartspros.com/b/wp-content/uploads/2025/03/APP-blog-square1.jpg
1080
1080
Steven E
https://www.appliancepartspros.com/b/wp-content/uploads/2020/11/app-logo-std.png
Steven E2025-04-01 06:31:162025-08-07 06:25:53How to replace the water inlet valve in a Whirlpool refrigerator https://www.appliancepartspros.com/b/wp-content/uploads/2025/02/APP-blog-square-2.jpg
1080
1080
Steven E
https://www.appliancepartspros.com/b/wp-content/uploads/2020/11/app-logo-std.png
Steven E2025-03-21 06:04:202025-03-21 07:23:11How to find out if you refrigerator is energy efficient
https://www.appliancepartspros.com/b/wp-content/uploads/2025/02/APP-blog-square-2.jpg
1080
1080
Steven E
https://www.appliancepartspros.com/b/wp-content/uploads/2020/11/app-logo-std.png
Steven E2025-03-21 06:04:202025-03-21 07:23:11How to find out if you refrigerator is energy efficientWith nearly a decade of experience in providing top-notch customer service regarding appliance parts and repair, Steven enjoys sharing practical advice, troubleshooting tips, and interesting information to help readers stay informed.