How can I replace a Whirlpool / Maytag / KitchenAid washer wash plate cap W11050804?
Steven E / Wednesday June 19, 2024
Is your washer’s wash plate cap damaged or missing, leaving your clothes vulnerable to snags and the machine’s hardware exposed? Don’t worry, we’ve got you covered! Dive into this step-by-step guide, complete with a handy how-to video below, and learn how to easily replace the wash plate cap in your Whirlpool, KitchenAid, or Maytag washing machine and get your laundry back on track in no time.
Looking for the right part? Enter your appliance model number below to find the exact match and get your appliance running like new again!
If you have a damaged or missing wash plate cap in your Whirlpool, KitchenAid, or Maytag washing machine, you can replace it yourself to save time and money.
Let’s walk through the entire replacement process step-by-step so you can get your washer back up and running.
You can find a replacement wash plate cap here. If you need other replacement parts for your washer, just enter your model number at AppliancePartsPros.com to find them. It’s that easy! Most orders arrive in just two business days, and we have thousands of guides to show you how to install your new parts.
What is the wash plate cap & why would it need to be replaced?
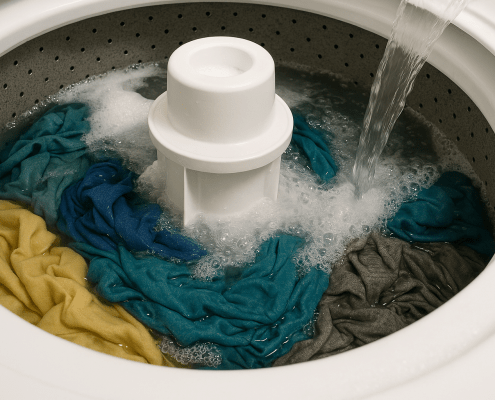
The wash plate or agitator is a large disk-shaped part mounted on the top of the wash basket. As the tub spins, the wash plate helps move the clothing through the water and detergent to get your clothes clean.
On top of the wash plate is a small plastic cap called the wash plate cap. This cap covers and protects the mounting bolt and other hardware that holds the wash plate. The wash plate cap prevents clothing and debris from catching on the protruding bolt during the wash cycle.
Over time, the constant motion of the wash plate can cause the plastic cap to become brittle and crack. Pieces of clothing or zippers may also break off parts of the cap. If the cap becomes damaged or falls off completely, it should be replaced since leaving the mounting hardware exposed may scratch or snag fabric in the washer.
Read more: Why It’s Best to Choose OEM Over Aftermarket Parts for Appliance Repairs
What you’ll need
- Replacement wash plate cap (make sure it’s compatible with your specific washer model before installing)
- Flathead screwdriver
Important: The specific tools required may vary depending on the model of your appliance and the type of fasteners used on it. Always consult the user manual or refer to any specific instructions provided by the manufacturer for the recommended tools for your appliance model.
Read more: My part is no longer available! What do I do now?
Safety tips
When working on any appliance, remember to keep safety first. Here are some tips to keep in mind:
- Always power off and unplug your appliance or switch off the circuit breaker before you attempt any maintenance or replacement work. This keeps you safe by eliminating any risk of electric shock.
- If the appliance has recently been used, give it plenty of time to cool down before working on it.
- Turn off the water supply at the outlet before beginning repairs. Keep towels ready to catch any residual water in the system when removing parts.
- Take your time while working to prevent accidents and personal injuries. Rushing is the enemy of precision.
- Work in a well-lit area so you can see and access appliance parts.
- Keep your workspace free of clutter and other obstacles. Keep children and pets away from the work area.
- Never work on internal parts with wet hands. Make sure the work area is completely dry.
- Check the user manual to see if there are specific installation or safety instructions related to your appliance or replacement part.
- Be gentle when handling or removing parts. Excessive force might damage the appliance or cause personal injury.
- Wear insulated work gloves to protect your hands from sharp metal parts and debris.
- When working with wires, avoid touching any exposed wires or terminals. If you need to touch a wire, use a non-conductive tool or wear insulating gloves to prevent electrical shock.
- Always take photos or make a note of wiring terminals or other connections before disconnecting them to make reassembly easier.
How to replace the wash plate cap
Follow these steps to change out the wash plate cap in your Whirlpool, KitchenAid, or Maytag washer.
- Unplug the washer from the power outlet.
- Open the lid of the washing machine.
- Find the wash plate cap. This is typically a small cap or cover located on the top of the wash plate or agitator inside the drum.
- Use a flathead screwdriver to carefully pry up the existing wash plate cap so you can remove it.
- Apply gentle pressure and work around the edges to pop the cap off.
- Place the new wash plate cap on top of the wash plate or agitator.
- Press down on the new cap to snap it into place so that it’s flush and level.
- Close the washer lid.
- Plug the washing machine back into the power outlet.
- Run a short test cycle to make sure the washer functions correctly with the new wash plate cap installed.
Read more: 6 Easy Ways to Perk Up Your Laundry Room
More information
Thanks for reading! We hope this guide helped you replace the wash plate cap on your Whirlpool, KitchenAid, or Maytag washer.
If you still need some replacement parts, grab your model number and head over to AppliancePartsPros.com. We offer over two million parts and most orders arrive in two business days. If you need some help with finding the right part or placing an order, you can contact our team at 1 (877) 477-7278.
While you’re waiting for your new part to arrive, you can explore our DIY blog and watch thousands of video tutorials on our YouTube channel.
Follow us on Facebook, Twitter and Instagram to see our latest repair guides!
With nearly a decade of experience in providing top-notch customer service regarding appliance parts and repair, Steven enjoys sharing practical advice, troubleshooting tips, and interesting information to help readers stay informed.


