How to fix a noisy trash compactor in your kitchen
Samantha Bullington / Tuesday January 30, 2024
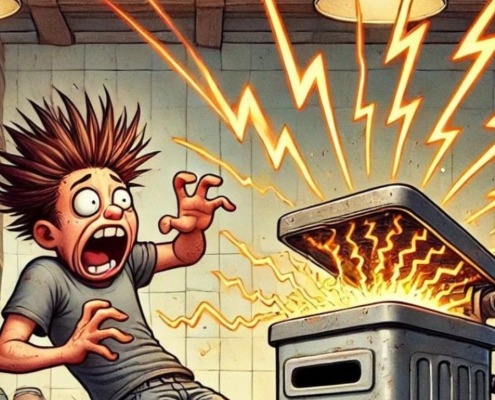
Are strange noises disrupting your serenity every time you use your trash compactor? While a bit of sound is normal, excessive noise often hints at potential issues brewing under the surface. Dive into our guide below with an instructive how-to video and discover how to bring back the silence in your kitchen.
Imagine a quiet evening at home, disrupted by the unexpected soundtrack of a rumbling, grumbling trash compactor.
While it’s perfectly normal for this handy appliance to produce some sound while compressing household waste, it shouldn’t sound like a mini earthquake under your kitchen counter.

An excessively noisy trash compactor can be more than just an auditory nuisance; it often signals underlying issues that need attention.
Let’s dive into troubleshooting this handy appliance so you can silence the beast in your kitchen.
If you need a replacement part for your trash compactor, you can use your model number to find what you’re looking for at AppliancePartsPros.com. We also have thousands of free DIY troubleshooting and repair guides to help you fix your appliance yourself.
WATCH: Reasons your trash compactor is noisy
Why do trash compactors get excessively noisy?
Trash compactors consist of powerful electric motors and a RAM system capable of generating over 2,000 pounds of pressure to smash waste together. This extreme compaction force is required to reduce waste volume by up to 75%.
During each cycle of normal trash compactor operation, you should hear some motor humming and RAM-shifting sounds. But excess noise usually stems from wear-and-tear issues over years of use, like:
- Metal and plastic gears that crack, strip, or wear down from friction
- Bearings throughout the drivetrain that seize up or disintegrate
- The RAM drive assembly loosening and causing rattling vibrations
- Drawer rollers cracking or wheels that stop spinning smoothly
- Improper installation that causes shaking or rattling against the cabinets

What you need
- Phillips-head screwdriver
- Bubble leveler
- T20 Torx bit
Safety tips
Trash compactors are high-powered machines that require safety precautions during repairs:
- Always power off and unplug your appliance or switch off the circuit breaker before attempting any maintenance or replacement work. This keeps you safe by preventing any risk of electric shock.
- If the appliance has recently been used, give it plenty of time to cool down before working on it.
- Take your time and don’t rush while working to prevent accidents and personal injuries.
- Work in a well-lit area so you can clearly see and access appliance parts.
- Keep your workspace free of clutter and other obstacles. Keep children and pets away from the work area.
- Never work on internal parts with wet hands. Make sure the work area is completely dry.
- Check the user manual to see if there are specific installation or safety instructions related to your appliance or replacement part.
- Be gentle when handling or removing parts. Excessive force might damage the appliance or cause personal injury.
- Wear insulated work gloves to protect your hands from sharp metal parts and debris.
- When working with wires, avoid touching any exposed wires or terminals. If you need to touch a wire, use a non-conductive tool or wear insulating gloves to prevent electrical shock.
- Don’t test live voltage with a multimeter if you’re unfamiliar with how to prevent short-circuiting.
- Consider wearing safety glasses and/or a dust mask when working with chemicals, dust or a large amount of debris to prevent irritation or injury.
READ MORE: 12 Easy DIY Ways to Lower Your Water Bill
Troubleshooting steps
1. Check that the unit is level
Trash compactors are all about that RAM pressure! The unit needs to rest evenly without any wobbling while it’s doing its thing.
When the supporting legs become uneven or lose their rubber pads, you’ll start to notice some serious shaking and vibration with every cycle. Since the motor and gear chains are moving at high speeds, even tiny misalignments can cause extra strain and noise.
Here’s how to inspect and adjust the machine’s level:
- Slide the compactor away from the wall to access the rear legs.
- Verify the rubber footpads are intact to dampen vibration.
- Use a bubble level tool on top to confirm the unit is level.
- Adjust the legs if needed by using spin extenders to raise or lower them.
READ MORE: 4 Simple Ways to Reduce Kitchen Waste
2. Check the drawer slides
Trash compactors feature a sturdy sliding drawer assembly that lets you easily load discarded waste for compression. And the best part? This large pull-out drawer glides smoothly on metal or plastic roller guides.
But after years of using them, these rollers can crack or the bearings inside can stop working. Then the drawer might make a loud rumbling and grinding noise when you open or close it.
Pinpoint the source of the roller noise with these steps:
- Fully open the drawer.
- Lift the drawer straight up and out to detach it from the internal slides.
- Check the cabinet roller slots for debris. Clean any gunk you find.
- Rotate the wheels to feel for sticking.
- Spin the drawer slider rollers to make sure the wheels turn freely.
You can try lubricating the slides to see if that helps things move smoother. If needed, install a new roller guide hardware kit.
READ MORE: How to prevent appliance fire hazards
3. Check the drive gear assembly
The drive gear assembly transfers rotational power from the electric motor to convert it into linear motion. This motion then pushes the RAM piston forward to compact trash. The gear train allows the motor to generate some serious compacting force.
After years of use, these plastic and metal gears can experience some serious wear and tear. They can crack, strip, or even warp. Debris can also sneak in and cause more damage. You’ll notice more noise and grinding sounds when the precision drive gears don’t work right.
Here’s how to assess and check the drive gears:
- Open the drawer.
- Detach the rails from the sides of the cabinet.
- Lift the drawer out.
- Access gear assembly by carefully tipping the unit back or sideways.
- Unscrew the cover panel with a Phillips-head screwdriver to reveal the gears.
- Look over the plastic and metal gears for any cracks or missing cogs. Spin them to see if they rotate smoothly.
If you find any damage, replace the entire gear drive assembly.
READ MORE: 7 Space-Saving Tips For Small Kitchens
4. Check the power nuts
The power screw and nuts team up to convert the rotation of the motor into linear motion, which makes the RAM piston move up and down. The power nuts attach to the screw and ride the threads to power the compacting.
If the plastic power nuts start wearing out over time, they might start squeaking, grinding, or squealing loudly. A thumping sound can also occur if the screw starts to strip.
Here’s what you need to do:
- Pull the drawer completely out.
- Detach the rails from the sides of the cabinet.
- Lift the drawer out.
- Carefully lay the compactor on its side.
- Use a T20 Torx bit to unscrew the access panels.
- Check the power nuts for cracks or stripped threads. Check the screw for damage.
If any parts are damaged, install a new power nut hardware kit.
READ MORE: Pantry Organization: A Step-by-Step Guide
5. Check the drive motor
The powerful electric motor at the back of the trash compactor generates power to compact every load. It spins at high RPMs when starting up to crush the garbage inside.
After a long time of use, the internal motor bearings might wear out. When this happens, the drive motor will have to work harder and become noisier. You may hear very loud straining, growling, humming, squealing, or screeching noises.
Here’s how to check the motor’s condition:
- Unplug the power cord.
- Unscrew the motor cover plate.
- Make sure the motor is secure. Tighten the bolts if needed.
- The motor start windings can be tested for resistance at the top limit switch from the red wire to the gray wire. You can use a multimeter and set it to resistance, which has a symbol that looks like an upside-down horseshoe. You should get a reading of 10 ohms.
- The run windings can be tested from the yellow wire at the top limit switch to the white wire of the unit. You should get a reading of 3 to 5 ohms.
Replace the motor if it’s damaged or fails testing.
READ MORE: How To Store and Organize Small Kitchen Appliances
Trash compactor maintenance tips
It’s always recommended to troubleshoot your trash compactor as soon as you notice excessive noise and replace damaged parts ASAP to prevent further damage.
Here’s how you can prevent future problems:
- Run gentle cycles for lightweight cans and bottles.
- Avoid compacting appliances, electronics and batteries.
- Check the drawer rollers and lubricate the slides at least once a year.
- Periodically check that the compactor is level.
WATCH: How to replace container roller bearing on a trash compactor
More information
Thanks for stopping by! We hope this guide helped you fix your noisy trash compactor.
If you run into any issues, just give us a call at 1-877-477-7278 or start a chat with a pro on our website so we can help you through it. We’ve got many more troubleshooting and repair guides on our DIY blog and YouTube channel, and, of course, all the parts you need to do it yourself at AppliancePartsPros.com. We can also help you troubleshoot common trash compactor problems here.
Make sure to connect with us on Facebook, Twitter and Instagram!
 https://www.appliancepartspros.com/b/wp-content/uploads/2024/07/Copy-of-Copy-of-Copy-of-Copy-of-Copy-of-Copy-of-Copy-of-Copy-of-Copy-of-Copy-of-Copy-of-app-blog-square-9.jpg
1080
1080
Steven E
https://www.appliancepartspros.com/b/wp-content/uploads/2020/11/app-logo-std.png
Steven E2024-07-16 09:08:572024-07-16 09:09:055 reasons a trash compactor shocks when it’s touched & how to fix it
https://www.appliancepartspros.com/b/wp-content/uploads/2024/07/Copy-of-Copy-of-Copy-of-Copy-of-Copy-of-Copy-of-Copy-of-Copy-of-Copy-of-Copy-of-Copy-of-app-blog-square-9.jpg
1080
1080
Steven E
https://www.appliancepartspros.com/b/wp-content/uploads/2020/11/app-logo-std.png
Steven E2024-07-16 09:08:572024-07-16 09:09:055 reasons a trash compactor shocks when it’s touched & how to fix it https://www.appliancepartspros.com/b/wp-content/uploads/2024/07/Copy-of-Copy-of-Copy-of-Copy-of-Copy-of-Copy-of-Copy-of-Copy-of-Copy-of-Copy-of-Copy-of-app-blog-square-8.jpg
1080
1080
Steven E
https://www.appliancepartspros.com/b/wp-content/uploads/2020/11/app-logo-std.png
Steven E2024-07-16 08:55:502024-07-16 08:55:59How to troubleshoot a trash compactor that smells bad
https://www.appliancepartspros.com/b/wp-content/uploads/2024/07/Copy-of-Copy-of-Copy-of-Copy-of-Copy-of-Copy-of-Copy-of-Copy-of-Copy-of-Copy-of-Copy-of-app-blog-square-8.jpg
1080
1080
Steven E
https://www.appliancepartspros.com/b/wp-content/uploads/2020/11/app-logo-std.png
Steven E2024-07-16 08:55:502024-07-16 08:55:59How to troubleshoot a trash compactor that smells bad https://www.appliancepartspros.com/b/wp-content/uploads/2024/07/Copy-of-Copy-of-Copy-of-Copy-of-Copy-of-Copy-of-Copy-of-Copy-of-Copy-of-Copy-of-Copy-of-app-blog-square-7.jpg
1080
1080
Steven E
https://www.appliancepartspros.com/b/wp-content/uploads/2020/11/app-logo-std.png
Steven E2024-07-16 08:42:252024-07-16 08:42:32Trash compactor leaves a mess: A DIY troubleshooting guide
https://www.appliancepartspros.com/b/wp-content/uploads/2024/07/Copy-of-Copy-of-Copy-of-Copy-of-Copy-of-Copy-of-Copy-of-Copy-of-Copy-of-Copy-of-Copy-of-app-blog-square-7.jpg
1080
1080
Steven E
https://www.appliancepartspros.com/b/wp-content/uploads/2020/11/app-logo-std.png
Steven E2024-07-16 08:42:252024-07-16 08:42:32Trash compactor leaves a mess: A DIY troubleshooting guideHey there, I’m Samantha and I’m super excited to be a part of the Appliance Parts Pros team! With 9 years of experience, I’ve had the awesome opportunity to assist countless customers in troubleshooting their home appliances and finding DIY repair solutions.