How to Fix Error Code E303 On a Bosch Oven
Steven E / Friday May 9, 2025
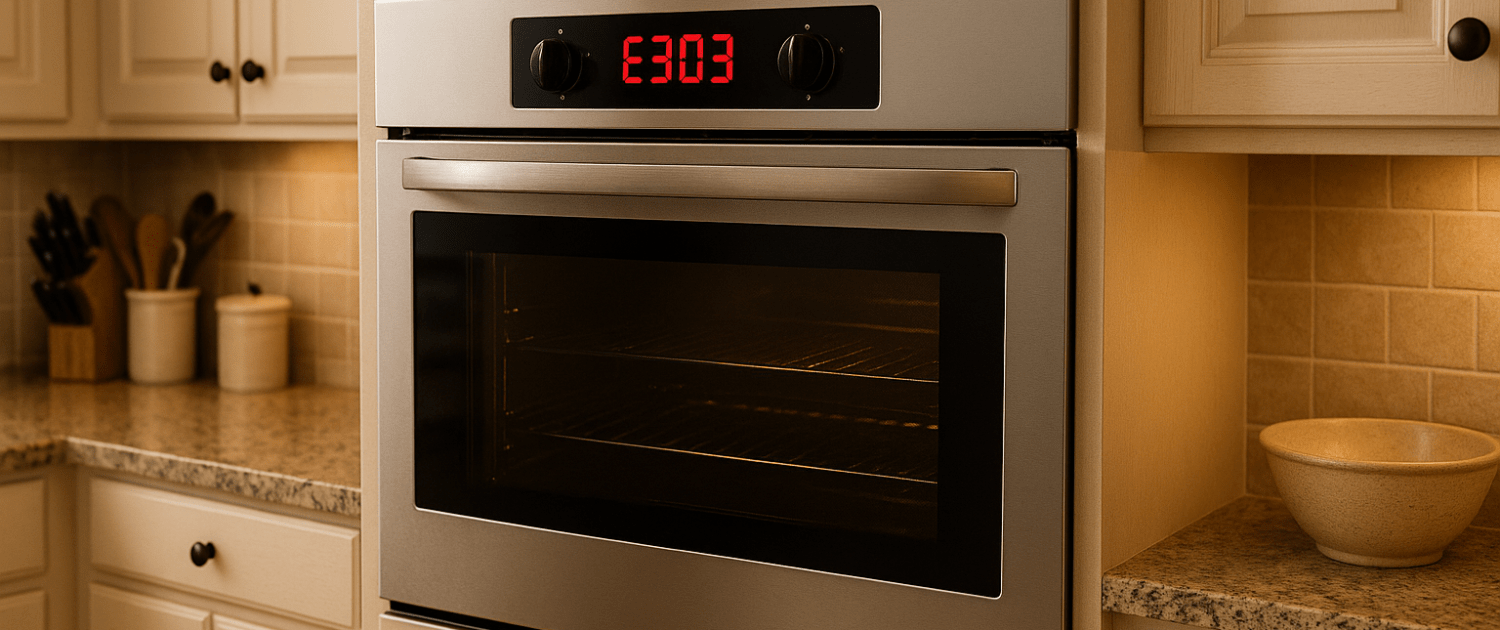
Experiencing an E303 error code on your Bosch 800 Series gas slide-in range? This error indicates the electronic components are getting too hot, so your oven is disabling heating to prevent damage. With some targeted troubleshooting, you can likely resolve this E303 error yourself and get your Bosch oven baking again in no time.
If you find out that you need any replacement parts for your appliance while you’re troubleshooting, you can enter your model number at AppliancePartsPros.com to order them. Most orders arrive in just two business days, and we have thousands of free guides to show you how to install your new parts.
The information in this article may not apply to your specific appliance model. We recommend consulting your manufacturer’s documentation or contact us with any questions.
What causes the error code?
The E303 error message is triggered when the temperature sensor on the control module detects the internal temperature is rising higher than the acceptable limit over a period of time.

Specifically, this error occurs when the temperature changes detected over time exceed the threshold built into the control module’s programming.
When triggered, the E303 error message appears causing the unit to immediately turn off all oven heating elements. The cooling fan will also switch to run at high speed. This halts operation to prevent damage to the oven’s delicate electronic components.
Safety precautions
When working on any appliance, remember to keep safety first. Here are some tips to keep in mind:
- Always power off and unplug your appliance or switch off the circuit breaker before attempting any maintenance or replacement work. This keeps you safe by preventing any risk of injury from electric shock.
- Wear insulated work gloves to protect your hands from sharp metal parts, pinching hazards and debris.
- Take your time and don’t rush while working to prevent accidents and personal injuries.
- Work in a well-lit area so you can clearly see and access the interior parts.
- Clear your workspace of clutter and other obstacles. Keep children and pets away from the work area.
- Never work on internal parts with bare wet hands. Make sure the work area is completely dry.
- Check your user manual to see if there are specific installation or safety instructions for your part or appliance.
- Be gentle when handling or removing parts. Excessive force might damage the appliance or cause injury.
- Wear safety glasses when working with chemicals, dust or cleaning large debris to prevent injury.
- If the appliance has recently been used, give it plenty of time for any heating parts to cool down before working on it.
- Take pictures or make a note of wiring terminals or other connections before disconnecting to prevent any problems with reassembly.
- When working with wires, avoid touching any exposed wires or terminals. If you need to touch a wire, use a non-conductive tool or wear insulating gloves to prevent electrical shock.
Troubleshooting steps
With the E303 fault code, the oven control module has detected dangerously high temps, so troubleshooting focuses on finding the cause of the excessive heat buildup. Here are the steps to diagnose and resolve this issue:
Step 1: Check the cooling fan
- Make sure the fan is spinning and rotating as expected.
- Listen closely to hear the fan operating.
- Check the fan operation:
- If the fan is not running at all, unplug the range.
- Check the wiring connections between the fan and the control module.
- Refer to the wiring diagram and small load schematic in the range’s service manual to identify the proper terminals.
- Ensure all connectors are securely attached and making good contact.
- Inspect the fan blades:
- Check for any bent or damaged fan blades that could be preventing normal operation.
Step 2: Inspect the heating elements
- Remove the thumb screws and bake chamber cover to access the bottom burner.
- Examine the burner tube and igniter for any visible damage.
- Use an ohmmeter to check the bake igniter’s resistance – it should be between 40-96 ohms when checked cold. Resistance lower than 25 ohms when cold likely indicates a faulty igniter that needs replacement.
- Verify the bake flame ignites and burns evenly across the entire burner tube when activated. An uneven flame that only ignites partially could explain the overheating.
- Inspect the gas valve, supply lines, and orifices for any blockages if flame issues are present.
- Inspect the broil element. Detach the broil burner assembly to view the top igniter and burner tube.
- Check the broil igniter resistance – it should measure 11-18 ohms with the oven cool.
- As with the bake burner, look for blocked gas supply lines or orifices if the broil flame seems weak or uneven.
- Reconnect components properly:
- When replacing faulty igniters or burners, be sure to reconnect all ground wires and conduits properly.
- Improper electrical connections can lead to arcing and heat buildup.
Step 3: Check for airflow obstructions
- Remove the bottom panel or kick plate to view the lower vent openings.
- Use a bright flashlight to look for any buildup or debris obstructing the air intake chamber beneath the oven cavity.
- The openings should be completely clean and unobstructed.
- Look at the area near the convection fan at the rear of the oven.
- Food splatter and drips can collect here over time and impede proper ventilation.
- Remove any obstructions and ensure the convection fan blade spins freely without scraping the housing.
- Ensure the upper vent openings along the rear of the cooktop are clear.
- Grease splatter often collects here, blocking the free flow of hot air.
- Clean any debris with an oven degreaser and nylon brush.
Step 4: Test the relays
- Press and hold “Enter,” “1” and “Bake” for 5 seconds when the range is in standby mode.
- Select the relay test option from the service mode menu.
- The primary relays to check for an E303 error are the ones supplying the bake/broil igniters and convection fan.
- Follow the menu to activate each relay and listen closely for an audible click when the state changes.
- Both states (on and off) should produce an audible click.
- A relay that fails to click or feels stuck could be faulty.
- Make a note of any problematic relays.
- If a faulty relay is confirmed, the control module will likely need replacement.
- Proper relay operation is critical to prevent overheating issues.
Step 5: Replace the control module
- The control module is typically screwed to a mounting plate inside the rear service control panel.
- Carefully disconnect all wire harnesses from the control module.
- Unscrew the mounting plate to remove the control module.
- Place the replacement control module outside the oven on a clean flat surface.
- Use extension cords to facilitate the replacement process.
- Precisely follow the wiring diagram when reconnecting the wires to avoid mismatches.
- Be extremely diligent to avoid pinching wires or damaging connectors.
- Use plenty of extension cords so the control module can be placed outside the oven.
- Double-check all connections to ensure they are properly made.
- Secure the replacement control module to the mounting plate.
- Reconnect all wire harnesses.
- With the proper replacement part installed, the E303 error should clear.
Additional information
Thank you for reading! We hope you found this information useful to get your oven working again.
If you have any other appliance repair needs or projects, don’t hesitate to explore our thousands of free videos and troubleshooting guides available. If you need replacement parts or some extra help, grab your model number and head over to AppliancePartsPros.com, where you can chat with a pro, order parts, read our DIY blog, and more.
Be sure to subscribe to us on YouTube and follow us on Facebook, Twitter, and Instagram!
 https://www.appliancepartspros.com/b/wp-content/uploads/2023/08/tracybeard_photo_camera_35mm_film_photo_depth_of_field_detailed_4a0511b2-f4a3-4713-bf13-00d2bc703079.png
572
1020
Steven E
https://www.appliancepartspros.com/b/wp-content/uploads/2020/11/app-logo-std.png
Steven E2023-08-04 11:30:162023-08-04 11:30:23F09 Whirlpool Washer Error Code: A Troubleshooting Guide
https://www.appliancepartspros.com/b/wp-content/uploads/2023/08/tracybeard_photo_camera_35mm_film_photo_depth_of_field_detailed_4a0511b2-f4a3-4713-bf13-00d2bc703079.png
572
1020
Steven E
https://www.appliancepartspros.com/b/wp-content/uploads/2020/11/app-logo-std.png
Steven E2023-08-04 11:30:162023-08-04 11:30:23F09 Whirlpool Washer Error Code: A Troubleshooting Guide https://www.appliancepartspros.com/b/wp-content/uploads/2023/08/Error-Code-F9E1.png
609
1086
Steven E
https://www.appliancepartspros.com/b/wp-content/uploads/2020/11/app-logo-std.png
Steven E2023-08-04 10:03:072023-08-04 10:03:15Error Code F9E1: Long Drain in a Whirlpool Washer
https://www.appliancepartspros.com/b/wp-content/uploads/2023/08/Error-Code-F9E1.png
609
1086
Steven E
https://www.appliancepartspros.com/b/wp-content/uploads/2020/11/app-logo-std.png
Steven E2023-08-04 10:03:072023-08-04 10:03:15Error Code F9E1: Long Drain in a Whirlpool Washer https://www.appliancepartspros.com/b/wp-content/uploads/2023/08/tracybeard_A_middle_aged_man_with_messy_hair_and_a_worried_expr_d25576d5-f8c5-49ec-b6a9-842e52ed22b0.png
609
1086
Steven E
https://www.appliancepartspros.com/b/wp-content/uploads/2020/11/app-logo-std.png
Steven E2023-08-03 13:19:312023-08-03 13:19:48Maytag Dryer Code AF: A Troubleshooting Guide
https://www.appliancepartspros.com/b/wp-content/uploads/2023/08/tracybeard_A_middle_aged_man_with_messy_hair_and_a_worried_expr_d25576d5-f8c5-49ec-b6a9-842e52ed22b0.png
609
1086
Steven E
https://www.appliancepartspros.com/b/wp-content/uploads/2020/11/app-logo-std.png
Steven E2023-08-03 13:19:312023-08-03 13:19:48Maytag Dryer Code AF: A Troubleshooting GuideWith nearly a decade of experience in providing top-notch customer service regarding appliance parts and repair, Steven enjoys sharing practical advice, troubleshooting tips, and interesting information to help readers stay informed.