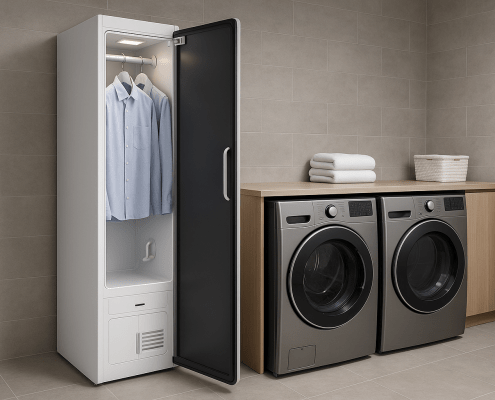
How to Fix Steam Closet Condensation or Fog Inside the Glass
Steven E / Wednesday July 9, 2025

If you’ve noticed condensation or fog forming between the layers of glass on the door or window panel of your laundry steam closet, it can be frustrating. Not only does it look unsightly, but it could also mean your closet isn’t sealing properly, which can lead to issues over time.
The good news? A foggy steam closet door is usually the result of a minor issue you can fix yourself. This guide will help you troubleshoot the problem, repair it, and prevent it from happening again. Let’s get that door crystal clear and your steam closet performing its best.
The information in this article may not apply to your specific appliance model. We recommend consulting your manufacturer’s documentation or contact us with any questions.
Why Does Fog Build Up Between the Glass?
Your steam closet door is made with insulated glass, usually two panes with a sealed air gap between them. That air gap is what keeps the exterior of the door cool and helps the closet maintain internal temperature and humidity.

When moisture appears inside the glass, it means the seal around the glass has failed, allowing humid air and steam to enter the gap and condense. Common causes include:
- Worn or cracked door gasket
- Loose or damaged glass panel seals
- Warped door frame
- Excessive humidity from clogged vents or improper drainage
Each of these can be inspected and fixed with a few tools and some patience.
Tools and Supplies You’ll Need
Before you get started, grab these items:
- Microfiber cloths
- Warm soapy water
- Screwdrivers (flathead and Phillips)
- Replacement door gasket (if needed)
- Clear silicone sealant (if resealing the glass)
- Level
- Flashlight
Step 1: Safety First
Always unplug your steam closet before working on it. You’ll be working around moisture and electrical parts, so it’s best to cut the power and let the unit cool completely before starting.
Step 2: Confirm It’s Inside the Glass
Sometimes what looks like condensation inside the glass is actually on the inside or outside surface.
To check:
- Wipe the exterior of the glass with a clean, dry microfiber cloth.
- Open the door and wipe the interior surface of the glass.
- If the fog remains visible between the panes, the seal between the glass layers has been compromised.
Step 3: Inspect the Door Gasket
The door gasket is a flexible rubber seal that keeps steam inside the chamber. If it’s cracked, flattened, or dirty, steam can escape and infiltrate the door’s internal air gap.
How to inspect and clean:
- Run your fingers along the gasket to feel for cracks, hard spots, or loose areas.
- Clean the gasket and the door frame with warm, soapy water and a cloth.
- If you see damage, replace the gasket by peeling off the old one and pressing the new gasket into place.
After replacing or cleaning the gasket, run a test cycle to see if the fogging improves.
Step 4: Tighten the Door Assembly
Over time, screws holding the door frame together can loosen slightly, allowing the glass seal to fail.
How to check:
- Open the door and look around the edges of the frame.
- Use a screwdriver to snug any visible screws without over-tightening.
- Look for gaps between the frame and the glass; it should sit flush all the way around.
Step 5: Reseal the Glass Panel
If the glass itself is leaking, you may be able to reseal it rather than replacing the entire door.
How to reseal:
- Carefully remove the door from its hinges if needed (check your manual for instructions).
- Lay it flat on a towel-covered surface.
- Gently pry the glass panel out of the frame, taking care not to crack it.
- Clean the edges of the glass and the inside of the frame thoroughly.
- Apply a thin, even bead of clear silicone sealant around the edge of the glass.
- Reassemble the door and let the sealant cure for 24 hours before using the steam closet.
Step 6: Check Ventilation and Drainage
Sometimes fogging can also be caused by excess moisture in the chamber, which escapes into the door assembly.
How to fix:
- Clean the interior vents with a soft brush or vacuum to improve airflow.
- Remove and clean the drain tray to ensure proper water drainage.
- Make sure the closet is level; a tilted unit can cause water to pool in the wrong places and create excess humidity.
Step 7: Run a Test Cycle
After cleaning, resealing, and adjusting, plug the unit back in and run a short cycle. Watch the glass carefully to see if the fogging reappears. If the glass remains clear, you’ve successfully fixed the problem.
Where To Find Us
If you need any replacement parts for your appliances, you can enter your model number at AppliancePartsPros.com to locate and order them quickly. Most orders arrive in just two business days, and we have tons of great information in our repair help section and YouTube videos to help you troubleshoot.
Stay connected with the latest DIY tips, tutorial videos, and repair guides by following us on Facebook, Instagram, and Twitter. We love hearing about your repair stories and successes. If you need more help or want personalized guidance, feel free to reach out. We’re ready to help you take on your next project with confidence!
 https://www.appliancepartspros.com/b/wp-content/uploads/2025/07/20250626_1511_Laundry-Steam-Closet_simple_compose_01jyptbe0tenasrfkphy3x07er.png
1024
1536
Steven E
https://www.appliancepartspros.com/b/wp-content/uploads/2020/11/app-logo-std.png
Steven E2025-07-03 12:59:132025-07-03 12:59:22How to Fix a Steam Closet That Leaves Clothes Unevenly Steamed
https://www.appliancepartspros.com/b/wp-content/uploads/2025/07/20250626_1511_Laundry-Steam-Closet_simple_compose_01jyptbe0tenasrfkphy3x07er.png
1024
1536
Steven E
https://www.appliancepartspros.com/b/wp-content/uploads/2020/11/app-logo-std.png
Steven E2025-07-03 12:59:132025-07-03 12:59:22How to Fix a Steam Closet That Leaves Clothes Unevenly Steamed https://www.appliancepartspros.com/b/wp-content/uploads/2025/07/20250626_1511_Laundry-Steam-Closet_simple_compose_01jyptbe0xfdevewrxrj7mgrv2.png
1024
1536
Steven E
https://www.appliancepartspros.com/b/wp-content/uploads/2020/11/app-logo-std.png
Steven E2025-07-03 12:47:172025-07-03 12:47:26Laundry Steam Closet Keeps Shutting Off Mid-Cycle? How To Fix It
https://www.appliancepartspros.com/b/wp-content/uploads/2025/07/20250626_1511_Laundry-Steam-Closet_simple_compose_01jyptbe0xfdevewrxrj7mgrv2.png
1024
1536
Steven E
https://www.appliancepartspros.com/b/wp-content/uploads/2020/11/app-logo-std.png
Steven E2025-07-03 12:47:172025-07-03 12:47:26Laundry Steam Closet Keeps Shutting Off Mid-Cycle? How To Fix It https://www.appliancepartspros.com/b/wp-content/uploads/2025/07/20250626_1517_Luxury-Steam-Closet_simple_compose_01jyptn89kee59pqmx7pdnhnec.png
1024
1536
Steven E
https://www.appliancepartspros.com/b/wp-content/uploads/2020/11/app-logo-std.png
Steven E2025-07-03 12:36:532025-07-03 12:37:03Repairing a Laundry Steam Closet That’s Not Recognizing Clothing
https://www.appliancepartspros.com/b/wp-content/uploads/2025/07/20250626_1517_Luxury-Steam-Closet_simple_compose_01jyptn89kee59pqmx7pdnhnec.png
1024
1536
Steven E
https://www.appliancepartspros.com/b/wp-content/uploads/2020/11/app-logo-std.png
Steven E2025-07-03 12:36:532025-07-03 12:37:03Repairing a Laundry Steam Closet That’s Not Recognizing ClothingWith nearly a decade of experience in providing top-notch customer service regarding appliance parts and repair, Steven enjoys sharing practical advice, troubleshooting tips, and interesting information to help readers stay informed.