How to Fix the F9 Error Code on Your Whirlpool Microwave
Steven E / Friday May 9, 2025
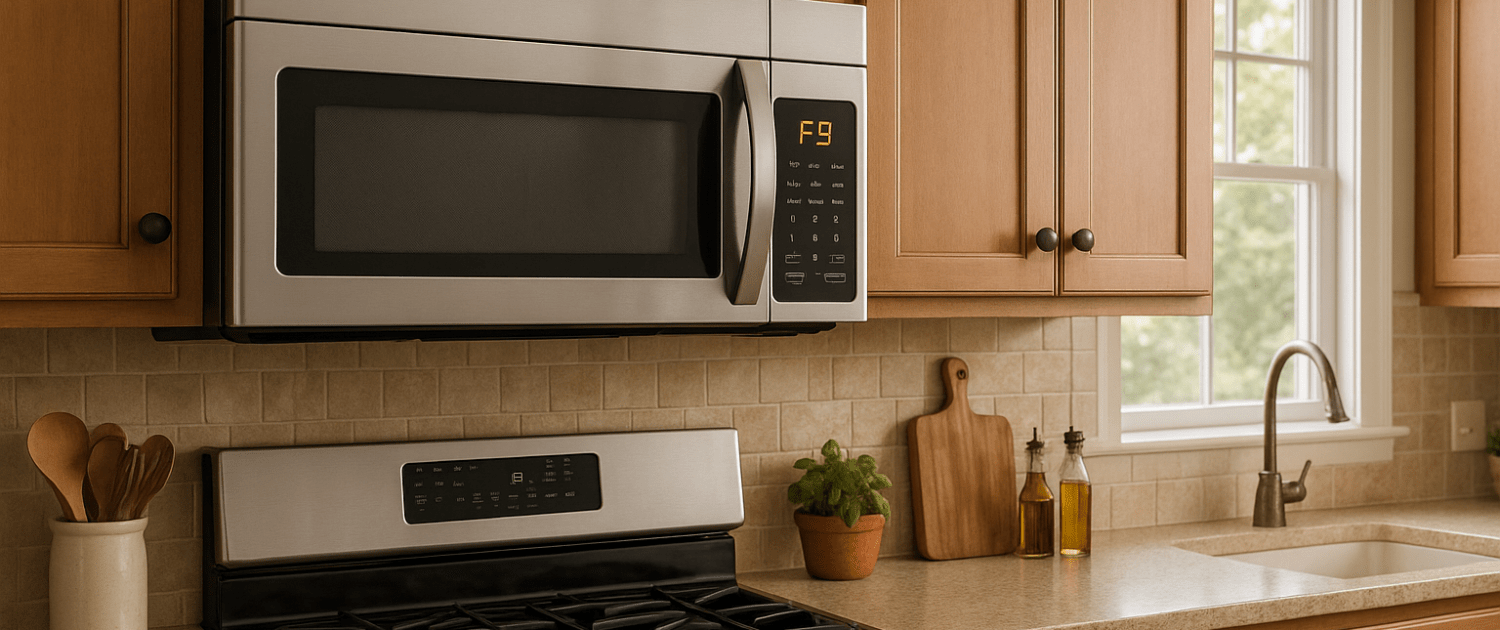
Is your microwave displaying an F9 error code? Like any appliance error code, an F9 means the microwave needs some troubleshooting attention before it will function normally again. We’ll explore what’s behind the F9 Whirlpool Microwave error code and walk through the steps to diagnose and resolve this communication error in your microwave oven.
If you find out that you need any replacement parts for your appliance while you’re troubleshooting, you can enter your model number at AppliancePartsPros.com to order them. Most orders arrive in just two business days, and we have thousands of free guides to show you how to install your new parts.
The information in this article may not apply to your specific appliance model. We recommend consulting your manufacturer’s documentation or contact us with any questions.
What causes the error code?
Microwave ovens contain a few key electronic control boards to regulate different components and cooking functions. These include:

- Relay board – Routes power to microwave, convection, and grill circuits.
- Inverter relay board – Powers the magnetron to generate microwaves.
Proper communication between these boards is essential for the oven to operate smoothly. The relay control board acts as the central brain, signaling the other boards when to power on and off.
When the F9 error code appears, it means the communication link between the relay control board and the inverter relay board is disrupted. This interruption in signals prevents the oven from activating its cooking functions.
Without fixing an F9 communication error, you won’t be able to get your microwave to actually work! The good news is, that the issue can usually be quickly resolved with some targeted troubleshooting of the relay boards and the wiring between them.
Safety precautions
When working on any appliance, remember to keep safety first. Here are some tips to keep in mind:
- Always power off and unplug your appliance or switch off the circuit breaker before attempting any maintenance or replacement work. This keeps you safe by preventing any risk of injury from electric shock.
- Wear insulated work gloves to protect your hands from sharp metal parts, pinching hazards and debris.
- Take your time and don’t rush while working to prevent accidents and personal injuries.
- Work in a well-lit area so you can clearly see and access the interior parts.
- Clear your workspace of clutter and other obstacles. Keep children and pets away from the work area.
- Never work on internal parts with bare wet hands. Make sure the work area is completely dry.
- Check your user manual to see if there are specific installation or safety instructions for your part or appliance.
- Be gentle when handling or removing parts. Excessive force might damage the appliance or cause injury.
- Wear safety glasses when working with chemicals, dust or cleaning large debris to prevent injury.
- If the appliance has recently been used, give it plenty of time for any heating parts to cool down before working on it.
- Take pictures or make a note of wiring terminals or other connections before disconnecting to prevent any problems with reassembly.
- When working with wires, avoid touching any exposed wires or terminals. If you need to touch a wire, use a non-conductive tool or wear insulating gloves to prevent electrical shock.
Microwave safety
Microwaves contain high-voltage parts and have the capacity to store voltage even when they’re disconnected from a power source. Please be very careful while working on a microwave’s internal parts to avoid electrocution, which has the potential to cause serious injuries or death.
- Always unplug the microwave before troubleshooting or making repairs.
- Discharge the high-voltage capacitor before working on high-voltage parts to eliminate the risk of electric shock. Do not continue if you are uncomfortable or unfamiliar with this process.
- Never attempt to run the microwave while its casing is open or when internal parts are exposed. Always completely reassemble the microwave before testing or using it.
- Never attempt to bypass any microwave safety features.
- Never run the microwave empty. Use a glass of water for test running.
- Removing a microwave from over the range is a two person job due to the weight and potential for damage. Follow manufacturer installation instructions for reinstallation over the range after repair.
Troubleshooting steps
With some simple but careful testing, you can pinpoint and fix the cause of the F9 communication error. Here is a step-by-step troubleshooting guide:
Step 1: Reset the power
As with any appliances with error codes, the first step should be power cycling the appliance.
Unplug the microwave oven or turn off the circuit breaker for 1 minute. This resets the control boards and internal logic circuits.
Restore power and test if the code still appears when trying to operate the oven. The power reset may clear up any communication glitches.
Discharging a microwave capacitor
IMPORTANT: Carefully follow the correct handling and discharge procedures since exposure to the voltage levels inside a microwave can potentially cause severe injury or death. Prioritize safety at all times and follow the instructions and recommendations provided by the manufacturer. If you do not feel comfortable discharging a capacitor, do not attempt to do it yourself.
- Unplug the microwave from the power source.
- Grab a screwdriver with good insulation on the handle to protect against electric shock.
- Gently touch the insulated screwdriver blade to one terminal of the capacitor.
- Slowly and gently slide the screwdriver forward until it reaches the other terminal of the capacitor. Hold it there for a few seconds. This discharge process often results in a loud and startling ‘POP’ sound.
- Repeat the process to create a short circuit between each capacitor terminal and the chassis (bare metal mounting plate surface). If the capacitor has three terminals, use the same method.
Step 2: Inspect board cables
The physical communications cable between the relay control board and the inverter relay board is a common failure point causing F9 communication disruptions. Thoroughly inspect this interconnect cable:
- Locate the cable that runs between connectors P66 and P56 on the relay board.
- Remove any protective wire coverings so you can closely examine the entire cable length.
- Check for any cuts, nicks, or crimps in the exterior cable sheathing. Any breach can allow wires to short.
- Gently bend and manipulate the cable to check for internal broken wires.
- Make sure the cable is firmly and fully inserted into both board connectors.
- Carefully examine all pins at both P66 and P56 connectors for any bent, broken, or pushed-in pins.
- Check for built-up corrosion or oxidation on the pins that may impede electrical contact.
- Make sure every single pin is straight, clean, and seated fully in the connector housing.
- Faulty connector seating is the most common cause of microwave communication errors.
Step 3: Replace relay board
If you’ve verified the interconnect cable and connectors are in good working shape, replace the relay board:
- Refer to the microwave schematic to identify the relay board location and all wire connections.
- Disconnect wires noting their terminal positions. Caution – high voltage is present!
- Remove any mounting screws or hardware to fully remove the faulty relay board.
- Install replacement relay board in the same orientation and fasten screws.
- Use the schematic as a reference to carefully reconnect all wiring to the proper terminals.
- Route and secure wires neatly to prevent pinching or strain.
- Restore power and test the oven to confirm F9 error is resolved.
With the new relay board installed, cycle power and test the oven. The fresh board should restore normal communication and clear the F9 error.
Step 4: Replace the inverter relay board
If the problem persists after replacing the relay board, the issue may be with the inverter relay board:
- As before, fully disconnect all wiring from the faulty control board terminals.
- Take notes and photos to ensure proper re-wiring of the replacement part.
- Remove any retaining screws or standoffs to fully remove the existing board.
- Install a new board in the same orientation and fasten it securely.
- Slowly reconnect wiring to proper terminals following the microwave schematic exactly.
- Power up the oven and verify F9 error is cleared and all functions operate normally.
Additional information
Thank you for reading! We hope you found this information useful to get your microwave working again.
If you have any other appliance repair needs or projects, don’t hesitate to explore our thousands of free videos and troubleshooting guides available. If you need replacement parts or some extra help, grab your model number and head over to AppliancePartsPros.com, where you can chat with a pro, order parts, read our DIY blog, and more.
Be sure to subscribe to us on YouTube and follow us on Facebook, Twitter, and Instagram!
 https://www.appliancepartspros.com/b/wp-content/uploads/2023/09/e-17-error-code-Bosch.png
572
1021
Steven E
https://www.appliancepartspros.com/b/wp-content/uploads/2020/11/app-logo-std.png
Steven E2023-09-06 08:20:042023-09-06 08:20:13E17/ E18 Bosch Dryer Error Code Troubleshooting Guide
https://www.appliancepartspros.com/b/wp-content/uploads/2023/09/e-17-error-code-Bosch.png
572
1021
Steven E
https://www.appliancepartspros.com/b/wp-content/uploads/2020/11/app-logo-std.png
Steven E2023-09-06 08:20:042023-09-06 08:20:13E17/ E18 Bosch Dryer Error Code Troubleshooting Guide https://www.appliancepartspros.com/b/wp-content/uploads/2023/08/E09-Bosch-Washer-Error-Code.png
609
1087
Steven E
https://www.appliancepartspros.com/b/wp-content/uploads/2020/11/app-logo-std.png
Steven E2023-08-31 07:20:382023-08-31 07:38:07E09 Bosch Washer Error Code Troubleshooting Guide
https://www.appliancepartspros.com/b/wp-content/uploads/2023/08/E09-Bosch-Washer-Error-Code.png
609
1087
Steven E
https://www.appliancepartspros.com/b/wp-content/uploads/2020/11/app-logo-std.png
Steven E2023-08-31 07:20:382023-08-31 07:38:07E09 Bosch Washer Error Code Troubleshooting Guide https://www.appliancepartspros.com/b/wp-content/uploads/2023/08/tracybeard_A_detailed_close_up_photograph_showing_a_hand_holdin_5357782d-1cd3-40d9-9a30-0099e94df724.png
572
1021
Steven E
https://www.appliancepartspros.com/b/wp-content/uploads/2020/11/app-logo-std.png
Steven E2023-08-28 12:43:462023-08-28 12:43:58Bosch Refrigerator E3 Error Code Troubleshooting Guide
https://www.appliancepartspros.com/b/wp-content/uploads/2023/08/tracybeard_A_detailed_close_up_photograph_showing_a_hand_holdin_5357782d-1cd3-40d9-9a30-0099e94df724.png
572
1021
Steven E
https://www.appliancepartspros.com/b/wp-content/uploads/2020/11/app-logo-std.png
Steven E2023-08-28 12:43:462023-08-28 12:43:58Bosch Refrigerator E3 Error Code Troubleshooting GuideWith nearly a decade of experience in providing top-notch customer service regarding appliance parts and repair, Steven enjoys sharing practical advice, troubleshooting tips, and interesting information to help readers stay informed.