How to Replace a Cracked or Yellowed Bathroom Fan Lens
Steven E / Thursday July 3, 2025
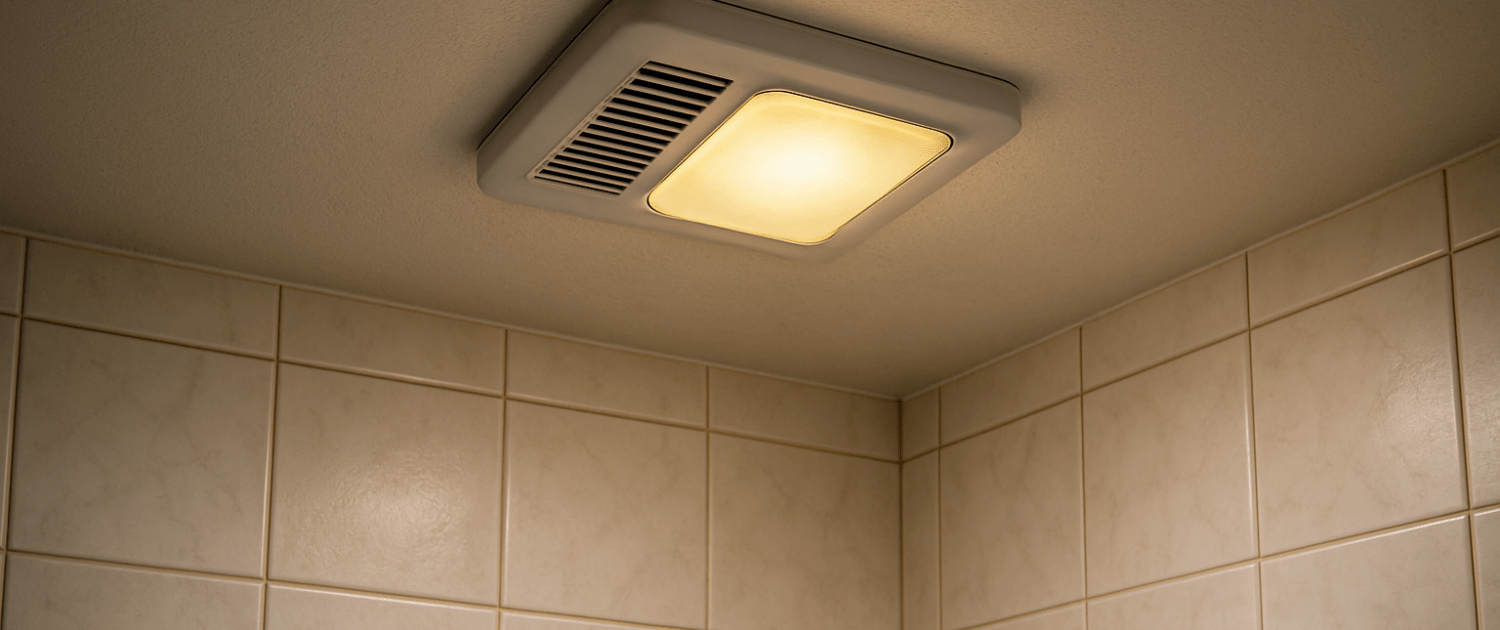
If your bathroom fan light cover is cracked, yellowed, or just plain ugly, it’s time for an upgrade. Replacing the lens is a super simple DIY project that can instantly make your bathroom look cleaner and brighter. Here’s how to pop off the old one and install a shiny new cover in no time.
The information in this article may not apply to your specific appliance model. We recommend consulting your manufacturer’s documentation or contact us with any questions.
Why Does the Bathroom Fan Lens Crack or Yellow?
Before we dive into the process of replacing your bathroom fan lens, let’s take a moment to understand why the lens might crack or yellow in the first place. Here are the common culprits:
- Heat and Humidity: Bathroom fans are exposed to high humidity levels, which can lead to moisture buildup around the lens. The combination of heat from the fan and moisture from the bathroom can cause plastic lenses to yellow or crack over time.
- Sunlight Exposure: If your bathroom has a window or direct exposure to sunlight, UV rays can cause plastic components, like the fan lens, to discolor and weaken, making it more susceptible to cracks.
- Age and Wear: Like any other appliance part, bathroom fan lenses degrade over time. The material of the lens may become brittle, cracked, or discolored simply because of its age.
- Cleaning Chemicals: Using harsh chemicals to clean the fan lens can cause discoloration or damage the surface of the lens, which may lead to yellowing or cracking.
Tools and Materials You’ll Need
Before you start the repair, gather all the necessary tools and materials. Here’s a list of what you’ll need to get the job done:

- Replacement bathroom fan lens (make sure it’s the correct size and model for your fan)
- Screwdriver (flathead and/or Phillips, depending on your fan)
- Step ladder (if your fan is installed high on the ceiling)
- Flashlight (optional, to help you see inside the fan)
- Safety gloves (to protect your hands while handling the fan lens)
- Cleaning supplies (optional, to clean the fan housing while the lens is removed)
Steps to Replace a Cracked or Yellowed Bathroom Fan Lens
1. Turn Off the Power to the Fan
The first step in any electrical repair is to ensure that the power is completely turned off. This will help prevent any accidents while you’re working on the fan.
- Go to your electrical panel and locate the circuit breaker that controls your bathroom fan. Turn it off to cut power to the fan.
- Double-check by using a voltage tester to ensure there is no electricity running through the fan’s wiring.
2. Remove the Fan Cover
Once the power is off, you can begin disassembling the fan. The next step is to remove the fan cover, which is typically held in place by screws or clips.
- Use a screwdriver to remove any screws holding the cover in place. Keep track of the screws in a safe place so you can use them again when reattaching the new lens.
- If the fan cover is held in place by clips, gently pry them open using a flathead screwdriver or your fingers.
- Carefully remove the cover and set it aside. You should now have access to the fan housing and the lens.
3. Remove the Broken or Yellowed Lens
Once the cover is removed, you’ll need to take out the old lens.
- If the lens is held in place by clips, gently press or pry the clips back to release the lens. Take care not to break the clips or cause further damage.
- If the lens is screwed into place, use a screwdriver to remove the screws. Make sure the screws are removed carefully so they aren’t lost or damaged.
- Once the lens is loose, carefully lift it out of the fan housing. If the lens is cracked, be cautious to avoid sharp edges.
4. Clean the Fan Housing (Optional)
While the lens is removed, it’s a good opportunity to clean the fan housing, especially if you’ve noticed dust or dirt buildup. Use a microfiber cloth, a damp cloth, or a vacuum to remove any debris inside the fan housing.
- Clean the housing: Gently wipe down the fan housing to remove any dust, dirt, or grease. This can help the new lens fit better and ensure that the fan operates efficiently.
- Check the fan blades: While you’re cleaning, take a quick look at the fan blades to ensure they’re not clogged with dust or dirt. Use a soft cloth to clean them as needed.
5. Install the New Bathroom Fan Lens
Now that the old lens has been removed and the housing is clean, it’s time to install the new lens.
- Align the new lens: Carefully place the new lens into the fan housing. Make sure it’s aligned properly with the clips or screw holes.
- Secure the lens: If the lens is secured by clips, press them back into place until they hold the lens securely. If the lens uses screws, use your screwdriver to tighten the screws and secure the lens in place. Be sure not to overtighten the screws, as this can crack the lens.
6. Reattach the Fan Cover
Once the lens is in place, it’s time to reattach the fan cover.
- Align the cover with the fan housing and carefully place it back over the lens.
- Use the same screws or clips that were previously holding the cover to secure it in place.
- Check the cover to make sure it’s seated properly and there are no gaps around the lens.
7. Restore Power and Test the Fan
After everything is reassembled, it’s time to restore power to the fan and check if everything is functioning properly.
- Turn the power back on by flipping the circuit breaker back to the “on” position.
- Test the fan by turning it on. Make sure the fan operates smoothly, and the new lens is securely in place without wobbling or rattling.
- If the fan is working properly and the lens is secured, you’ve successfully completed the repair!
Where To Find Us
If you need any replacement parts for your appliances, you can enter your model number at AppliancePartsPros.com to locate and order them quickly. Most orders arrive in just two business days, and we have tons of great information in our repair help section and YouTube videos to help you troubleshoot.
Stay connected with the latest DIY tips, tutorial videos, and repair guides by following us on Facebook, Instagram, and Twitter. We love hearing about your repair stories and successes. If you need more help or want personalized guidance, feel free to reach out. We’re ready to help you take on your next project with confidence!
 https://www.appliancepartspros.com/b/wp-content/uploads/2025/06/20250624_1425_Bathroom-Vent-with-Light_simple_compose_01jyhjws87em29jhv6s00qh7j7.png
1024
1536
Steven E
https://www.appliancepartspros.com/b/wp-content/uploads/2020/11/app-logo-std.png
Steven E2025-06-26 07:25:312025-06-26 07:25:41Can a Bathroom Fan Be Too Powerful? Understanding High CFM
https://www.appliancepartspros.com/b/wp-content/uploads/2025/06/20250624_1425_Bathroom-Vent-with-Light_simple_compose_01jyhjws87em29jhv6s00qh7j7.png
1024
1536
Steven E
https://www.appliancepartspros.com/b/wp-content/uploads/2020/11/app-logo-std.png
Steven E2025-06-26 07:25:312025-06-26 07:25:41Can a Bathroom Fan Be Too Powerful? Understanding High CFM https://www.appliancepartspros.com/b/wp-content/uploads/2025/06/20250624_1425_Bathroom-Vent-with-Light_simple_compose_01jyhjws86f9xtt6qafwqffp9c.png
1024
1536
Steven E
https://www.appliancepartspros.com/b/wp-content/uploads/2020/11/app-logo-std.png
Steven E2025-06-26 07:19:212025-06-26 07:19:30Understanding Bathroom Fan CFM: What It Is and Why It Matters
https://www.appliancepartspros.com/b/wp-content/uploads/2025/06/20250624_1425_Bathroom-Vent-with-Light_simple_compose_01jyhjws86f9xtt6qafwqffp9c.png
1024
1536
Steven E
https://www.appliancepartspros.com/b/wp-content/uploads/2020/11/app-logo-std.png
Steven E2025-06-26 07:19:212025-06-26 07:19:30Understanding Bathroom Fan CFM: What It Is and Why It Matters https://www.appliancepartspros.com/b/wp-content/uploads/2025/06/20250625_0840_Bathroom-Fan-in-Morning-Light_simple_compose_01jykhkjd5ek0sszrvn5vf4nf1.png
1024
1536
Steven E
https://www.appliancepartspros.com/b/wp-content/uploads/2020/11/app-logo-std.png
Steven E2025-06-26 06:55:342025-06-26 06:55:44How to Troubleshoot Bathroom Exhaust Fan Wiring Problems
https://www.appliancepartspros.com/b/wp-content/uploads/2025/06/20250625_0840_Bathroom-Fan-in-Morning-Light_simple_compose_01jykhkjd5ek0sszrvn5vf4nf1.png
1024
1536
Steven E
https://www.appliancepartspros.com/b/wp-content/uploads/2020/11/app-logo-std.png
Steven E2025-06-26 06:55:342025-06-26 06:55:44How to Troubleshoot Bathroom Exhaust Fan Wiring ProblemsWith nearly a decade of experience in providing top-notch customer service regarding appliance parts and repair, Steven enjoys sharing practical advice, troubleshooting tips, and interesting information to help readers stay informed.