How To Replace A Washer Balance Ring (With Video!)
APP Expert / Wednesday June 15, 2022
Is your washer making strange sloshing sounds or refusing to spin properly? You might be dealing with a faulty balance ring, a crucial component that stabilizes your machine during those high-speed spin cycles. Fortunately, we’ve got you covered—with easy-to-follow steps and a companion how-to video right below, you’ll be able to replace the balance rings in your Samsung washer in no time!
Need a replacement balance ring for your washer? Search below using your specific washing machine model number to identify the exact part needed:
Modern washers come with a couple of components called balance rings. These plastic tubes filled with a saltwater solution keep your appliance from going off balance and running away with your laundry. That watery sound they make may be annoying, but these parts are vital – if one goes, your washer may not work at all, reporting an unbalanced load error during spin cycles.
To fix the issue, you’ll need to dig into your washer, but you can get it done in an hour or two with a few basic tools. Want to know how? Keep reading! This guide and the companion video will walk you through how to replace the balance rings in your Samsung washer.


What Is A Balance Ring?
Are you hearing a mystery sloshing noise from your washer when it should be dry? In all likelihood, that’s just the balance ring. The balance ring is a fluid-filled plastic ring attached to the washer’s inner tub, and basically, it does what it says on the tin – keeps the washer balanced when it’s in a spin cycle. How does it do this? It acts as a counterweight. Sometimes, the force of movement in the washer will shift all the laundry in the basket to one side. The saltwater solution in the ring shifts to the opposite side when this happens, offsetting the weight in the tub and keeping things stable.
So, if the balance ring is missing, drained of fluid, or otherwise damaged, your washer won’t be properly equipped to prevent off-balance loads. If your washer is frequently going out of balance and your balance ring is missing or damaged, it’s time to replace this part.
Finding The Right Replacement Part
To track down a compatible replacement, you’ll need your appliance’s model number, which can be found on a sticker on the washer. Check behind the washer door, either along the wall of the front panel or on the door itself. You may also find the washer’s model number behind the kickplate at the bottom of the washer or behind the front access panel. Armed with your model number, you can search for a compatible part at AppliancePartsPros.com. We’ve got genuine OEM parts for every major brand, and they’ll be delivered to your door in just a few days. While you’re there, you can check out tips and advice from both our experts and other do-it-yourselfers.
How To Replace A Washing Machine Balance Ring
For this tutorial, we replaced the balance ring on a Samsung front-loading washing machine. For front-loading washers, the steps to replace the balance ring are roughly the same, so you’ll be able to use this guide regardless of your appliance’s brand or model. If you are working with a top-loading machine, the steps in this guide likely will not line up. In that case, head over to our YouTube channel. We’ve got tons of guides for different styles, brands, and models of washer.
Tools for the job
You’ll need a few basic tools to complete this job:
- A Phillips screwdriver and a small flathead screwdriver
- A socket set with 19mm, 13mm, 10mm, and 7mm sockets
- A ratchet & long (10-inch) extension
- Pliers
- Putty knife
- Thread locker
- A pan or other basin to catch water
- Wood blocks or cinder blocks
Before you begin…
For your safety, and to make your job a bit easier overall, you should do the following before you begin:
- Disconnect the appliance from power, either at the wall outlet or circuit breaker. Never do work on an appliance that is receiving power.
- Shut off the hot and cold water supply valves and remove the drain hose from the drain pipe.
- Pull the washer away from the wall, giving yourself ample room to access the back.
- Prep your workspace by laying a towel down behind the washer. We’ll be disassembling most of the appliance for this job, and water will likely spill out when we disconnect the water lines.
- Label the water line hoses. You’ll be disconnecting them, and labeling them now with marked masking tape, red and blue yarn, or other tags will make it easier to remember which is which when it’s time to reassemble.
Replacing a balance ring
To access the balance ring on a front-loading Samsung washer like ours, you’ll need to disassemble most of the appliance. That may sound like a lot of work, but don’t let it scare you off! It’s easy–it just takes some time. You will need to set aside a couple of hours the first time you attempt a washer disassembly, but we’re here with a guide that’ll walk you through each step. If you’re more familiar with how a washer is put together, anticipate this job taking anywhere from 45 minutes to an hour.
Disassembling Your Washer
- Remove the rear access panel to start. It’s held in place by two screws. Once those are out, lift up on it to remove it.
- Disconnect all wires from the rear of the tub. You should be able to do this by hand, but if any of the tabs are giving you trouble, a flathead screwdriver can be used to press them in. You can use a Phillips screwdriver to remove the grounding wire screw and the screws holding the wire harness bundle in place.
- Remove the rotor and stator. You’ll need to loosen the nut that secures them with a 19mm socket and ratchet. To make this easier, you should stabilize the rotor and stator. Check out the companion video to see how you can do this with a screwdriver. Remove the nut and the two washers. Remove the rotor by wiggling it back and forth side-to-side. It’s lined with magnets, which can make removing it a little tricky. Remove the stator. It’s held in place by a number of 10mm bolts. Use your socket and ratchet to remove those.
- Remove the top of the washer. The top is held on by two screws at the back. Once those are removed, grab onto the top and pull it back to release the top, then lift it away.
- Disconnect the hoses on the top of the washer. There should be two. Each hose is held on by a clamp. You may be able to loosen one of the clamps by hand, but you will need a screwdriver to loosen the other. Simply slide the clamps back once they are loose and pull the hoses off their fittings.
- Remove the detergent dispenser drawer. Pull it out as far as it will go, and then press the button at the back to free it up and remove it.
- Remove the control panel. It’s held in place by a few screws across the top. One the screws are out, rotate the console forward and then disconnect the wires still holding it to the washer.
- Time to disassemble the front panel. This is a multi-step process. Don’t forget to check out our video for a detailed look at how it’s done.
- Open up the front access panel where the drain hose can be found. Move the drain hose out of the way temporarily and remove the two screws in that access cavity.
- Open up the washer’s door and remove the washer door switch assembly from the front of the washer. It’s held in place by three screws.
- Remove the door boot seal clamp. This metal ring can be found by pushing the door boot seal (the rubber gasket around the washer opening) back slightly. You can use a flathead screwdriver to pry the clamp out from the bottom, then carefully work it the rest of the way out. Take care that you don’t damage the gasket while doing this!
- Push the door gasket back and out of the way.
- Remove the screws that hold the panel onto the bulkhead. There are a few of them across the top.
- Lift the front panel up slightly to clear it from the top locking tab, then carefully pull it away from the bulkhead. Be mindful of any parts that may still be attached to the front panel as you remove it.
- Ensure the washer is completely drained. Put a pan or bowl beneath the drain hose, then uncap the drain hose and allow it to drain into the pan.
- Remove the hose from the door boot seal. Use a pair of pliers to release the clamp locking it in place, and a flathead screwdriver to pry the hose itself off the fitting.
- Remove the inner door boot seal clamp. On our washer, we needed to use a ratchet to loosen the bolt holding the clamp. Once it was loose, we used a flathead screwdriver to pry the clamp out the rest of the way. Some models of washer may require pliers or a vice grip to remove this clamp. If you’re having trouble figuring out how to remove the inner seal clamp on your dishwasher, one of the other washing machine how to videos on our youtube channel may be able to help you out!
- Remove the door boot seal. It should come away by hand.
- Remove the dispenser hose from the tub. Use a pair of pliers to loosen the clamp so that the hose can be pulled off the fitting.
- Remove the weights from the tub. A 13mm socket and ratchet can be used to remove the mounting bolts.
- Remove the air pressure hose from the tub.
- It’s likely secured to the tub by a few twist ties along one side.
- Next, remove the pump hose from the tub. It’s secured by a clamp that can be loosened with pliers.
- With the pump hose out of the way, remove the two clamps holding the air pressure hose to the tub. There’s one in front held in place by a screw, and one in back that you can loosen with a pair of pliers.
- With both clamps off, you can remove the hose and push it out of the way.
- Disconnect the tank heater electrical connections. You should find them right next to where the air pressure hose is. Disconnect the wires first, then remove the screw that clamps the bundle into place on the tub.
- Remove the tub-to-pump hose from the bottom of the tub. Loosen the clamp with a Phillips screwdriver.
- Remove the shock absorbers from the bottom of the tub. There will be two shocks in the front and two in the back. A 13mm socket and ratchet can be used to remove the bolts holding them in place. Pull the shocks down to free them from the tub and set them out of the way. To free up the last shock absorber, you may need to lift up on the tub as you move it.
- Back on the top of the washer, remove the suspension springs.
- To access the spring on the dispenser side, you’ll need to move the dispenser housing itself out of the way. Remove the screw holding the housing in place and slide it out of the washer bulkhead.
- Carefully unhook the first spring from the frame and lower the tub down to the bottom of the washer. Disconnect the spring from the tub and hook it back into its mounting point at the top.
- Set the dispenser assembly back in place. Don’t reinstall the screw just yet.
- On the opposite side, the spring is likely hidden by a hose or wire. Move that out of the way first. You may have to unhook some wire harness retainers.
- Lift the tub slightly so that it’s a little easier to unhook the other spring. Having an assistant on this part could help.
- Unhook the second spring and carefully lower the tub back down. Then remove the spring from the tub and hook it back into place at its mounting point.
- Take the tub assembly out of the washer bulkhead. Lift it and slide it forward. You may have to wiggle it a little to get it out.
- Once the tub is out, set it up on some blocks so that the center is free. Since you’ve got the washer tub all the way out, now is a great time to inspect the whole assembly for damage. Make sure all the bolts are in good shape and the outer tub isn’t cracked. You’ll be taking the outer tub apart next, so we recommend installing a new seal to replace the old one before you put everything back together.
- Remove all the screws holding the outer tub together with a 10mm ratchet. Once they’re all out, remove the top half of the outer tub. You may need to wedge a small flathead screwdriver between the two halves to split them.
Replacing The Lower Balance Ring
At this point, you have access to the upper balance ring, but we’re going to start you off with instructions for how to remove the lower balance ring, which is on the underside of the inner tub.
- Remove the inner tub. It’s possible that your washer’s bearings have seized to the spider assembly. If you can’t just lift the inner tub out, you’ll need to flip the whole thing over and use a mallet or hammer to carefully pound the outer tub out.
- Move the outer tub aside and set the inner tub upside down on the blocks.
- Remove the spider assembly. These are the aluminum arms that hold the tub stable. They are held in place by six bolts that can be removed with a 10mm socket and ratchet.
- Remove the old balance ring. It’s held in place by a few screws. Once those are out, it can be lifted out of the tub.
- Install the new ring. Set it into place and secure it with screws.
- Reinstall the spider assembly. Be sure to apply blue thread locker to the bolts before installing them.
- Put the inner tub back into the outer tub. Take care not to let it drop into place. Make sure that your wave washer – that’s the washer that is slightly bent – is still in place on the bearing.
Replacing The Upper Balance Ring
With the inner tub set back into the bottom half of the outer tub, it’s time to replace that upper balance ring.
- Remove the six screws holding the balance ring in place. These can be found along the outside of the inner tub, toward the top.
- Lift the balance ring out of the inner tub. A putty knife can help you to break it free if it’s stuck.
- Set the new balance ring down into its seat on the inner tub, making sure that the screw holes are lined up on the tub and the ring.
- Reinstall the balance ring screws.
Reassembling Your Washer
Alright! You’ve successfully replaced the balance rings in your washer. The last stage of this repair is putting it all back together again. For the most part, this is a lot of repeating the same steps you just did but in reverse. We’ll give you a brief overview here, but you can check out the tutorial video for a detailed look at each step.
- Put the outer tub back together. Make sure the heating element is slotted correctly. There may also be tabs you’ll have to fit the upper half of the tub into. Once it’s set, reinstall the screws.
- Put the tub back into the washer – don’t hesitate to get some help for this step!
- Reattach the suspension springs. Don’t forget to put the detergent dispenser housing and any wires or tubes back into place and secure them, too.
- Put the shock absorbers back on. Apply thread locker to each bolt before reinstalling.
- Reconnect the hoses and wires to the tub. You’ll need to reconnect the tub-to-pump hose, heater electrical connections, air pressure hose, pump hose, and detergent dispenser hose. Here are some quick tips for those:
- The tub-to-pump hose may be easier to reinstall if it’s a little wet.
- The pump hose (the hose that is installed over the air pressure hose) has to be properly aligned with a notch/arrow on the tub. The arrow on the tub should go between the two notches on the hose.
- The detergent dispenser hose similarly has tabs that need to be properly aligned.
- Reinstall the door boot seal. Be sure to check out our video for this step to get a great visual guide on how this is done!
- Tuck the groove on the seal into the outer lip of the tub, making sure that the tabs on the gasket meet with the screws on the tub.
- Once it’s all in, reinstall the inner clamp by tucking it into place. The screw needs to be at 12 o’clock.
- Don’t forget to reinstall the hose at the top of the seal.
- Reinstall the washer tub weights. Set them onto the mounting pegs first, then reinstall the bolts. If needed, coat the threads of each bolt with thread locker.
- Put the front panel back on.
- Line it up with the bottom brackets, then thread the drain hose through the access panel.
- Next, make sure the door switch is in place as you push the front panel back on.
- Reinstall the top mounting screws.
- Reinstall the lower mounting screws behind the drain hose access panel, then clip the drain hose back into place.
- Pull the door gasket into place on the front panel. It should be tucked into the groove on the front panel before you put the clamp back into place. Make sure the clamp spring is at the very bottom. You will need to use pliers to pull the spring and properly lock the gasket in place.
- Reinstall the control panel. Plug its wire harnesses back in, and then push the control panel back into place.
- Slide the detergent drawer back into place.
- Reinstall the stator. Make sure the wire connectors are around 4 or 5 o’clock. Install one bolt by hand so that it will stay in place while you put the rest of the bolts in. Once it’s mounted, reinstall the wire harness and reconnect all wires. Don’t forget the ground wire screw!
- Put the rotor back onto the stator. Set it on the shaft and then reinstall the two washers and nut that secure it.
- Reinstall the rear access panel. After it’s seated, don’t forget to reinstall the screws.
- Reattach the top two hoses and resecure their clamps.
- Put the washer top back on, making sure you line up the brackets properly. Once it’s set, you can reinstall the mounting screws.
Wrapping Up
By following this guide, you should’ve successfully disassembled, repaired, and reassembled your washer. Your final step is to test things out! Turn the power and water supplies back on, then run a wash cycle without any laundry in it. You’re watching for leaks, listening for unusual noises like knocking, and making sure nothing goes off balance. If it all checks out, you can get your laundry day back on track! The next time you need parts or assistance with home appliance repair, keep us in mind.
If you need any replacement parts for your appliances, you can enter your model number at AppliancePartsPros.com to locate and order them quickly. Most orders arrive in just two business days, and we have tons of great information in our repair help section and YouTube videos to help you troubleshoot.
Stay connected with the latest DIY tips, tutorial videos, and repair guides by following us on Facebook, Instagram, and Twitter. We love hearing about your repair stories and successes. If you need more help or want personalized guidance, feel free to contact or call us at 877-477-7278. We’re ready to help you take on your next project with confidence!
Since 1999, AppliancePartsPros.com has helped millions of people repair their broken appliances by providing high-quality original parts at well below retail prices, free support and troubleshooting, and award-winning customer service from an expert, friendly, US-based customer support team!
 https://www.appliancepartspros.com/b/wp-content/uploads/2024/01/DALL·E-2024-01-18-15.40.55-A-front-load-washing-machine-in-a-modern-laundry-room-setting-depicted-in-a-realistic-style.-The-washing-machine-is-sleek-and-contemporary-featuring.png
1024
1792
Steven E
https://www.appliancepartspros.com/b/wp-content/uploads/2020/11/app-logo-std.png
Steven E2024-01-18 12:46:002025-07-25 12:39:45How to replace shock absorber W11415987 on a front-load Whirlpool, KitchenAid or Maytag washer
https://www.appliancepartspros.com/b/wp-content/uploads/2024/01/DALL·E-2024-01-18-15.40.55-A-front-load-washing-machine-in-a-modern-laundry-room-setting-depicted-in-a-realistic-style.-The-washing-machine-is-sleek-and-contemporary-featuring.png
1024
1792
Steven E
https://www.appliancepartspros.com/b/wp-content/uploads/2020/11/app-logo-std.png
Steven E2024-01-18 12:46:002025-07-25 12:39:45How to replace shock absorber W11415987 on a front-load Whirlpool, KitchenAid or Maytag washer https://www.appliancepartspros.com/b/wp-content/uploads/2024/01/Copy-of-IMAGE-TEMPLATE-FOR-BLOG-3.jpg
1080
1920
Steven E
https://www.appliancepartspros.com/b/wp-content/uploads/2020/11/app-logo-std.png
Steven E2024-01-18 09:15:242025-07-25 11:52:05How to replace the pressure switch in a Kenmore washer
https://www.appliancepartspros.com/b/wp-content/uploads/2024/01/Copy-of-IMAGE-TEMPLATE-FOR-BLOG-3.jpg
1080
1920
Steven E
https://www.appliancepartspros.com/b/wp-content/uploads/2020/11/app-logo-std.png
Steven E2024-01-18 09:15:242025-07-25 11:52:05How to replace the pressure switch in a Kenmore washer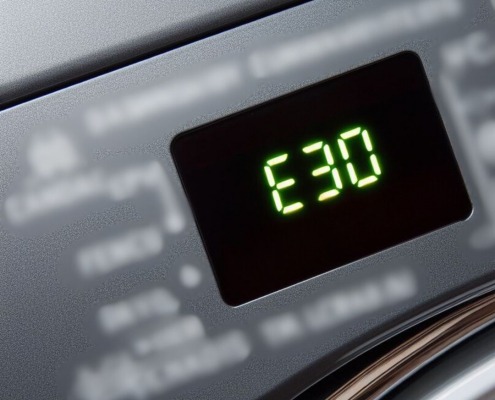 https://www.appliancepartspros.com/b/wp-content/uploads/2024/01/Untitled-design-6.jpg
1080
1080
Steven E
https://www.appliancepartspros.com/b/wp-content/uploads/2020/11/app-logo-std.png
Steven E2024-01-09 11:02:042025-07-25 09:32:25E30 error on a GE front-load washer: A troubleshooting guide
https://www.appliancepartspros.com/b/wp-content/uploads/2024/01/Untitled-design-6.jpg
1080
1080
Steven E
https://www.appliancepartspros.com/b/wp-content/uploads/2020/11/app-logo-std.png
Steven E2024-01-09 11:02:042025-07-25 09:32:25E30 error on a GE front-load washer: A troubleshooting guideHi! I’m Matt H., and I’m thrilled to be your guide through the world of appliance repair with over 25 years of invaluable experience in the industry.
From the early days of my career, I have been deeply passionate about appliances and their inner workings. Over the years, I’ve seen it all – from vintage models to the latest cutting-edge technology – and I’ve dedicated myself to mastering the art of repair. With a toolbox in one hand and a wealth of knowledge in the other, I’ve tackled every challenge that has come my way, learning and growing with each repair.
Join me as we dive into the intricacies of appliance repair. From step-by-step repair guides to explanations of common problems and their solutions, I’ll be here to simplify the repair process and empower you with the knowledge you need to keep your appliances running smoothly.
Feel free to explore our blog, ask questions, and leave comments – this platform is a space for learning, sharing, and growing together. Let’s work together to ensure that your appliances continue to serve you for years to come.
Thank you for joining me on this journey, and I look forward to being your go-to resource for all things related to appliance repair!