How To Replace A Washer Timer Knob (With Video!)
APP Expert / Wednesday April 13, 2022
Is your washing machine’s timer knob giving you trouble? Whether it’s cracked, missing, or not gripping the timer shaft as it should, replacing it can restore your washer’s functionality in just a few steps. Dive into our detailed guide and follow along with our how-to video below to master this simple DIY fix and get back to seamless laundry days!
Need a replacement timer knob for your washer? Search below using your specific washing machine model number to identify the exact part needed:
Replacing the timer knob on your washing machine is a quick and easy job that you’ll have wrapped up in just a few minutes. Stick around, because by the end of this article, you’ll know exactly how!
Should I Replace My Washer’s Timer Knob?
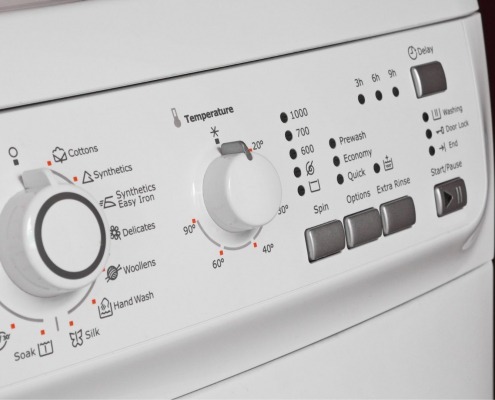
The timer knob is the dial that lets you select the length of a wash cycle on your washing machine. It’s usually the largest knob on the control panel, and depending on your washer model, probably locks into place a bit differently than the other knobs and buttons on your washer. Usually, it’s pretty obvious when you need to replace the timer knob – it’s missing outright, cracked, or otherwise aesthetically damaged. Sometimes, though, you may need to inspect things to be sure the knob is the issue.
- Does the knob spin freely when you turn it? That could be an issue with the knob’s interior or the timer, itself. If the knob’s interior is cracked, it won’t sit right on the timer shaft, and it’s the knob that needs to be replaced. If the timer shaft is damaged, then it’s the timer that will need to be swapped out.
- Is the washer skipping cycles or not responding to your input? This is more likely a problem with the timer, itself. Check out our YouTube channel for tons of washer repair guides, including instructions on switching out washer timers.
Finding The Right Replacement Part
Finding the right part is as easy as searching for your washer’s model number, which you can find in your appliance manual. If you don’t have access to the manual, the model number will be on a label sticker somewhere on the appliance. Check behind the washer door, either along the wall of the front panel or on the door itself. You may also find the washer’s model number behind the kickplate at the bottom of the washer or behind the front access panel.
Armed with your model number, you can search for a compatible part at AppliancePartsPros.com. We’ve got genuine OEM parts for every major brand, and they’ll be delivered to your door in just a few days. While you’re there, you can check out tips and advice from both our experts and other do-it-yourselfers.
Over the years, designs for washer knobs have changed slightly. If you’re fixing an older model of washer, there’s a good chance that the parts you find online won’t look like the ones your washer came with, but that’s okay! Even if the knob looks different, outside or in, updated parts will generally fit older models. Searching by your washer’s model number will ensure you find a compatible fit.
How To Replace A Washer Timer Knob
For most washer knobs, replacement is usually as easy as pulling the old one off and pressing the new one into place. However, the timer knob requires a few more steps to ensure it’s installed correctly.
In this tutorial, we replaced the timer knob on a Whirlpool top-loading direct drive washer. The steps we’ve laid out here should be useful if you have a similar washer, but may not universally apply, particularly if you have a front-loading model. If this guide isn’t matching up to your washing machine, check out our other guides on our YouTube channel.
Tools for the job
You’ll just need a few things to complete this job:
- A compatible OEM replacement timer knob
- Needle-nose pliers
- A Phillips screwdriver
- Depending on your washer model, possibly a putty knife
- Work gloves
Before you begin…
As simple as this job is, you’re still going to be opening up the console and working around wiring when replacing the timer knob. For safety, be sure to disconnect the washer from power, either at the wall outlet or circuit breaker. Never perform any maintenance on an appliance that is still receiving power.
Replacing A Washer Timer Knob
- Remove the control panel’s mounting hardware. Depending on your washer’s model, there may be a few different ways to do this:
- There may be plastic trim covering the mounting hardware, so pry these off the sides if you can’t find the screws.
- Most models will have a pair of mounting screws holding the control panel in place, either on the front, facing in, or on the back, facing down into the frame.
- Some models are held in place with locking tabs that must be released with a putty knife. Slip the putty knife beneath the control panel at the front and slide it a few inches in to hit the tab and press in to release it.
- Open the control panel up. On the Whirlpool direct drive washer, it simply swings back and out of the way.
- Steady the timer shaft. On the back of the timer – that’s the large black plastic component inside the control panel, found behind where the timer knob sits – in the center, there’s a knob that will rotate as you turn the timer shaft. Use a pair of needle-nose pliers to hold this still.
- Pull the old knob off from the front. It should come away by hand with minimal effort.
- Inspect the timer shaft for damage. The timer shaft should have two intact prongs at the end. If either of these prongs has broken off, the entire timer will need to be replaced as well, as the knob will no longer work.
- Push the new knob into place. The hole on the timer knob will have two flat sides inside, the flat portions should align with the angled sections on the timer shaft, not the sides. Lining these up will ensure the knob is secure once installed. Press the knob all the way down to ensure it’s locked into place.
- Troubleshooting note: if the timer shaft was pushed in by accident before you installed the new knob, you can pull the main shaft back out by hand. The black inner shaft you will need to push back down with a pair of needle-nose pliers. Check out our video tutorial for a look at how this is done!
- Close up the control panel. Flip it forward, making sure the tabs are seated, and then pull it back to lock it into place.
- Reinstall any mounting hardware for the control panel. Reinstall screws, and don’t forget the side trim if needed!
- Time for a test! Sure, you just changed out the timer knob, but it’s still a good idea to take the washer for a spin before getting back to doing laundry. Make sure the knob isn’t spinning freely, and make a few different selections on your washer, ensuring each one produces the correct result.
Wrapping Up
If you thought that was an easy fix, imagine what else you can maintain with a few minutes and the right replacement parts! Appliance repair is so much easier than it seems, especially when you’ve got great tips and tutorials to help you through. The next time you need repair guides or replacement parts, come on back to AppliancePartsPros.com. With our genuine OEM components and helpful, knowledgeable staff, you can manage just about any do-it-yourself project!
If you need any replacement parts for your appliances, you can enter your model number at AppliancePartsPros.com to locate and order them quickly. Most orders arrive in just two business days, and we have tons of great information in our repair help section and YouTube videos to help you troubleshoot.
Stay connected with the latest DIY tips, tutorial videos, and repair guides by following us on Facebook, Instagram, and Twitter. We love hearing about your repair stories and successes. If you need more help or want personalized guidance, feel free to contact or call us at 877-477-7278. We’re ready to help you take on your next project with confidence!
Since 1999, AppliancePartsPros.com has helped millions of people repair their broken appliances by providing high-quality original parts at well below retail prices, free support and troubleshooting, and award-winning customer service from an expert, friendly, US-based customer support team!
Hi! I’m Matt H., and I’m thrilled to be your guide through the world of appliance repair with over 25 years of invaluable experience in the industry.
From the early days of my career, I have been deeply passionate about appliances and their inner workings. Over the years, I’ve seen it all – from vintage models to the latest cutting-edge technology – and I’ve dedicated myself to mastering the art of repair. With a toolbox in one hand and a wealth of knowledge in the other, I’ve tackled every challenge that has come my way, learning and growing with each repair.
Join me as we dive into the intricacies of appliance repair. From step-by-step repair guides to explanations of common problems and their solutions, I’ll be here to simplify the repair process and empower you with the knowledge you need to keep your appliances running smoothly.
Feel free to explore our blog, ask questions, and leave comments – this platform is a space for learning, sharing, and growing together. Let’s work together to ensure that your appliances continue to serve you for years to come.
Thank you for joining me on this journey, and I look forward to being your go-to resource for all things related to appliance repair!


