How to replace defrost thermostat WP67006387 on a Whirlpool, KitchenAid or Maytag refrigerator
Samantha Bullington / Tuesday December 26, 2023
Does your refrigerator seem to be losing its cool while your freezer stays icy? A faulty defrost thermostat could be the hidden culprit, but don’t worry—you can fix it yourself and save on costly repairs! Check out the step-by-step guide below, complete with a how-to video to smoothly breeze through the replacement process.
Replacing the defrost thermostat in your Whirlpool, KitchenAid or Maytag bottom-mount refrigerator is an easy repair that you can usually complete yourself. This safety device clips onto the evaporator in the freezer. The thermostat can fail over time and cause issues with the defrost cycle and warming of the refrigerator section. Replacing this part can help restore cool temperatures and keep your fridge running smoothly.
If you need to order a replacement defrost thermostat, you can grab part WP67006387 here. If you need a different version, just enter your model number at AppliancePartsPros.com. Most orders arrive in just a few business days.
You got this! Let’s tackle this replacement together.
WATCH: How to install a defrost thermostat
What you need
- Flat-head screwdriver
- 1/4-inch nut driver
- Wire strippers
- Wire crimpers
- Wire cutters
- Heat shrink tubing
- Heat gun or hair dryer
- Defrost thermostat WP67006387: Take your model number to AppliancePartsPros.com to locate the correct part for your model.
Keep safety first
Before you start any repair work, safety should be your top priority.
- Always power off and unplug your appliance or switch off the circuit breaker before attempting any maintenance or replacement work. This keeps you safe by preventing any risk of electric shock.
- Take your time and don’t rush while working to prevent accidents and personal injuries.
- Work in a well-lit area so you can clearly see and access the interior parts.
- Clear your workspace of clutter and other obstacles. Keep children and pets away while working.
- Never work on internal parts with bare wet hands. Make sure your work area is completely dry.
- Check your user manual to see if there are specific installation or safety instructions for your part or appliance.
- Be gentle when handling or removing parts. Excessive force might damage the appliance or the part or cause injury.
- Wear insulated work gloves to protect your hands from sharp metal parts and debris.
- Wear safety glasses when working with chemicals, dust or cleaning large debris to protect your eyes.
Step 1 – Access the thermostat
To access the faulty defrost thermostat, we need to get some refrigerator parts out of the way.
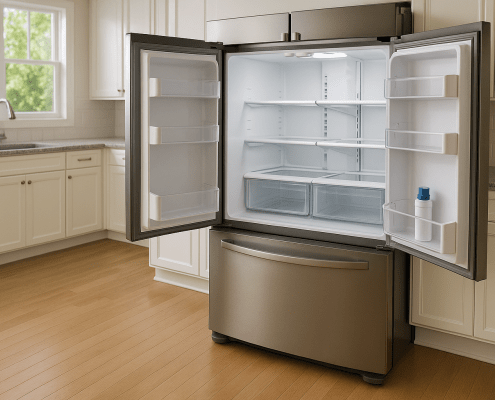
- Open the fridge and freezer doors.
- Take out all shelves and storage bins.
- The freezer door is held on by two screws along the top back and one on the bottom. Use a Phillips head screwdriver to loosen the top screws and remove the bottom screws. Lift the door up and off. Set it aside.
- With the door removed, push the door rails in slightly so that the evaporator cover screws are not blocked. This gives you room to take the back panel off.
- Pop off the small plastic covers to reveal the main back panel screws. A flat-head screwdriver will be used to remove these covers.
- Remove the thermistor from its cover holder.
- Use a 1/4-inch nut driver to remove the four main screws holding the back panel on. Slowly pull the panel down and maneuver it out while steering clear of sensor wires and cooling lines behind it.
- Find the defrost thermostat, which is mounted to a copper refrigerant line tubing in the back right section of the freezer.
READ MORE: How To Clean Refrigerator Coils
Step 2 – Replace the thermostat
- Carefully unclip the thermostat from the copper tubing. Watch for sharp evaporator fins as you work around the lines.
- Use wire cutters to snip the wires leading from the thermostat. Cut them close to the body so you have room to splice.
- The replacement part may come with some pre-stripped lead wiring. If not, use wire strippers to remove about 1/4″ of insulation from each wire. Place a heat shrink wrap onto each wire.
- Take the stripped replacement thermostat wires and join them to the corresponding fridge wires using wire crimp connectors. Seal the connections by sliding heat shrink tubing over them and heating it with a heat gun or hair dryer to tighten them.
- Position the new defrost thermostat back onto the copper tubing line in the same spot as the old one. Hook it securely into place with its mounting clip. Make sure any loose wiring is tucked neatly out of the way and not obstructing fan operation or touching coils and fins.
READ MORE: A Complete Guide to Refrigerator Organization
Step 3 – Reassemble the fridge & test it
You’ll need to reinstall all the fridge components in the reverse order of removal:
- Maneuver the back panel into position, aligning any sensor probes and wires into their corresponding cutouts and brackets. Insert and tighten down the 1/4-inch hex head screws.
- Line up the cover locking tabs and press them into place. Replace the thermistor into its designated holder slot on the cover panel before snapping it together.
- Set the freezer door back over its upper mounting slots. Insert and tighten down the top and bottom 1/4-inch hex head screws.
- Return all storage drawers and shelves to their original locations in the freezer and refrigerator compartments.
- Plug the refrigerator power cord back in or flip the appropriate circuit breaker switches to restore power. Let the unit run for a while to make sure its cooling functions are working in both the fresh food and freezer sections. If any problems arise, double-check your wiring connections on the replacement defrost thermostat.
READ MORE: Freezer is Cold and Refrigerator is Warm
More information
Thanks for reading! We hope this guide helped you replace the defrost thermostat in your Whirlpool, KitchenAid or Maytag refrigerator.
If you still need some replacement parts, grab your model number and head over to AppliancePartsPros.com. We offer over two million parts and most orders arrive in two business days. If you need some help with finding the right part or placing an order, you can contact our team at 1 (877) 477-7278.
While you’re waiting for your new part to arrive, you can explore our DIY blog and watch thousands of video tutorials on our YouTube channel.
Be sure to follow us on Facebook, Twitter and Instagram to see our latest repair guides!
Hey there, I’m Samantha and I’m super excited to be a part of the Appliance Parts Pros team! With 9 years of experience, I’ve had the awesome opportunity to assist countless customers in troubleshooting their home appliances and finding DIY repair solutions.


