How to replace door gasket ADX73350635 on an LG fridge
Steven E / Wednesday December 27, 2023
Is your refrigerator working overtime to keep your food cold? A worn-out door gasket might be the culprit, letting cold air escape and compromising energy efficiency. Don’t worry; we’ve got a simple DIY solution, complete with a step-by-step video guide just below, to help you replace that gasket and keep your fridge running efficiently!
The door gasket on your LG refrigerator keeps cold air in and warm air out so your food stays at a safe temperature. Over time, the original gasket can deteriorate or become damaged, which can reduce energy efficiency as the refrigerator works overtime to maintain the set temperature.
Thankfully the gasket is an easy repair that you can do yourself. Let’s walk through the steps to remove the old gasket and install a new one.

If you need gasket ADX73350635, you can order it here. If you need a different gasket or any other part for your refrigerator, you can enter your model number at AppliancePartsPros.com to find an exact replacement.
The information in this article may not apply to your specific appliance model. We recommend consulting your manufacturer’s documentation or contact us with any questions.
What you need
- Putty knife
- Cleaning supplies
- Phillips screwdriver
- Flat-blade screwdriver
Read more: How To Clean Refrigerator Coils In 5 Easy Steps & Why To Do It
Safety precautions
When performing any repair or maintenance work on a refrigerator or any other appliance, it is important to prioritize safety. Here are some tips to keep in mind:
- Always power off and unplug your appliance or switch off the circuit breaker before attempting any maintenance or replacement work. This keeps you safe by preventing any risk of electric shock.
- When using cleaning solutions, adhesives, or other chemicals during the repair, make sure that the area is properly ventilated. Open windows or use fans to improve air circulation and avoid inhaling any fumes.
- If the appliance has recently been used, give it plenty of time to cool down before working on it.
- Take your time and don’t rush while working to prevent accidents and personal injuries.
- Work in a well-lit area so you can clearly see and access appliance parts.
- Keep your workspace free of clutter and other obstacles. Keep children and pets away from the work area.
- Check the user manual to see if there are specific installation or safety instructions related to your appliance or replacement part.
- Be gentle when handling or removing parts. Excessive force might damage the appliance or cause personal injury.
- Wear insulated work gloves to protect your hands from sharp metal parts and debris.
- Consider wearing safety glasses and/or a dust mask when working with chemicals, dust or a large amount of debris to prevent irritation or injury.
Read more: Cool Savings: 6 Fridge Energy Saving Tips
How to shape the gasket
If you’ve purchased a new refrigerator door gasket and find that it’s compressed or flattened due to packaging or storage, you’ll need to reshape it before installing it on your fridge. Reshaping the gasket ensures it provides a proper seal and prevents air leaks.
- Carefully remove the refrigerator door gasket from its packaging. Take care not to tear or damage it.
- Lay the gasket flat on a clean surface and check it for any visible creases, folds, or areas that appear compressed or flattened.
- To make the gasket more pliable and easier to reshape, you can use a gentle heat source such as a hair dryer or warm water. Be cautious not to overheat or damage the gasket.
Hair dryer method: Set the hair dryer to a low or medium heat setting. Hold the hair dryer several inches away from the gasket and move it back and forth along the length of the gasket. The warm air will help soften the gasket and make it more flexible.
Warm water method: Fill a basin or sink with warm water. Submerge the gasket in the water for a few minutes to allow it to soak and absorb the warmth. Remove the gasket from the water and gently pat it dry with a clean towel.
- Once the gasket is warmed up and pliable, you can begin reshaping it. Start by gently stretching the gasket along its length to remove any creases or folds. Pay close attention to the areas that were compressed or flattened.
- Carefully use your hands to mold and reshape the gasket. Gently pull and stretch the gasket in the areas that need reshaping, working from one end to the other. Avoid applying excessive force or pulling too hard, as it may damage the gasket.
- Look over the gasket and check that it’s uniformly rectangular, without any significant creases or flattened areas.
- Allow the gasket to cool down completely before you install it so it retains its new shape.
Replacement steps
- Make sure your refrigerator is unplugged and that the circuit breaker is switched off to prevent any risk of electric shock.
- Open the refrigerator doors.
- Use the Phillips screwdriver to remove the two screws holding the Mullion divider in place.
- Find the hinges at the top and bottom, as well as a center bracket. Push up on the assembly to disengage all three.
- Pull out the harness from the cavity and disconnect the plug by pressing on the tab and pulling it out. Be careful not to break it. Then set it aside.
- Push on the old gasket to expose the seam, and then use a flat-blade screwdriver to pry it out.
- Continue pulling the old gasket until it is completely removed.
- The new gasket should have a ridge that goes all around, which fits into a groove on the refrigerator. Make sure the groove on the door is clean before you install it.
- Lift the new gasket and place the corners in first, pressing them in.
- Install the top and bottom portions of the new gasket, pressing them in as well. Make sure that the flappers on the top and bottom face outward.
- Close the refrigerator doors and check from the side that the gasket is installed correctly and has a good seal.
- Plug in the harness and secure it in place.
- Place the upper and lower hinges and the middle bracket on the doors, so that they align with the tabs.
- Reinstall the centerpiece and secure it with Phillips screws.
- Check that the gasket is sealing properly against the Mullion divider and it touches evenly.
- Close the Mullion door, close the doors, plug the refrigerator back in, and check that it starts cooling properly.
Read more: Causes of condensation around a refrigerator’s French doors
Additional information
Thanks for reading! We hope this article helped you replace the door gasket on your LG refrigerator.
If you still need some replacement parts, grab your model number and head over to AppliancePartsPros.com. We offer over two million parts and most orders arrive in two business days. If you need some help with finding the right part or placing an order, you can contact our team at 1 (877) 477-7278.
While you’re waiting for your new part to arrive, you can explore our DIY blog and watch thousands of video tutorials on our YouTube channel.
Be sure to follow us on Facebook, Twitter and Instagram to see our latest repair guides!
 https://www.appliancepartspros.com/b/wp-content/uploads/2021/06/shutterstock_1655474032.jpg
1009
1500
APP Expert
https://www.appliancepartspros.com/b/wp-content/uploads/2020/11/app-logo-std.png
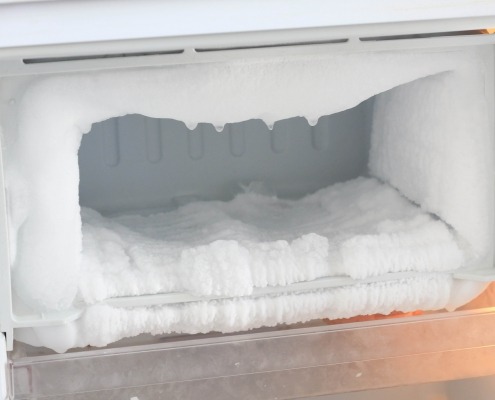
APP Expert2021-06-14 16:31:522025-07-16 07:28:46Refrigerator Not Defrosting: Top 6 Reasons & How to Fix (With Video!)
https://www.appliancepartspros.com/b/wp-content/uploads/2021/06/shutterstock_1655474032.jpg
1009
1500
APP Expert
https://www.appliancepartspros.com/b/wp-content/uploads/2020/11/app-logo-std.png
APP Expert2021-06-14 16:31:522025-07-16 07:28:46Refrigerator Not Defrosting: Top 6 Reasons & How to Fix (With Video!)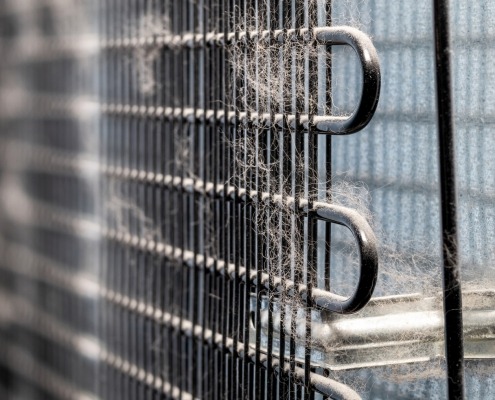 https://www.appliancepartspros.com/b/wp-content/uploads/2021/03/shutterstock_1878792160.jpg
1017
1300
Steven E
https://www.appliancepartspros.com/b/wp-content/uploads/2020/11/app-logo-std.png
Steven E2021-03-17 10:27:362025-07-16 05:30:05How To Clean Refrigerator Coils In 5 Easy Steps & Why To Do It
https://www.appliancepartspros.com/b/wp-content/uploads/2021/03/shutterstock_1878792160.jpg
1017
1300
Steven E
https://www.appliancepartspros.com/b/wp-content/uploads/2020/11/app-logo-std.png
Steven E2021-03-17 10:27:362025-07-16 05:30:05How To Clean Refrigerator Coils In 5 Easy Steps & Why To Do ItWith nearly a decade of experience in providing top-notch customer service regarding appliance parts and repair, Steven enjoys sharing practical advice, troubleshooting tips, and interesting information to help readers stay informed.