How to replace float WD21X22822 on a GE dishwasher
Samantha Bullington / Friday February 2, 2024
Is your GE dishwasher misbehaving with pesky water leaks or filling issues? Don’t let a faulty float ruin your day. Dive into our step-by-step guide, complete with an easy-to-follow how-to video, and fix your dishwasher in a snap!
Are you having issues with a malfunctioning or broken float that’s causing water level issues or leaks in your GE dishwasher? Don’t worry! Replacing this part is a simple repair that anyone can do in no time.
With just some basic tools, a new replacement float, and these easy-to-follow steps, you’ll be able to get your dishwasher working like new again!
You can find a replacement float WD21X22822 here. If you need any other replacement GE dishwasher parts, visit this page or enter your model number at AppliancePartsPros.com.
WATCH: How to install a dishwasher float
What’s the purpose of a dishwasher float?
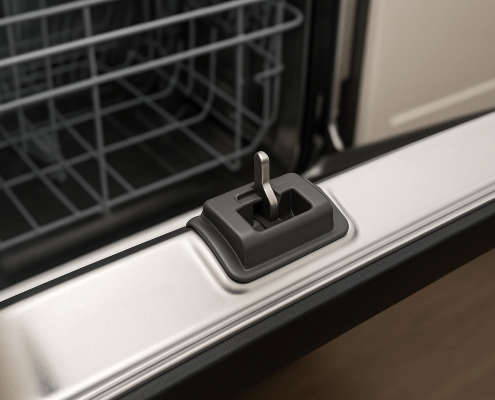
A float is a part that controls the water level inside your dishwasher while it’s running. As the unit fills with water from the hot water supply line, the float will rise along with the water level. Eventually, the float triggers a switch to shut off the water supply when the right level is reached.
The float may need to be replaced if:
- Water is leaking from the base of the dishwasher
- The dishwasher is overfilling and/or overflowing
- An error code related to the water sensor is displaying
READ MORE: Best Loading Techniques For Your Dishwasher
What you need
- Phillips screwdriver
- Bucket
- Towels
- GE dishwasher float replacement part WD21X22822
Keep safety first
When working on any appliance, remember to keep safety first. Here are some tips to keep in mind:
- Always power off and unplug your appliance or switch off the circuit breaker before attempting any maintenance or replacement work. This keeps you safe by preventing any risk of electric shock.
- Turn off the water supply at the outlet before beginning repairs. Keep towels ready to catch any residual water in the system when removing parts.
- If the appliance has recently been used, give it plenty of time to cool down before working on it.
- Take your time and don’t rush while working to prevent accidents and personal injuries.
- Work in a well-lit area so you can clearly see and access appliance parts.
- Keep your workspace free of clutter and other obstacles. Keep children and pets away from the work area.
- Never work on internal parts with wet hands. Make sure the work area is completely dry.
- Check the user manual to see if there are specific installation or safety instructions related to your appliance or replacement part.
- Be gentle when handling or removing parts. Excessive force might damage the appliance or cause personal injury.
- Wear insulated work gloves to protect your hands from sharp metal parts and debris.
- When working with wires, avoid touching any exposed wires or terminals. If you need to touch a wire, use a non-conductive tool or wear insulating gloves to prevent electrical shock.
- Consider wearing safety glasses and/or a dust mask when working with chemicals, dust or a large amount of debris to prevent irritation or injury.
Replacement steps
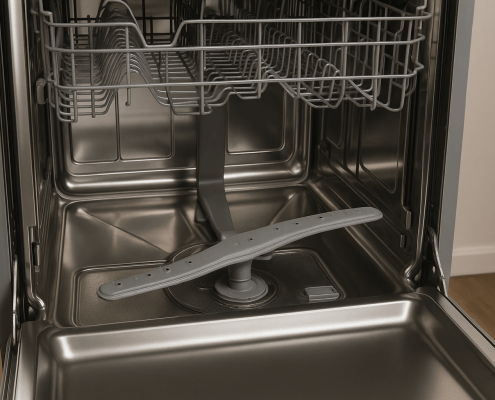
Step 1- Remove the lower rack
- Make sure the dishwasher is unplugged and the water supply is turned off.
- Open the dishwasher door all the way.
- Slide out the lower dish rack.
- Lift the lower rack off the track.
- Set the lower rack aside.
READ MORE: 12 Easy DIY Ways to Lower Your Water Bill
Step 2 – Remove the filter cover
- Twist and disconnect the filter guard cover.
- Lift out the filter screen and set it aside.
Step 3 – Remove the old float
With the filter removed, you’ll have open access to the float.
- Reach into the cavity and remove the circular or square float piece. It may be snapped into a bracket or already loose.
- Check the old part for cracks or damage to make sure it needs to be replaced.
READ MORE: How to prevent appliance fire hazards
Step 4 – Install the new float
If your dishwasher model has a float bracket, just snap the new float piece into place at the marked opening.
No bracket? Just set the replacement float in the exposed cavity where you removed the faulty one.
READ MORE: 7 Space-Saving Tips For Small Kitchens
Step 5 – Reassemble the dishwasher
You’ll need to put all the dishwasher parts back together in reverse order:
- Replace the filter screen and turn until the arrows align so it’s locked into place.
- Slide the lower rack back on the track and push it inside the tub.
- Close the dishwasher door.
READ MORE: Pantry Organization: A Step-by-Step Guide
Wrap it up
- Turn the water supply valve back to the on position.
- Plug the dishwasher back in or flip the circuit breaker back on.
- Run a test cycle and make sure there aren’t any leaks. If you find any problems, double-check your work.
READ MORE: How To Store and Organize Small Kitchen Appliances
More information
Thanks for reading! We hope this guide helped you replace the float in your GE dishwasher.
If you still need some replacement parts, grab your model number and head over to AppliancePartsPros.com. We offer over two million parts and most orders arrive in two business days. If you need some help with finding the right part or placing an order, you can contact our team at 1 (877) 477-7278. We can also help you troubleshoot common dishwasher problems here.
While you’re waiting for your new part to arrive, you can explore our DIY blog and watch thousands of video tutorials on our YouTube channel.
Be sure to follow us on Facebook, Twitter and Instagram to see our latest repair guides!
Hey there, I’m Samantha and I’m super excited to be a part of the Appliance Parts Pros team! With 9 years of experience, I’ve had the awesome opportunity to assist countless customers in troubleshooting their home appliances and finding DIY repair solutions.


