How to replace oven thermostat WB20K8 on a gas GE range
Steven E / Friday January 5, 2024
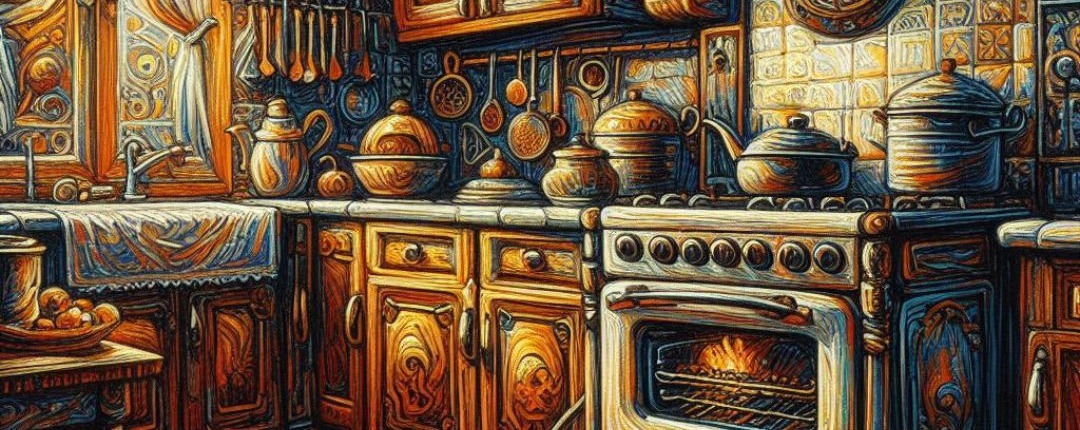
Is your GE gas range giving you trouble by not maintaining the right temperature? Don’t let a faulty thermostat keep you from cooking your favorite meals—solve the issue with our simple, step-by-step guide to replacing the oven thermostat. Plus, watch the how-to video below to get your oven back to perfect working order in no time!
If your GE gas range is experiencing temperature control issues, it may be time to replace the oven thermostat. The WB20K8 oven thermostat is a common replacement part for many GE gas range models, and replacing it is usually a relatively straightforward process.
Let’s explore how to replace the thermostat so you can get your oven working again. If you need to order thermostat WB20K8, you can get it here. If you need any other replacement parts for your gas GE range, enter your model number at AppliancePartsPros.com to find them or check out this page.

WATCH: How To Replace GE Oven Thermostat WB20K8
What you need
- Torx T15 screwdriver – to remove the screws securing the cooktop burner bases. Having a Torx bit that fits well helps you avoid stripping the screws.
- Putty knife – to pry up the igniter units and release the top panel edge clips.
- Phillips screwdriver – for taking out oven door screws and disconnecting wiring.
- Gloves – to prevent injuries from sharp metal parts.
- Compatible OEM replacement thermostat for your model (check if thermostat WB20K8 is compatible with your range)
READ MORE: How To Find Your Appliance’s Model Number
Safety precautions
When working on any appliance, remember to keep safety first. Here are some tips to keep in mind:
- Always power off and unplug your range or switch off the circuit breaker before attempting any maintenance or replacement work. This keeps you safe by preventing any risk of electric shock.
- Find the gas shut-off valve on the gas line and turn it to the off position before starting any work.
- If the range has recently been used, give it plenty of time to cool down before working on it.
- Take your time and don’t rush while working to prevent accidents and personal injuries.
- Work in a well-lit area so you can clearly see and access appliance parts.
- Keep your workspace free of clutter and other obstacles. Keep children and pets away from the work area.
- Never work on internal range parts with wet hands. Make sure the work area is completely dry.
- Check the user manual to see if there are specific installation or safety instructions related to your range or replacement part.
- Be gentle when handling or removing parts. Excessive force might damage the range or cause personal injury.
- Wear insulated work gloves to protect your hands from sharp metal parts and debris.
- When working with wires, avoid touching any exposed wires or terminals. If you need to touch a wire, use a non-conductive tool or wear insulating gloves to prevent electrical shock.
- Once the thermostat has been replaced, check for gas leaks at all connections with a leak detector solution before reusing the oven.
READ MORE: 6 tips to safely cook with a gas range
Replacement steps
Step 1 – Access the thermostat
- Remove the burner grates, burner caps and burners. Allow time for the range to cool if the cooktop has been used recently.
- Remove all twelve screws that hold the burner bases to the top panel. If any screws are stubborn, apply a rustbuster and let it soak overnight before attempting to remove them.
- Use a putty knife to pry out all four top burner igniters and disconnect the igniter wires.
- Insert a putty knife into the seam under the cooktop and push in to unlock the locking clip at each front corner.
- Lift the left side of the top panel up and out of the bracket. Pull the right side from the mounting hole to remove the top panel.
- Remove all the knobs and take out the four Phillips screws from the front of the range.
- Open the oven door about a quarter of the way and pull it off the hinges.
- Remove both oven racks.
Step 2 – Remove the old thermostat
- Squeeze and remove the retainer clips to free the sensor bulb located at the back of the oven interior.
- Carefully bend the sensor bulb to fit it into the hole and push it through.
- Move to the back of the range and pull the thermostat sensor out. Straighten the bulb and pull it completely through the hole.
- Use a Philips screwdriver to remove the three screws that hold the front control panel from the bottom. Carefully lower the front panel down.
- Unscrew the two screws that hold the thermostat, pull it out, and remove the protective splash guard.
- Disconnect the two wires from the thermostat terminals.
- Clear any obstacles from the sensor and remove the old thermostat.
Step 3 – Install the new thermostat
- Uncoil the new sensor tube and feed it under the burner tubes and wires.
- Bend the new sensor bulb and insert it into the hole at the back of the oven.
- Fish out the thermostat sensor from inside the oven, straighten it out, and clip it onto the back wall.
- Connect both thermostat wires (it doesn’t matter which one goes where).
- Slide on the splash guard, put the shaft through the opening, and secure the thermostat with two Phillips screws.
Step 4 – Reassemble the range
- Re-install the front panel and the three Phillips screws at the bottom of the panel.
- Slide in both oven racks and install the door on the hinges. Slide it down and make sure it closes properly.
- Secure the front panel with the four Phillips screws under the knobs.
- Re-install the knobs.
- Re-install the top panel by inserting the right side first and placing the left side into the back support.
- Thread the igniter wires through the holes and connect the igniters.
- Lower the cooktop and push it down to lock it, then push in all the igniters.
- Re-install the burner screws.
- Put all burners, caps and grates back in place.
Step 5 – Test the range
With everything reassembled, turn the gas supply back on, plug the oven back in, and make sure there are no gas leaks. You can use a special leak detector fluid to help you see any leaks.
Test the range to make sure the oven heats up normally.
READ MORE: Gas Range Not Heating Evenly: Top 4 Reasons and Fixes
Additional information
Thanks for reading! We hope this article helped you replace the thermostat on your GE gas range.
If you still need some replacement parts, grab your model number and head over to AppliancePartsPros.com. We offer over two million parts and most orders arrive in two business days. If you need some help with finding the right part or placing an order, you can contact our team at 1 (877) 477-7278.
While you’re waiting for your new part to arrive, you can explore our DIY blog and watch thousands of video tutorials on our YouTube channel.
Be sure to follow us on Facebook, Twitter and Instagram to see our latest repair guides!
 https://www.appliancepartspros.com/b/wp-content/uploads/2025/05/20250519_0932_Sunny-Kitchen-Cookspace_simple_compose_01jvmbsy7wenk82vg985ja3cgc.png
1024
1536
Steven E
https://www.appliancepartspros.com/b/wp-content/uploads/2020/11/app-logo-std.png
Steven E2025-05-22 12:00:392025-08-15 06:26:21GE Gas Range Electrode Clip WB01K10112 Replacement Guide
https://www.appliancepartspros.com/b/wp-content/uploads/2025/05/20250519_0932_Sunny-Kitchen-Cookspace_simple_compose_01jvmbsy7wenk82vg985ja3cgc.png
1024
1536
Steven E
https://www.appliancepartspros.com/b/wp-content/uploads/2020/11/app-logo-std.png
Steven E2025-05-22 12:00:392025-08-15 06:26:21GE Gas Range Electrode Clip WB01K10112 Replacement Guide https://www.appliancepartspros.com/b/wp-content/uploads/2025/05/20250414_1400_Farmhouse-Kitchen-Elegance_simple_compose_01jrtq83d4e8nsc0a794v64gn3.png
1024
1536
Steven E
https://www.appliancepartspros.com/b/wp-content/uploads/2020/11/app-logo-std.png
Steven E2025-05-22 11:54:282025-08-15 06:58:41Whirlpool Range Ceramic Terminal Block 12001676 Guide
https://www.appliancepartspros.com/b/wp-content/uploads/2025/05/20250414_1400_Farmhouse-Kitchen-Elegance_simple_compose_01jrtq83d4e8nsc0a794v64gn3.png
1024
1536
Steven E
https://www.appliancepartspros.com/b/wp-content/uploads/2020/11/app-logo-std.png
Steven E2025-05-22 11:54:282025-08-15 06:58:41Whirlpool Range Ceramic Terminal Block 12001676 Guide https://www.appliancepartspros.com/b/wp-content/uploads/2025/05/20250522_0958_Farmhouse-Kitchen-Glow_simple_compose_01jvw4fsqnea0sy39mynycdnq0.png
1024
1536
Steven E
https://www.appliancepartspros.com/b/wp-content/uploads/2020/11/app-logo-std.png
Steven E2025-05-22 11:52:432025-08-15 07:17:01Bosch Gas Range Igniter Mounting Clip 00189322 Guide
https://www.appliancepartspros.com/b/wp-content/uploads/2025/05/20250522_0958_Farmhouse-Kitchen-Glow_simple_compose_01jvw4fsqnea0sy39mynycdnq0.png
1024
1536
Steven E
https://www.appliancepartspros.com/b/wp-content/uploads/2020/11/app-logo-std.png
Steven E2025-05-22 11:52:432025-08-15 07:17:01Bosch Gas Range Igniter Mounting Clip 00189322 GuideWith nearly a decade of experience in providing top-notch customer service regarding appliance parts and repair, Steven enjoys sharing practical advice, troubleshooting tips, and interesting information to help readers stay informed.