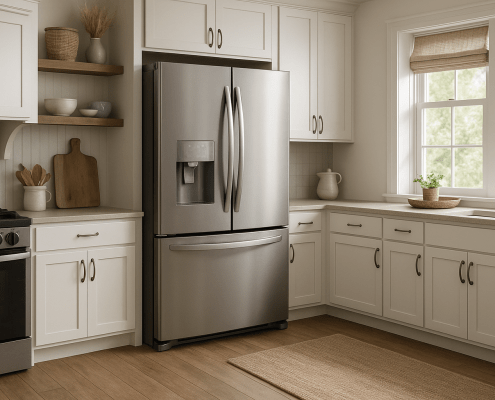
How to replace Samsung refrigerator water inlet valve DA97-08587A
Steven E / Thursday April 18, 2024
Tired of dealing with a Samsung refrigerator that refuses to dispense water or make ice? The culprit could be a faulty water inlet valve. Fortunately, we’ve got a step-by-step guide and a handy how-to video right below to have you swapping out that problem part in no time, so you can get back to enjoying effortless ice and chilled water.
Need a part? Search below using your appliance model number to find exactly what you need:
If you’re noticing issues with your Samsung refrigerator’s water dispenser or ice maker, the problem part may be the water inlet valve. If you need to replace it, follow this guide so you can finish the job in under an hour.
You can find a replacement water inlet valve here. If you need other replacement parts for your Samsung refrigerator, just enter your model number at AppliancePartsPros.com to find them. It’s that easy! Most orders arrive in just two business days, and we have thousands of guides to show you how to install your new parts.
Why would you need to replace the valve?
The water inlet is at the bottom rear of the fridge and supplies water to the dispenser and ice maker. Over time, the valve can fail from normal use or become clogged with mineral deposits that can disrupt water flow.
Symptoms of a bad inlet valve include:
- No water dispensed
- No ice production
- Leaking water
- Water dripping into the ice maker
What you need
- Phillips screwdriver
- Adjustable wrench
- Utility knife
- New water inlet valve (make sure it’s compatible with your specific model before installing)
How to replace the water inlet valve
Follow these steps to replace the water inlet valve in your Samsung refrigerator.
Step 1: Remove the rear access panel
The water inlet valve is mounted to the back of the refrigerator cabinet. To access it, you’ll need to remove the rear access panel. On most Samsung models, the panel is held on with several Phillips head screws.
- Turn the fridge off and unplug it from the power outlet.
- Turn off the water supply to the fridge.
- Use a Phillips screwdriver to remove the rear access panel screws. Set them aside.
- If there’s a plastic retainer over one of the water lines that’s secured with an additional screw, remove this screw and take off the retainer.
- Gently pull the panel away from the refrigerator and set it off to the side.
Read more: Fridge Filters: A Master Guide to All You Need to Know
Step 2: Disconnect the electrical plug
Before removing the water lines, you need to disconnect the electrical plug that powers the valve.
- Find the small plastic connector plugged into the rear of the valve assembly.
- Push in on the locking tab to release the connector, then pull it out of the valve.
Step 3: Disconnect the water lines
With the plug removed, you can now start detaching the water lines from the inlet valve.
- Place a towel and/or bucket beneath the valve to catch any water drops that may spill out during this step.
- There are typically two types of connections. Locate them on your unit:
Compression nut connections – This is used for the main water supply line. There’s a threaded compression nut holding the line to the valve.
Use an adjustable wrench to loosen and unthread this nut completely. Once it’s detached, pull the tubing out of the valve port.
Quick connect fittings – Plastic water lines are attached to the valve with these push-to-connect fittings. There’s a locking collar that keeps them solidly attached.
To release, press down on the collar with a wrench while simultaneously pulling the tubing out of the port.
- Wrap a towel around the end of the supply line to prevent dripping onto the floor. Use tape to secure it pointing upward, which will minimize the amount of water that spills out.
Read more: Why Is There Water Pooling in My Refrigerator?
Step 4: Remove the old inlet valve
- Take out the screw holding the valve’s mounting bracket to the refrigerator cabinet. It might be located behind the drain tube, so move the tube out of the way if needed.
- Slide the bracket off the valve to separate it.
- Pull the valve body out and discard the old valve.
Step 5: Install the new inlet valve
- Connect all the water lines to the new valve:
For the compression nut fitting, slide the nut onto the supply line and tighten it onto the valve port with your fingers. Use a wrench to tighten it further. Don’t over-tighten the nut.
For the quick connect lines, firmly push them into the matching ports until the locking collar clicks into place.
- Check that the drain tube is positioned well and routed behind the supply line.
- Plug the electrical connector into the rear of the valve. You may need to lift the protective cover box to access the port.
- Slide the mounting bracket back over the valve and secure it with the screw.
- Tighten the bracket with a screwdriver.
Read more: Cool Savings: 6 Fridge Energy Saving Tips
Step 6: Reinstall the access panel
- Line up the panel against the back of the refrigerator. Make sure any tabs are inserted into their corresponding slots or openings.
- Thread in the original screws and tighten them down with a Phillips screwdriver to keep the panel back in place.
- Reattach any retainers or brackets that were removed from the water lines.
Final steps
- Turn the water supply back on at the shut-off valve. Check carefully for any leaks at the water line connections and fittings. Tighten them if needed.
- Plug the refrigerator back in and turn it on.
- Try dispensing some water to make sure the new water inlet valve works correctly. It may take several hours after the replacement for ice to be produced.
Read more: How to clean and maintain your refrigerator’s water dispenser
More information
Thanks for reading! If you have any other appliance repair needs or projects, you can find more resources including our DIY blog at AppliancePartsPros.com. There, you can enter your model number to order the exact parts you need. Most orders arrive in two business days.
You can also reach our award-winning customer service team at 1-877-477-7278, chat with a pro on our website, and watch thousands of free video tutorials on our YouTube channel. We can also help you troubleshoot common fridge problems here.
With nearly a decade of experience in providing top-notch customer service regarding appliance parts and repair, Steven enjoys sharing practical advice, troubleshooting tips, and interesting information to help readers stay informed.


