How to replace the door closure kit on a Whirlpool refrigerator
Steven E / Monday May 5, 2025
Is your Whirlpool refrigerator door giving you a hard time with creaks or a stubborn seal? These common door closure issues can be more than just a nuisance, potentially leading to energy waste and increased utility bills. Fortunately, our step-by-step guide, complete with a how-to video, will have your refrigerator door closing smoothly in no time!
Looking for the right part? Enter your appliance model number below to find the exact match and get your appliance running like new again!
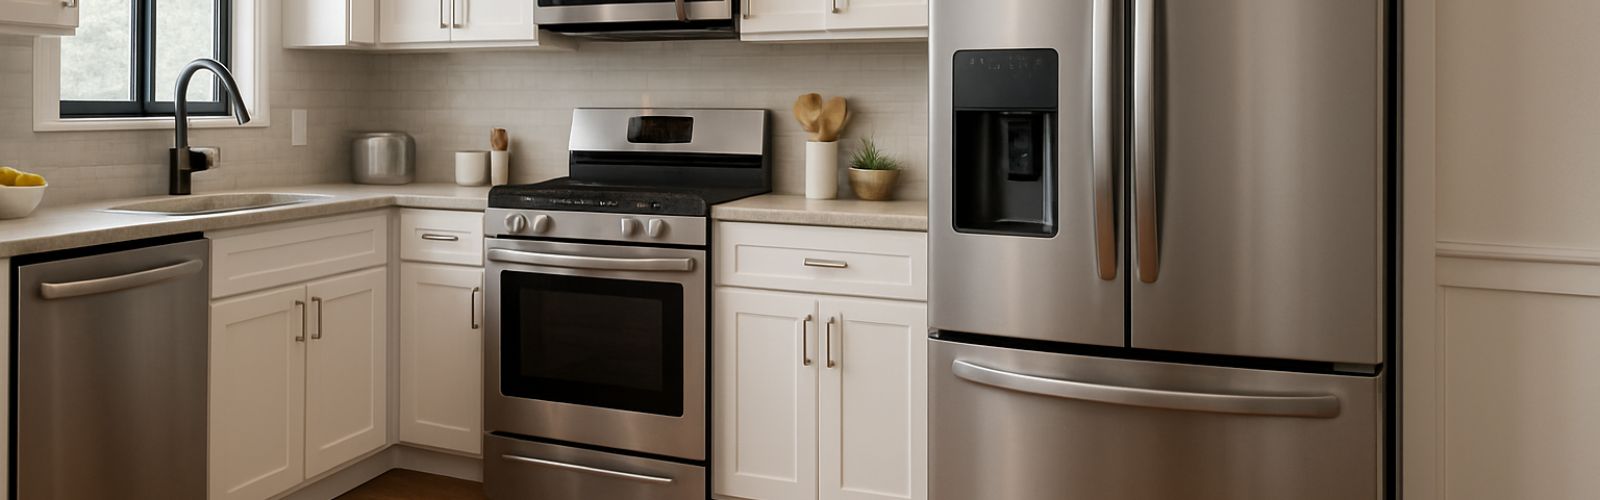
The door closure kit on a Whirlpool refrigerator is responsible for smooth opening, closing, and proper sealing of the refrigerator doors. Over time, the door closure kit may wear out, leading to issues such as difficulty in opening or closing the doors, popping sounds, or improper sealing. Fortunately, replacing the door closure kit is a relatively simple task that can be accomplished with basic tools. By following the steps outlined in this guide, you can restore your Whirlpool refrigerator and resolve these common door-related problems. Depending on your experience level, the repair should take only a few minutes of your time. So let’s get started and learn how to replace the door closure kit on your Whirlpool refrigerator.

Watch here: How To: Whirlpool/KitchenAid/Maytag Door Closure Kit R0181181
The information in this article may not apply to your specific appliance model. We recommend consulting your manufacturer’s documentation or contact us with any questions.
What you’ll need
- 1/4” nut driver
- 5/16” nut driver
- Phillips screwdriver
- Flat blade screwdriver
Safety precautions
- Always power off and unplug your appliance or switch off the circuit breaker before attempting any maintenance or replacement work. This keeps you safe by preventing any risk of electric shock.
- Take your time and don’t rush while working to prevent accidents and personal injuries.
- Work in a well-lit area so you can clearly see and access the interior parts.
- Clear your workspace of clutter and other obstacles. Keep children and pets away from the work area.
- Never work on internal parts with bare wet hands. Make sure the work area is completely dry.
- Check your user manual to see if there are specific installation or safety instructions for your part or appliance.
- Be gentle when handling or removing parts. Excessive force might damage the appliance or cause injury.
- Wear insulated work gloves to protect your hands from sharp metal parts, pinching hazards and debris.
- Wear safety glasses when working with chemicals, dust or cleaning large debris to prevent injury.
Replacement steps
- Determine which color of cams to use based on the color of your refrigerator. If your refrigerator is white, use the white cams. If it is black, use the corresponding black cams.
- To access the part that needs replacement, you must remove the door assembly. The part to be replaced is located at the very bottom of the door.
- Start by removing the hinge assembly. Use a Phillips head screwdriver to loosen and remove the screw that holds the protective cover in place.
- The top hinge is held in position by three small bolts. Use a 5/16 inch nut driver to loosen and remove these bolts.
- With the bolts removed, you can now remove the top hinge by wiggling it and sliding it up and out.
- Once the top hinge is removed, you can now take off the entire door assembly. Tilt the top part of the door forward slightly and then lift it up to detach it from the lower hinge.
- Now that the door is removed, place something soft underneath it to prevent scratching the front surface. Turn the door and set it down in a way that allows access to the bottom side.
- There are two different cams included in the door closure kit. Use a quarter inch nut driver to loosen the retaining screw of the old cam located on the door. Then, use a small flat blade screwdriver to pry up and remove the old cam.
- At the base of the refrigerator, use a quarter inch nut driver to loosen and remove the screw that holds the lower door cam in position. Remove the old lower cam.
- Install the new lower cam by aligning it with the octagon-shaped opening on the base of the door. Rotate it slightly to align it properly and then push it into place. Thread in and tighten the retaining screw.
- Next, position the new upper cam over the raised door mount on the base of the refrigerator. Press it down into position and align the screw hole correctly. Thread and tighten the retaining screw.
- With the new door closure kit installed, you can now reattach the door. Make sure the mount on the lower hinge goes into the bottom of the door.
- Place the top hinge back into position by inserting one end into the hole in the door. Align the bolt holes correctly. Use a 5/16 inch nut driver to thread and tighten the three retaining bolts.
- Reinstall the protective cover by threading and tightening the retaining screw.
- Plug in the refrigerator to restore power.
Congratulations! You have successfully installed the new door closure kit on your refrigerator.
Additional information
Thanks for reading! We hope this guide helped you replace the door closure kit on your Whirlpool refrigerator.
If you still need some replacement parts, grab your model number and head over to AppliancePartsPros.com. We offer over two million parts and most orders arrive in two business days. If you need some help with finding the right part or placing an order, you can contact our team at 1 (877) 477-7278.
While you’re waiting for your new part to arrive, you can explore our DIY blog and watch thousands of video tutorials on our YouTube channel.
Be sure to follow us on Facebook, Twitter and Instagram to see our latest repair guides!
 https://www.appliancepartspros.com/b/wp-content/uploads/2025/09/groovetopia_macro_shot_of_frost_crystals_forming_irregular_patt_37deb777-ed26-4ba3-927c-946d5393a753.png
816
1456
appthr
https://www.appliancepartspros.com/b/wp-content/uploads/2020/11/app-logo-std.png
appthr2025-09-24 13:04:442025-09-25 06:50:45Refrigerator Sealed Systems: Where DIY Stops and Gauges Begin
https://www.appliancepartspros.com/b/wp-content/uploads/2025/09/groovetopia_macro_shot_of_frost_crystals_forming_irregular_patt_37deb777-ed26-4ba3-927c-946d5393a753.png
816
1456
appthr
https://www.appliancepartspros.com/b/wp-content/uploads/2020/11/app-logo-std.png
appthr2025-09-24 13:04:442025-09-25 06:50:45Refrigerator Sealed Systems: Where DIY Stops and Gauges Begin https://www.appliancepartspros.com/b/wp-content/uploads/2025/06/20250618_1202_Refrigerator-Door-Gasket-Issue_simple_compose_01jy1wbpw8fxvvpx4nn5ejvsk3.png
1024
1536
Steven E
https://www.appliancepartspros.com/b/wp-content/uploads/2020/11/app-logo-std.png
Steven E2025-06-20 06:21:482025-08-20 12:16:14How to Replace Door Gasket W10355582 on a Whirlpool Fridge
https://www.appliancepartspros.com/b/wp-content/uploads/2025/06/20250618_1202_Refrigerator-Door-Gasket-Issue_simple_compose_01jy1wbpw8fxvvpx4nn5ejvsk3.png
1024
1536
Steven E
https://www.appliancepartspros.com/b/wp-content/uploads/2020/11/app-logo-std.png
Steven E2025-06-20 06:21:482025-08-20 12:16:14How to Replace Door Gasket W10355582 on a Whirlpool Fridge https://www.appliancepartspros.com/b/wp-content/uploads/2025/06/20250617_1527_Refrigerators-Ice-Maker_simple_compose_01jxznp0v6ebzsggaqpx90xtq8.png
1024
1536
Steven E
https://www.appliancepartspros.com/b/wp-content/uploads/2020/11/app-logo-std.png
Steven E2025-06-20 06:06:492025-06-20 06:06:58Whirlpool Fridge Not Making Ice? How To Troubleshoot the Sensor
https://www.appliancepartspros.com/b/wp-content/uploads/2025/06/20250617_1527_Refrigerators-Ice-Maker_simple_compose_01jxznp0v6ebzsggaqpx90xtq8.png
1024
1536
Steven E
https://www.appliancepartspros.com/b/wp-content/uploads/2020/11/app-logo-std.png
Steven E2025-06-20 06:06:492025-06-20 06:06:58Whirlpool Fridge Not Making Ice? How To Troubleshoot the SensorWith nearly a decade of experience in providing top-notch customer service regarding appliance parts and repair, Steven enjoys sharing practical advice, troubleshooting tips, and interesting information to help readers stay informed.