How to replace the fill funnel on a GE dishwasher
Steven E / Thursday May 8, 2025
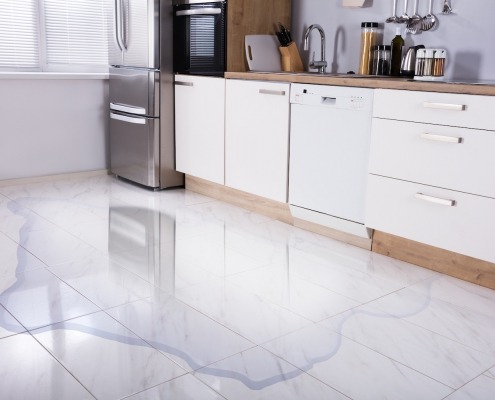
Is your GE dishwasher leaving you high and dry—or in a pool of water on your kitchen floor? The fill funnel, a small but crucial component, might be to blame, and replacing it could prevent costly leaks and water damage. Dive into our step-by-step guide and watch the accompanying video to learn how to tackle this fix like a pro!
Looking for the right part? Enter your appliance model number below to find the exact match and get your appliance running like new again!
When it comes to keeping your GE dishwasher running smoothly and avoiding leaks, don’t forget about the fill funnel (WD49X25081)! This little part is a big deal in getting water safely into your dishwasher. If it gets worn out or damaged, it could lead to leaks and damage to your kitchen. But no worries – swapping out the GE Dishwasher Fill Funnel Kit is an easy DIY job. We’ll guide you through each step, so you’ll feel like a pro handling this repair.
The information in this article may not apply to your specific appliance model. We recommend consulting your manufacturer’s documentation or contact us with any questions.
WATCH: How to replace the fill funnel in a dishwasher
What is the purpose of the fill funnel?
Before we get into the nitty-gritty of the replacement process, let’s shine a light on what the fill funnel does. Tucked inside your dishwasher, this little guy is the entry point for water into the appliance. It makes sure water goes straight into the dishwasher’s tub, so your dishes come out sparkling. But if it’s busted, you might end up with a wet kitchen floor and the risk of slips and water damage.
Safety first
When working on any appliance, always keep safety first to avoid personal injury or damage to the appliance or parts. Here are some safety tips to keep in mind:
- Always power off and unplug your appliance or switch off the circuit breaker before you attempt any maintenance or replacement work. This keeps you safe by preventing any risk of electric shock.
- If the appliance has recently been used, give it plenty of time to cool down before working on it.
- Take your time while working to prevent accidents and personal injuries. Rushing is the enemy of precision.
- Work in a well-lit area so you can clearly see and access appliance parts.
- Keep your workspace free of clutter and other obstacles. Keep children and pets away from the work area.
- Never work on internal parts with wet hands. Make sure the work area is completely dry.
- Check the user manual to see if there are specific installation or safety instructions related to your appliance or replacement part.
- Be gentle when handling or removing parts. Excessive force might damage the appliance or cause personal injury.
- Wear insulated work gloves to protect your hands from sharp metal parts and debris.
- When working with wires, avoid touching any exposed wires or terminals. If you need to touch a wire, use a non-conductive tool or wear insulating gloves to prevent electrical shock.
- Consider wearing safety glasses and/or a dust mask when working with chemicals, dust or a large amount of debris to prevent irritation or injury.
- Turn off the water supply at the outlet before beginning repairs. Keep towels ready to catch any residual water in the system when removing parts.
Tools and materials needed
- 5/8 inch wrench
- 5/16 inch nut driver
- Phillips screwdriver
- Pliers
- Small flat head screwdriver
- Fill funnel service kit WD49X25081 – Take your model number to AppliancePartsPros.com to locate the correct part for your unit.
Gathering these tools beforehand will streamline the process
Remove the old fill funnel
Step 1: Disconnect lines
- Position a towel under the sink where you’ll be working. This little tip can save you from mopping up spills later on.
- Using your 5/8 inch wrench, disconnect the fill line attached to the hot water valve. It’s normal for a bit of water to escape, hence the towel.
- Move on to the drain hose. Depending on your setup, it may connect to a garbage disposal or an air gap. Loosen the clamp with your 5/16 inch nut driver and carefully detach the hose.
Step 2: Remove the dishwasher
Before you can access the fill funnel, the dishwasher needs to be partially pulled out from its cabinet.
- Start by unscrewing the mounting brackets that secure the dishwasher to the countertop.
- Open the dishwasher door to access and remove these screws.
- With the screws out, use the door to carefully start pulling the dishwasher out.
- You may need to grab the sides of the dishwasher to fully extract it from its nook.
Step 3: Access the fill funnel
With the dishwasher pulled out, you’ll have clear access to the fill funnel area.
- The fill funnel is typically located on the left side, secured by a large nut.
- Use pliers to loosen this nut, allowing you to remove the old fill funnel.
Install the new fill funnel
Step 1: Prepare the new fill funnel
The GE Dishwasher Fill Funnel Kit should include all necessary components for a smooth installation. If your kit came with different sized adapters, make sure to select the one that fits your model.
- Locate the top piece that connects to the dishwasher’s water inlet.
- Carefully snap it onto the new fill funnel, making sure you have a secure fit. The design typically makes sure you can’t mismatch the parts due to differing sizes or shapes.
- Position the new fill funnel in place, aligning it with the opening on the dishwasher. This is where the water enters the machine, so make sure it’s seated properly.
Step 2: Secure the fill funnel
Once the fill funnel is in place, it’s time to secure it:
- Using your hand, thread the large nut onto the fill funnel to hold it in place. Once it’s hand-tight, use pliers to snug it up. Be careful not to overtighten, as this could damage the nut or the funnel.
- If your model requires it, reattach the water inlet hose to the adapter on the new fill funnel. Make sure you have a tight fit to prevent leaks.
Reassembly the dishwasher
Step 7: Slide the dishwasher back in
Carefully push the dishwasher back into its cabinet space. This step might require a bit of finesse to make sure that the hoses and electrical lines do not get pinched or tangled:
- As you push the dishwasher back, periodically check to make sure that the fill line and drain hose are not getting caught or kinked. This is important to prevent damage or impeded water flow.
- Make sure the dishwasher is properly aligned within the cabinet and under the countertop. This makes sure you have stability and proper operation.
Step 8: Reconnect the lines
Now that the dishwasher is back in place, it’s time to reconnect the water supply and drain lines:
- Screw the fill line back onto the hot water valve. Hand-tighten first, then use your 5/8 inch wrench to make sure you have a leak-free connection.
- Reattach the drain hose to its connection point, whether it’s the garbage disposal or an air gap. Tighten the clamp with your 5/16 inch nut driver.
Step 9: Secure the dishwasher to the countertop
- Open the dishwasher door to access the mounting brackets.
- Using your Phillips screwdriver, reattach the dishwasher to the countertop with the provided screws.
This step prevents the dishwasher from tipping forward when loaded with dishes.
Final steps
Step 10: Restore power or water supply
With the physical installation complete, it’s time to bring the dishwasher back to life:
- Return to the valve under the sink and turn the water supply back on.
- Check for any leaks at the connections you’ve worked on.
- If you notice any drips, tighten the connections slightly more.
- Reconnect the dishwasher to the power source, either by plugging it in or flipping the circuit breaker back on.
Step 11: Run a test cycle
Before loading your dishwasher with dishes, run a short test cycle:
- Choose a short wash cycle to quickly verify the functionality of the fill funnel and ensure there are no leaks.
- As the dishwasher runs, inspect around and underneath the appliance for any signs of water leakage. Pay special attention to the area around the new fill funnel installation.
- Make sure that the dishwasher sounds normal as it fills, washes, and drains. Any unusual noises might indicate a problem that needs further investigation.
More information
Thanks for reading! We hope this guide helped you replace the fill funnel in your GE dishwasher.
If you still need some replacement parts, grab your model number and head over to AppliancePartsPros.com. We offer over two million parts and most orders arrive in two business days. If you need some help with finding the right part or placing an order, you can contact our team at 1 (877) 477-7278.
While you’re waiting for your new part to arrive, you can explore our DIY blog and watch thousands of video tutorials on our YouTube channel.
Be sure to follow us on Facebook, Twitter and Instagram to see our latest repair guides!
With nearly a decade of experience in providing top-notch customer service regarding appliance parts and repair, Steven enjoys sharing practical advice, troubleshooting tips, and interesting information to help readers stay informed.


