How to Replace the Filter 5304506525 on a Frigidaire Dishwasher
Steven E / Monday June 16, 2025
Are your dishes coming out of your Frigidaire dishwasher less than sparkling? A clogged or malfunctioning filter could be the culprit, but don’t worry – this common issue is easy to tackle with our step-by-step guide. And to make it even simpler, we’ve included a how-to video below to get your dishwasher back to peak performance in no time!
Looking for the right part? Enter your appliance model number below to find the exact match and get your appliance running like new again!
It’s important to have clean dishes in your home. If you’re seeing that your Frigidaire dishwasher isn’t getting your plates, cups, and silverware sparkling clean, the issue might be a clogged or faulty filter. No worries though, replacing the filter on your Frigidaire dishwasher is a simple do-it-yourself project that can bring back its cleaning performance.

Watch here: How to replace the dishwasher filter
The information in this article may not apply to your specific appliance model. We recommend consulting your manufacturer’s documentation or contact us with any questions.
Benefits of replacing your filter
While fairly straightforward, replacing a clogged or older dishwasher filter provides some meaningful benefits:
- Clogged filters prevent proper water circulation and pressure. New filters optimize spray action.
- Unclogging blockages decrease pump effort and extend the overall appliance lifetime.
- Caught early, worn seals can be replaced to prevent leaks and water damage.
So in addition to just better cleaning results, a new filter also contributes to the longevity and reliability of your dishwasher.
Replacing the filter requires no tools or special skills, so consider adding it to your list of periodic preventative maintenance. We recommend inspecting and replacing dishwasher filters every 2 years as standard practice to maximize operating efficiency.
Tools and materials needed
The great news is that you won’t need any tools for this replacement. You’ll need to pick up just a few items before tackling this repair job:
- Frigidaire dishwasher filter, part #5304506525 – Take your model number to AppliancePartsPros.com to locate the correct part for your appliance.
- Flashlight
- Towels
That’s all you need!
Safety first
Your safety should always be the top priority when performing any appliance repair.
- Always power off and unplug your appliance or switch off the circuit breaker before attempting any maintenance or replacement work. This keeps you safe by preventing any risk of electric shock.
- If the appliance has recently been used, give it plenty of time to cool down before working on it.
- Take your time and don’t rush while working to prevent accidents and personal injuries.
- Work in a well-lit area so you can clearly see and access appliance parts.
- Keep your workspace free of clutter and other obstacles. Keep children and pets away from the work area.
- Never work on internal parts with wet hands. Make sure the work area is completely dry.
- Check the user manual to see if there are specific installation or safety instructions related to your appliance or replacement part.
- Be gentle when handling or removing parts. Excessive force might damage the appliance or cause personal injury.
- Wear insulated work gloves to protect your hands from sharp metal parts and debris.
- When working with wires, avoid touching any exposed wires or terminals. If you need to touch a wire, use a non-conductive tool or wear insulating gloves to prevent electrical shock.
- Don’t test live voltage with a multimeter if you’re unfamiliar with how to prevent short-circuiting.
- Consider wearing safety glasses and/or a dust mask when working with chemicals, dust or a large amount of debris to prevent irritation or injury.
- If your appliance has any parts that hold water, turn off the water supply at the outlet before beginning repairs. Keep towels ready to catch any residual water in the system when removing parts.
Step 1 – Access the dishwasher interior
The first step is to gain access to your appliance’s underside components:
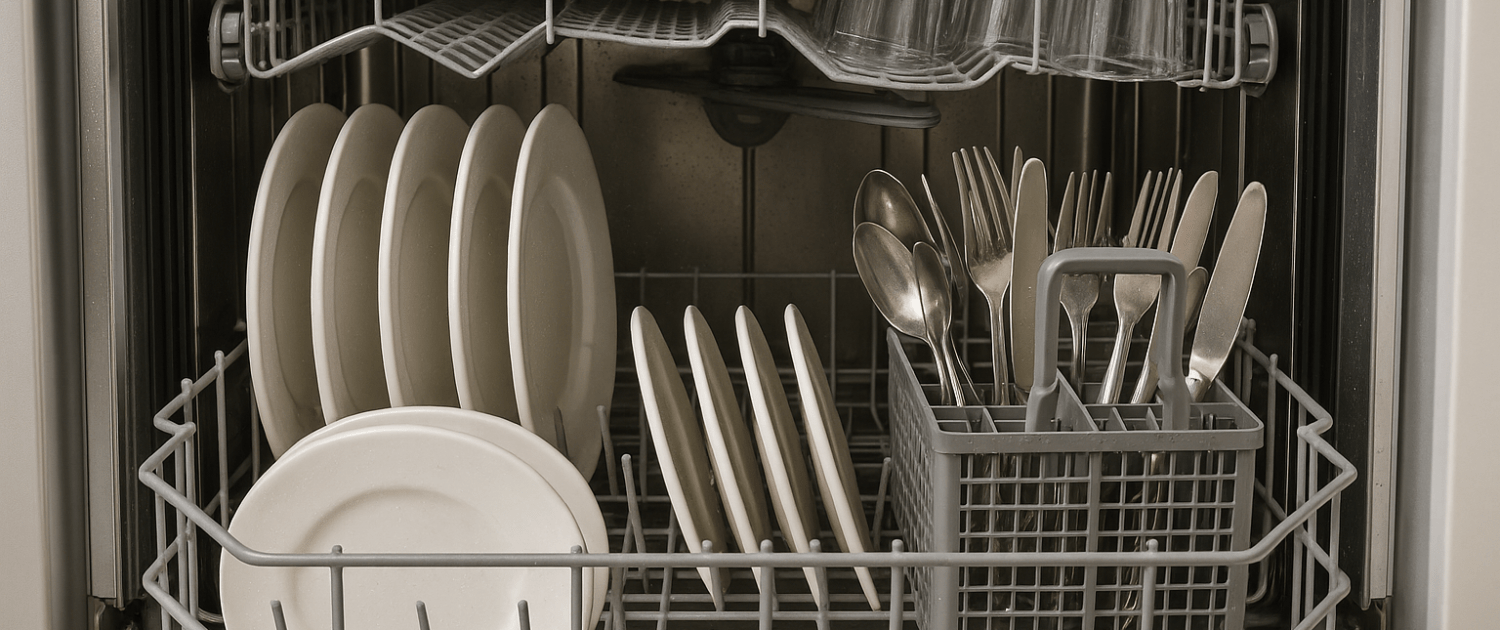
- Open the dishwasher door completely to access the washing chamber.
- Remove the lower dish rack by pulling it completely out, and then lifting it up and out to lighten your workload. Set it safely aside.
- Some models have an access panel at the bottom front. Remove this panel if your model is equipped with it.
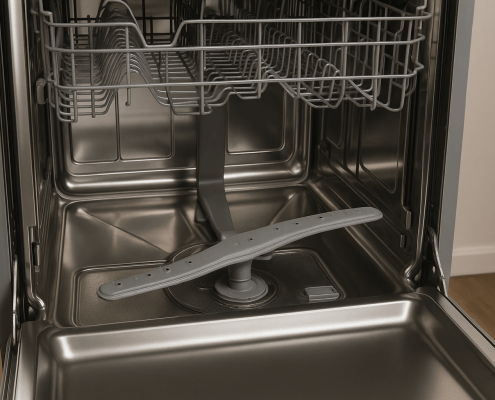
With the rack removed and the access panel detached, you have an open view of the internal floor of the tub. This is where the filter components are located.
Step 2 – Remove the old filter
Now comes the process of taking apart the old filter unit:
- Locate the plastic filter lock tab. It connects to the front center of the cylindrical filter housing.
- Turn the tab handle 90 degrees counterclockwise. This releases the locking mechanism.
- Lift straight up on the filter unit’s handle to detach the entire cylindrical housing. Set it aside.
- Separate the filter screen frame from the plastic cylindrical base. Simply apply light pressure to detach the old filter.
Step 3 – Install the new filter
Just follow these steps to get your new Frigidaire dishwasher filter in place:
- Confirm that the filter base o-ring is present and intact. Replace if worn or damaged to prevent water leaks. Take your model number to AppliancePartsPros.com to locate the correct part for your unit.
- Align and place the filter screen frame onto the round filter base, applying light downward pressure to mate components. You’ll feel them click into place when properly attached.
- Orient the assembled cylindrical filter housing so that the lock tab interface will be positioned to the 12 o’clock position when fully inserted.
- With the front tub access drain cleared, lower the entire filter assembly straight down into the tub drain hole. The o-ring creates a tight seal.
- Make sure you have the correct rotational orientation, and turn the tab clockwise 90 degrees until an audible click. The filter assembly is now firmly locked into position.
With the new filter installed and the housing tightened down, you’re almost done! Just wrap up a few closing tasks for completion.
Step 4 – Finishing touches
To wrap up this replacement project:
- Confirm proper filter orientation one last time. Verify that no components interfere with spray arm rotation.
- Reinstall the lower dish rack. Slide the rack fully to the back of the tub chamber.
- Replace any access panels previously removed. Securely screw panels into place using a screwdriver if needed.
- Turning the water supply back on. Check beneath the dishwasher cabinet for any leaks at the filter housing drain connections. Tighten if necessary.
- Restore power to the appliance at the circuit breaker or wall outlet.
- Run a test cycle wash with the dishwasher empty to verify normal functioning.
And that’s all there is to it – you’ve successfully learned how to replace your Frigidaire dishwasher filter! Just grab some dirty dishes and verify that fresh, debris-free water now circulates over them.
More information
Thanks for stopping by! We hope this guide helped you replace your dishwasher filter.
If you run into any issues, just give us a call at 1-877-477-7278 or start a chat with a pro on our website so we can help you through it. We’ve got many more troubleshooting and repair guides on our DIY blog and YouTube channel, and, of course, all the parts you need to do it yourself at AppliancePartsPros.com.
Make sure to connect with us on Facebook, Twitter and Instagram!
 https://www.appliancepartspros.com/b/wp-content/uploads/2025/06/20250618_1135_Open-Dishwasher-Interior_simple_compose_01jy1tspt8frxbw1s0kphty34n.png
1024
1536
Steven E
https://www.appliancepartspros.com/b/wp-content/uploads/2020/11/app-logo-std.png
Steven E2025-06-19 06:08:512025-08-20 10:25:45Whirlpool Dishwasher Lower Spray Arm W10803178 Install Guide
https://www.appliancepartspros.com/b/wp-content/uploads/2025/06/20250618_1135_Open-Dishwasher-Interior_simple_compose_01jy1tspt8frxbw1s0kphty34n.png
1024
1536
Steven E
https://www.appliancepartspros.com/b/wp-content/uploads/2020/11/app-logo-std.png
Steven E2025-06-19 06:08:512025-08-20 10:25:45Whirlpool Dishwasher Lower Spray Arm W10803178 Install Guide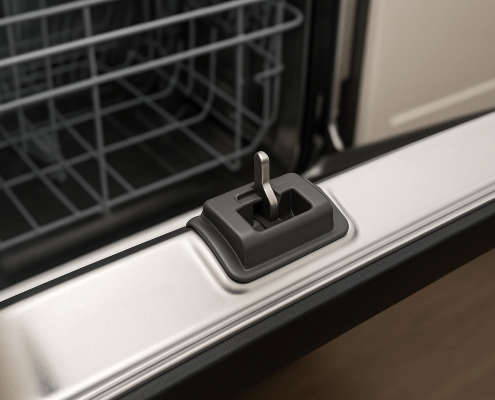 https://www.appliancepartspros.com/b/wp-content/uploads/2025/06/20250618_1039_Open-Dishwasher-Latch_simple_compose_01jy1qj818fwfaqxpm29d92q0h.png
1024
1536
Steven E
https://www.appliancepartspros.com/b/wp-content/uploads/2020/11/app-logo-std.png
Steven E2025-06-19 05:37:352025-08-20 09:45:30How to Replace Door Latch 8193830 on a Whirlpool Dishwasher
https://www.appliancepartspros.com/b/wp-content/uploads/2025/06/20250618_1039_Open-Dishwasher-Latch_simple_compose_01jy1qj818fwfaqxpm29d92q0h.png
1024
1536
Steven E
https://www.appliancepartspros.com/b/wp-content/uploads/2020/11/app-logo-std.png
Steven E2025-06-19 05:37:352025-08-20 09:45:30How to Replace Door Latch 8193830 on a Whirlpool Dishwasher https://www.appliancepartspros.com/b/wp-content/uploads/2025/06/20250522_0842_Dishwasher-in-Sunlit-Kitchen_simple_compose_01jvw04ekdeqjtrnj7897hae8j.png
1024
1536
Steven E
https://www.appliancepartspros.com/b/wp-content/uploads/2020/11/app-logo-std.png
Steven E2025-06-19 05:22:312025-08-20 08:45:33DIY Install Door Spring WP8270182 on a Whirlpool Dishwasher
https://www.appliancepartspros.com/b/wp-content/uploads/2025/06/20250522_0842_Dishwasher-in-Sunlit-Kitchen_simple_compose_01jvw04ekdeqjtrnj7897hae8j.png
1024
1536
Steven E
https://www.appliancepartspros.com/b/wp-content/uploads/2020/11/app-logo-std.png
Steven E2025-06-19 05:22:312025-08-20 08:45:33DIY Install Door Spring WP8270182 on a Whirlpool DishwasherWith nearly a decade of experience in providing top-notch customer service regarding appliance parts and repair, Steven enjoys sharing practical advice, troubleshooting tips, and interesting information to help readers stay informed.