How to replace the lid latch assembly on a Whirlpool washer
Steven E / Thursday May 15, 2025

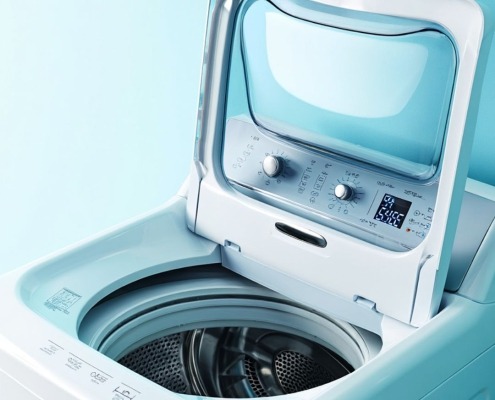
Is your Whirlpool washer refusing to start, or flashing a lid lock error? It might be time to replace the lid latch assembly, part number W10810403. This little part plays a big role in making sure your washer locks safely before starting a cycle. Luckily, it’s a quick fix with just a screwdriver and a bit of patience. Let’s walk through the replacement so you can get back to clean laundry in no time.
The information in this article may not apply to your specific appliance model. We recommend consulting your manufacturer’s documentation or contact us with any questions.
What you need
Gather the following tools and parts before getting started:
- Nut driver
- Putty knife
- Torque screwdriver
- Pliers
- Flathead screwdriver
- String with hooks
- New lid latch assembly – This specific repair requires Whirlpool part # W10810403. Search for this part number to find the correct latch for your model.
Safety precautions
Safety should always be a priority when working on any appliance. Here are a few practical tips to help you stay safe:

- Turn off the power to the appliance by unplugging it or switching off the circuit breaker before starting any maintenance or repairs. This protects you from the risk of electric shock.
- Wear insulated gloves to shield your hands from sharp edges, pinching hazards, or debris.
- Work at a steady pace and take your time to avoid accidents or injuries.
- Make sure your workspace is well-lit so you can clearly see and access the parts you’re working on.
- Keep the area clear of clutter, and ensure children and pets stay out of the workspace.
- Never handle internal parts with wet hands. Check that both your hands and the work area are completely dry.
- Refer to your appliance’s user manual for any specific instructions or safety guidelines related to the part or repair.
- Handle parts gently to avoid damage to the appliance or potential injuries from applying too much force.
- Use safety glasses when dealing with chemicals, dust, or large debris to protect your eyes from harm.
- If the appliance was recently used, give it enough time to cool down before working on any heated components.
- Take photos or notes of wiring connections and terminals before disconnecting anything to make reassembly easier.
- Avoid touching exposed wires or terminals. If you must handle wires, use non-conductive tools or wear insulated gloves to minimize the risk of electrical shock.
Steps to replace the lid latch
With the right tools on hand, you’re ready to fix your washer. Follow these steps to remove the broken lid latch and install a new one:
- The repair begins by removing the small cover plate on the back of the washer. This gives access to the interior. Use a nut driver to remove the single screw holding the cover plate in place. Set the plate and screw aside.
- Next, use the nut driver to remove the two screws securing the top panel above the back cover opening. Lift up gently on the top panel while pulling it forward slightly to release the tabs. Remove the panel completely.
- Locate the control panel at the top front of the washer. Insert a putty knife into the seam on each side to release the spring clips. Once unclipped, tilt the control panel forward to access the back.
- With the back of the control panel accessible, use a flathead screwdriver to detach the two wiring plugs. Press down on the locking tabs to release each plug.
- Open the washer lid fully and tape it in the open position. This will allow access to the top of the washing machine housing while keeping the lid out of your way during the repair.
- To detach the lid latch assembly, the entire top of the washer needs to be removed. Pull firmly on the front edge of the top panel while wiggling it gently to release the metal hinge tabs from their slots. Once released, lift the top up and temporarily hook it in place using a string.
- Inside the top opening, locate the wire harness leading to the lid latch assembly. Use a flathead screwdriver to detach the harness from the two plastic clips securing it.
- You can now access the lid latch assembly. Remove the two T15 torque screws to detach the latch mechanism from the washer top. Set the old latch assembly aside.
- Align the new replacement lid latch in the same position as the old one. Insert and tighten the two T15 torque screws to secure it.
- With the new latch in place, reattach the wire harness by pressing it back into the plastic harness clips.
- Carefully lower the washer top back down, engaging the hinge tabs in their slots. Pull the top forward to lock it into place. Remove the tape holding the lid open.
- Lift the control panel back into place, reattaching the two wiring plugs removed earlier. Press firmly to ensure the locks click back into place.
- Finally, replace the outer panels and back cover plate removed at the start, securing them with the original screws.
More information
If you need any replacement parts for your appliances, you can enter your model number at AppliancePartsPros.com to locate and order them quickly. Most orders arrive in just two business days, and we have tons of great information in our repair help section and YouTube videos to help you troubleshoot.
Stay connected with the latest DIY tips, tutorial videos, and repair guides by following us on Facebook, Instagram, and Twitter. We love hearing about your repair stories and successes. If you need more help or want personalized guidance, feel free to reach out. We’re ready to help you take on your next project with confidence!
 https://www.appliancepartspros.com/b/wp-content/uploads/2025/04/APP-blog-square-8.jpg
1080
1080
Steven E
https://www.appliancepartspros.com/b/wp-content/uploads/2020/11/app-logo-std.png
Steven E2025-04-01 05:53:082025-04-01 05:53:18How to Resolve Frigidaire Washer Error Code E55 Quickly
https://www.appliancepartspros.com/b/wp-content/uploads/2025/04/APP-blog-square-8.jpg
1080
1080
Steven E
https://www.appliancepartspros.com/b/wp-content/uploads/2020/11/app-logo-std.png
Steven E2025-04-01 05:53:082025-04-01 05:53:18How to Resolve Frigidaire Washer Error Code E55 Quickly https://www.appliancepartspros.com/b/wp-content/uploads/2025/04/APP-blog-square-7.jpg
1080
1080
Steven E
https://www.appliancepartspros.com/b/wp-content/uploads/2020/11/app-logo-std.png
Steven E2025-04-01 05:47:092025-04-01 05:47:18How to Resolve Frigidaire Washer Error Code F02 Fast
https://www.appliancepartspros.com/b/wp-content/uploads/2025/04/APP-blog-square-7.jpg
1080
1080
Steven E
https://www.appliancepartspros.com/b/wp-content/uploads/2020/11/app-logo-std.png
Steven E2025-04-01 05:47:092025-04-01 05:47:18How to Resolve Frigidaire Washer Error Code F02 Fast https://www.appliancepartspros.com/b/wp-content/uploads/2025/04/APP-blog-square-3.jpg
1080
1080
Steven E
https://www.appliancepartspros.com/b/wp-content/uploads/2020/11/app-logo-std.png
Steven E2025-04-01 05:41:362025-04-01 05:41:46How to Fix Frigidaire Washer Error Code F03
https://www.appliancepartspros.com/b/wp-content/uploads/2025/04/APP-blog-square-3.jpg
1080
1080
Steven E
https://www.appliancepartspros.com/b/wp-content/uploads/2020/11/app-logo-std.png
Steven E2025-04-01 05:41:362025-04-01 05:41:46How to Fix Frigidaire Washer Error Code F03With nearly a decade of experience in providing top-notch customer service regarding appliance parts and repair, Steven enjoys sharing practical advice, troubleshooting tips, and interesting information to help readers stay informed.