How to replace Whirlpool dryer drive motor W10410999
Steven E / Thursday April 18, 2024
Is your dryer refusing to start or running in fits and starts? The culprit may be a worn-out drive motor, but don’t fret! Our step-by-step guide, complete with a helpful how-to video below, will walk you through the process of replacing it and getting your dryer back in working order.
Need a part? Search below using your appliance model number to find exactly what you need:

The drive motor in an electric or gas dryer powers the rotating drum and tumbling of laundry during drying cycles. As the primary force that spins the laundry and circulates the air, the motor withstands continuous vibrations within the machine housing. Over thousands of cycles, parts like bushings, brushes and windings can deteriorate from friction, heat and mechanical stresses.

Even if this is the first time you’ve heard of a drive motor, we’re here to help you understand it and replace it so you can get your dryer running smoothly again.
Let’s get started.
You can find a replacement drive motor here. If you need other replacement parts for your Whirlpool dryer, just enter your model number at AppliancePartsPros.com to find them. It’s that easy! Most orders arrive in just two business days, and we have thousands of guides to show you how to install your new parts.
Why would the drive motor need to be replaced?
There are several reasons why the drive motor would need to be replaced, including:
- Standard wear and tear from normal dryer use over time
- The dryer won’t start cycles or only runs them intermittently
- Standard wear and tear from normal dryer use over time
- The dryer won’t start cycles or only runs them intermittently
What you need
- Phillips screwdriver
- 5/16-inch nut driver
- 1/4-inch nut driver
- Needle nose pliers
- Wire cutters/strippers
- Flathead screwdrivers (small and large)
- Socket wrench with 3/8 inch socket
- Socket wrench with extension
- Hammer
- Wiring terminals
- Wire connectors
- Measuring tape
- Replacement drive motor (make sure it’s compatible with your specific model before installing)
How to replace the drive motor
Follow these steps to easily replace the drive motor yourself, without the need for an expensive service call.
Step 1: Remove the front panel
You’re going to need to dismantle the dryer cabinet to gain access to the drive motor.
- Turn off the dryer and unplug it from the electrical outlet. This eliminates any chance of electrocution while you’re working.
- Use a Phillips screwdriver to remove the screws along the bottom of the front panel.
- Lift the front panel slightly to disengage the clips from the top of the cabinet.
- Tilt the front panel forward and lay it on its side, across the front of the dryer cabinet.
Step 2: Remove the bulkhead
- Use a 5/16-inch nut driver to remove the four screws holding the bulkhead to the cabinet.
- Unclip the wire harness holder and move it out of the way.
- Lift off the bulkhead and set it aside on top of the front panel.
Step 3: Remove the top
- Find the one screw on each side of the cabinet top. Use a ratchet wrench with a 3/8-inch socket and extension to reach and remove these screws.
- Lift off the dryer top and support it against a wall or with a lanyard/strap if your unit isn’t against a wall.
Step 4: Take off the drive belt
- Reach into the dryer and find the idler pulley. Pull it sideways to release tension on the drive belt.
- Slip the drive belt off of the idler pulley and motor pulley.
- Set the belt aside.
Step 5: Remove the drum
Lift the drive belt and slide the drum out of the dryer cabinet. Set the drum aside.
Step 6: Remove the blower housing cover
- Use a 1/4-inch nut driver to remove all screws holding the blower housing cover.
- Remove the bottom screw with a 5/16-inch nut driver.
- Lift off the blower housing cover and set it aside.
Read more: Tips for Caring for Your Dryer | Clothes Dryer Maintenance
Step 7: Disconnect the blower wheel
With the dryer interior exposed, you can access and remove the faulty drive motor.
- Reach into the blower housing and compress the blower wheel clamp with needle nose pliers to detach it. Set the clamp aside.
- Remove the snap ring from the blower wheel shaft with snap ring pliers or a small flathead screwdriver.
- Pull the blower wheel off the motor shaft.
Step 8: Remove the motor mount clamps
- Use a large flathead screwdriver to pry up the motor mount clamps by releasing one side and then the other.
- Remove the clamps from the mounts.
Step 9: Disconnect the wires
- Identify each wire connection location using the wire colors (red, purple, blue, yellow, black). Make a note of these connections or take a photo so you can remember where they go.
- Use needle nose pliers to detach the wires from the motor terminals.
Step 10: Take off the pulley and snap ring
- Measure and mark the drive pulley location on the motor shaft. This will help you with reinstallation later on.
- Use a 3/16-inch Allen wrench to loosen the set screw holding the drive pulley and slide it off.
- Use snap ring pliers or a flathead screwdriver to remove the snap ring from the shaft.
Step 11: Lift out the old motor
With all fasteners and connections detached, carefully lift the old motor out of the dryer.
Read more: 9 Ways To Improve Your Dryer’s Performance
Step 12: Transfer the drive pulley and snap ring
- Slide the snap ring onto the new motor shaft; use pliers if needed. Make sure it’s correctly seated in the groove.
- Align the set screw on the drive pulley with the shaft flat and slide it into position according to your previous measurements.
- Tighten the set screw moderately using the Allen wrench. This will hold the pulley in place temporarily.
Step 13: Add new terminals for wiring
- Use wire cutters to remove the old terminals from the yellow and red wires.
- Strip 1/4 inch of insulation from the wire ends.
- Crimp on the new push-on terminals. Make sure the bare wires are fully inserted.
Read more: How does a gas dryer work?
Step 14: Secure the motor mount clamps
Now you can mount the new drive motor into the dryer.
- Set the new motor into position by aligning the grommets and motor switch angle.
- Hook one side of the motor mount clamps over the mounts.
- Use a flathead screwdriver to lock the open clamp sides into place.
Step 15: Reconnect the wires
- Refer to the wiring diagram or the photo you took earlier to connect each wire to the proper terminal.
- Remove any unnecessary jumper wires.
- Check all wires to make sure they’re firmly attached.
Step 16: Replace the blower wheel and snap ring
- Align the motor shaft flat with the blower wheel flat and push it into place.
- Reinstall the snap ring fully into the shaft groove.
- Reattach the blower wheel clamp.
Step 17: Replace the blower housing cover
- Set the blower housing cover back into position.
- Use the 1/4-inch and 5/16-inch nut drivers to replace all the mounting screws.
Read more: Gas Dryers vs Electric Dryers: Which is Better For You?
Step 18: Reassemble the dryer
- Feed the drum back into the dryer cabinet and make sure it sits properly on the rollers.
- Loop the drive belt back over the drum by aligning it with any alignment marks you made earlier.
- Wrap the drive belt around the motor pulley and idler pulley.
- Push the idler pulley to tension the belt as needed.
- Set the top panel back into place and replace the side screws.
- Align the bulkhead duct and lift it into position. Replace the screws.
- Swing the front panel back into place and engage the top clips.
- Replace all the front panel screws.
- Plug the dryer back in and turn it on.
- Run a short test cycle to make sure the dryer is working correctly.
Read more: Don’t Let Your Noisy Dryer Drive You Crazy! Discover the Top Causes and Easy Fixes Today
More information
Thanks for reading! If you have any other appliance repair needs or projects, you can find more resources including our DIY blog at AppliancePartsPros.com. There, you can enter your model number to order the exact parts you need. Most orders arrive in two business days.
You can also reach our award-winning customer service team at 1-877-477-7278, chat with a pro on our website and watch thousands of free video tutorials on our YouTube channel. We can also help you troubleshoot common dryer problems here.
 https://www.appliancepartspros.com/b/wp-content/uploads/2025/04/APP-blog-square-1-20.jpg
1080
1080
Steven E
https://www.appliancepartspros.com/b/wp-content/uploads/2020/11/app-logo-std.png
Steven E2025-04-30 06:14:472025-08-11 12:56:33How to Install the Whirlpool Dryer Repair Kit (4392067)
https://www.appliancepartspros.com/b/wp-content/uploads/2025/04/APP-blog-square-1-20.jpg
1080
1080
Steven E
https://www.appliancepartspros.com/b/wp-content/uploads/2020/11/app-logo-std.png
Steven E2025-04-30 06:14:472025-08-11 12:56:33How to Install the Whirlpool Dryer Repair Kit (4392067)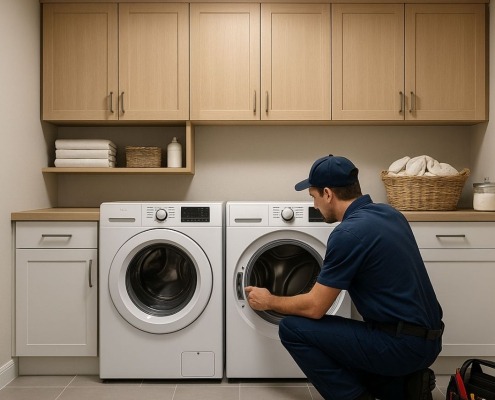 https://www.appliancepartspros.com/b/wp-content/uploads/2025/04/APP-blog-square-185.jpg
1080
1080
Steven E
https://www.appliancepartspros.com/b/wp-content/uploads/2020/11/app-logo-std.png
Steven E2025-04-30 06:03:192025-08-11 12:49:45How to replace the idler pulley assembly on a Whirlpool dryer
https://www.appliancepartspros.com/b/wp-content/uploads/2025/04/APP-blog-square-185.jpg
1080
1080
Steven E
https://www.appliancepartspros.com/b/wp-content/uploads/2020/11/app-logo-std.png
Steven E2025-04-30 06:03:192025-08-11 12:49:45How to replace the idler pulley assembly on a Whirlpool dryer https://www.appliancepartspros.com/b/wp-content/uploads/2025/04/APP-blog-square-224.jpg
1080
1080
Steven E
https://www.appliancepartspros.com/b/wp-content/uploads/2020/11/app-logo-std.png
Steven E2025-04-30 05:38:432025-04-30 05:38:52How to Boost Your Laundry With Washer and Dryer Pedestals
https://www.appliancepartspros.com/b/wp-content/uploads/2025/04/APP-blog-square-224.jpg
1080
1080
Steven E
https://www.appliancepartspros.com/b/wp-content/uploads/2020/11/app-logo-std.png
Steven E2025-04-30 05:38:432025-04-30 05:38:52How to Boost Your Laundry With Washer and Dryer PedestalsWith nearly a decade of experience in providing top-notch customer service regarding appliance parts and repair, Steven enjoys sharing practical advice, troubleshooting tips, and interesting information to help readers stay informed.